
Troubleshooting guide


1-4
Cisco Wide Area Application Services Configuration Guide
OL-26579-01
Chapter 1 Maintaining Your WAAS System
Upgrading the WAAS Software
Manager, you must install the Universal software file, reload the device, change the device mode to
central-manager, and then reload the device again. Additionally, kdump analysis functionality is not
included in the Accelerator only image.
To configure the software file settings form, follow these steps:
Step 1 From the WAAS Central Manager menu, choose Admin > Version Management > Software Update.
Step 2 Click the Create New Software File icon in the taskbar.
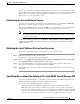
The Creating New Software File window appears. (See Figure 1-1.)
Figure 1-1 Creating New Software File Window
Step 3 In the Software File URL field, specify the location of the new WAAS software file as follows:
a. Choose a protocol (http or ftp) from the drop-down list.
b. Enter the URL for the .bin software file that you downloaded from Cisco.com. For example, a valid
URL might look like the following:
http://internal.mysite.com/waas/WAAS-xxxx-K9.bin
where WA AS -xxxx-K9.bin is the name of the software upgrade file. (The filename typically includes
the version number.)
Be sure that the URL identifies the correct type of software image for the devices you want to
upgrade, either Universal or Accelerator only.
Step 4 If your server requires user login authentication, enter your username in the Username field and enter
your login password in the Password field. Enter the same password in the Confirm Password field.
The Software Version and Image Type fields cannot be edited. They are filled in automatically after you
submit the settings and the image is validated.
Step 5 In the Advanced Settings section, check the Auto Reload check box to automatically reload a device
when you upgrade the software. If you do not check this box, you will need to manually reload a device
after you upgrade the software on it to complete the upgrade process.