
Installation guide


D5060801 VX Clinical Assistant Quick Installation Guide | January 2012 | © 2012 Cisco Systems, Inc. All rights reserved.
Cisco TelePresence VX Clinical Assistant
QUICK INSTALLATION GUIDE
4
Installing the battery
5
Installing accessory options
6
Starting the system
If the Battery has enough charge, then the VX
Clinical Assistant is ready to be congured and
begin making calls.
If the Battery does not have enough charge,
provide power by plugging the system into
an appropriate outlet (120V or 240V) -- this
charges the Battery while powering the system
with AC power.
NOTE: It is recommended that the unit is initial-
ly charged 4-6 hours or until the batter meter
indicates a full charge.
Make sure the display is ON if it has not turned
on automatically.
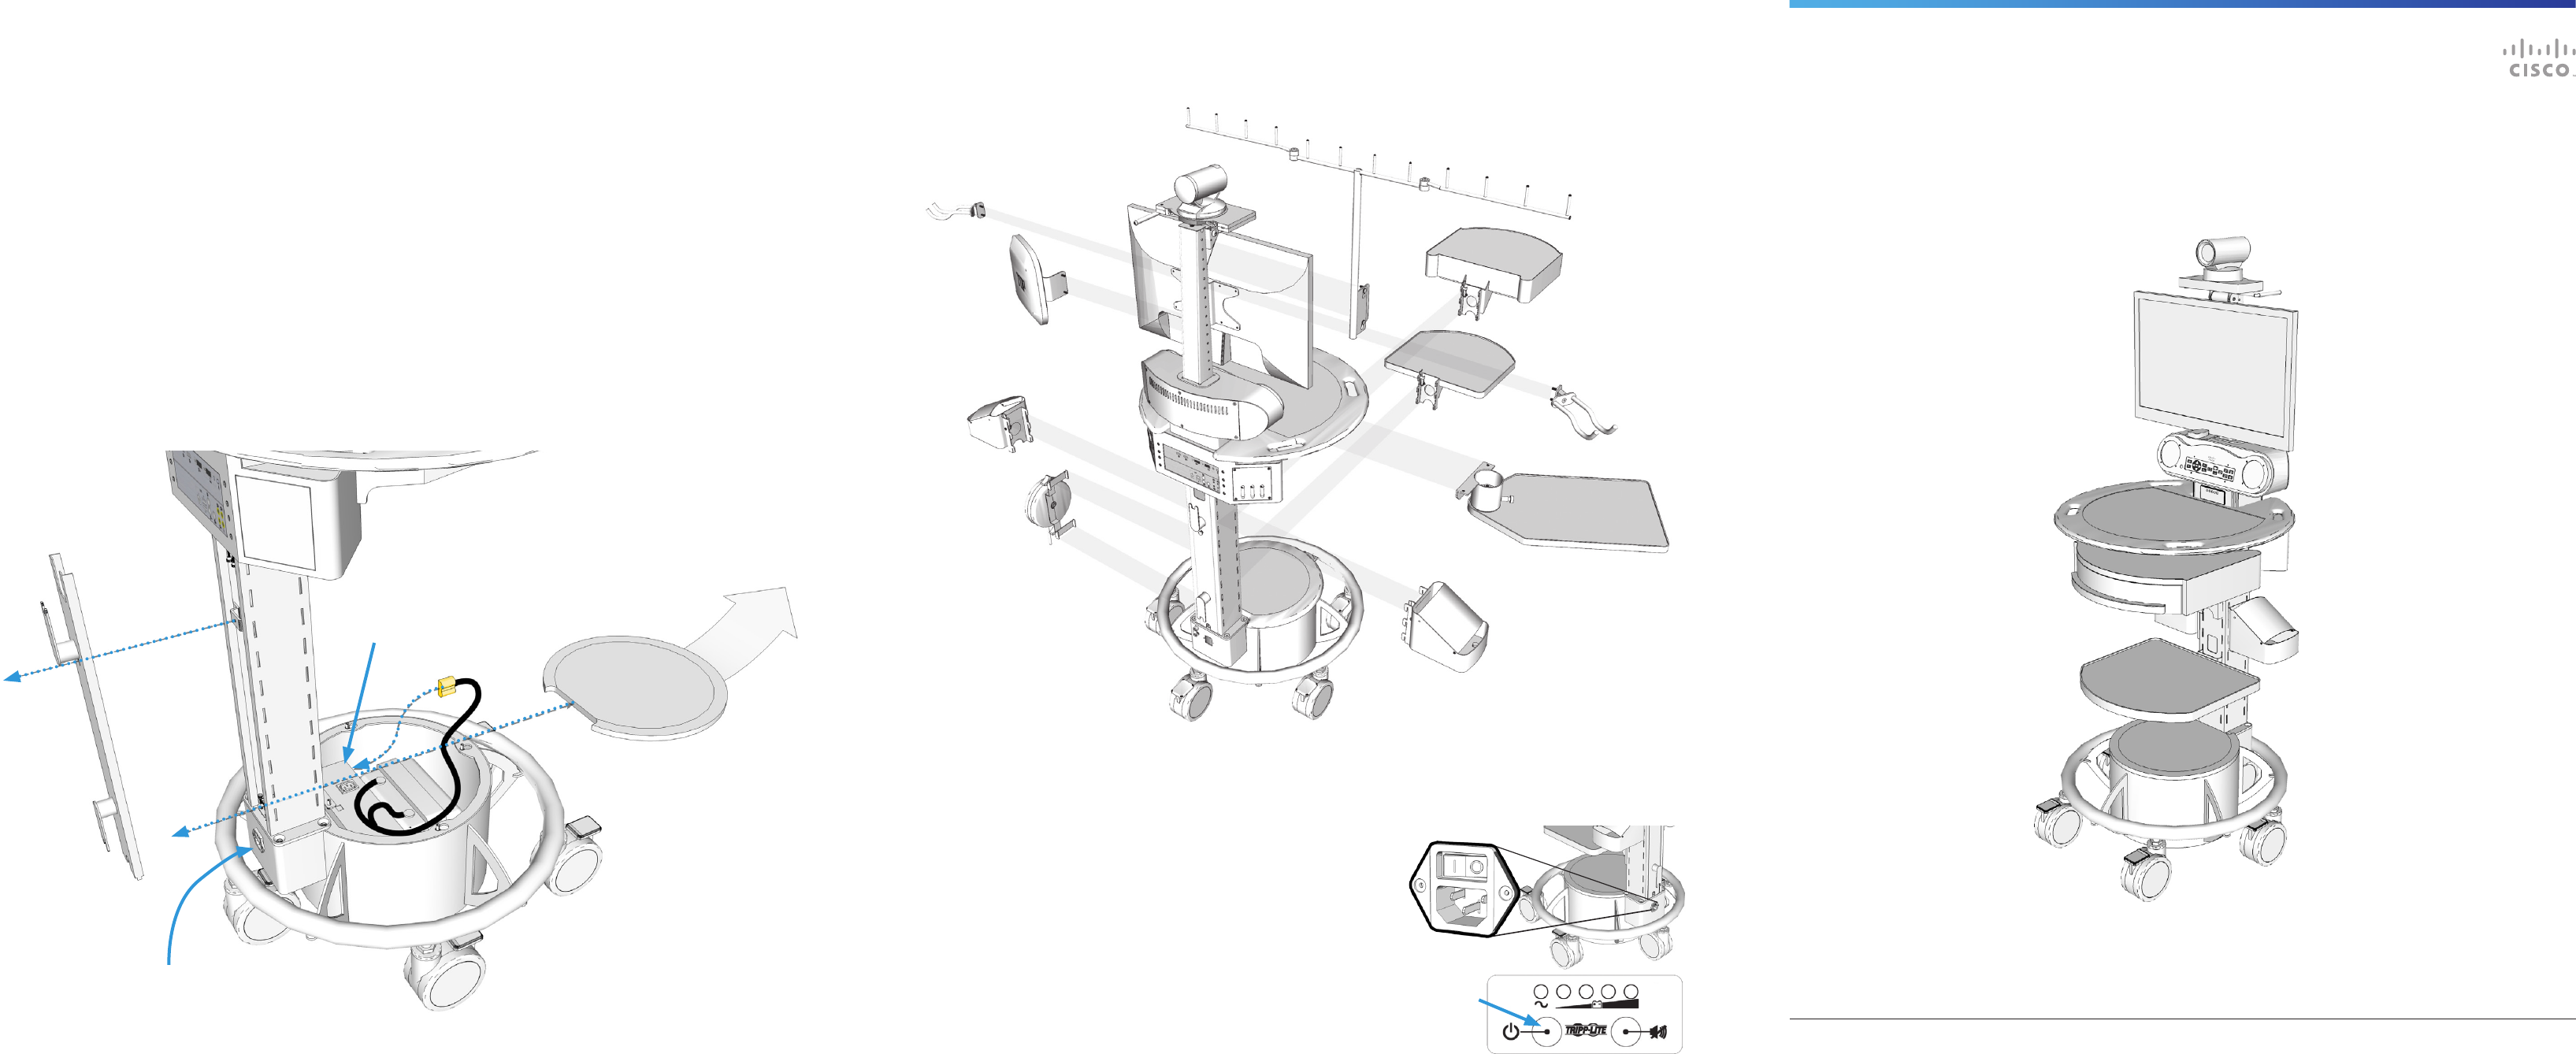
Base Plate
Access Panel
Thumb
screw
Battery
Connector
A
Remove the Access Panel on the lower
column by releasing the thumbscrew (1)
near the top of the panel.
B
Remove the thumb screw (1) that holds the
Base Plate in place.
C
Remove the Base Plate by gently pulling the
plate forward and then up.
D
Locate the yellow Battery Connector that
extends from the battery and plug into the
Power Supply Unit in the base.
E
Replace the Base Plate and the Access
Panel.
NOTE: Ensure the POWER SWITCH is in the ON position.
Providing power to the system via the AC power cord will
automatically switch the system from battery power to
AC power; the battery power will shut o and will begin
to charge from the AC power.
Drawer
Splash Cover
Scope Hooks
PC Shelf
Laptop Tray
Storage Pod
Retractable
Cord Caddy
Wireless Mount
A number of optional add-ons for storage and peripheral use for the VX Clinical Assistant may be in-
stalled. Please refer to the unit’s User Manual for additional information and installation instructions.
Power Button
(on the Battery
Meter Panel)
When connected to an AC outlet, turn the unit ON with the
power switch at the rear of the unit’s base and then press and
hold the Power Button on the Battery Meter Control Panel for
one (1) second.
When operating with the battery only, press and hold the
Power Button on the Battery Meter Control Panel for one (1)
second.
NOTE: The switch at the unit’s base toggles AC power only.
The battery will operate when it has a charge and the system
is not connected to AC power. The battery will not charge
unless the AC switch is on and plugged in to an AC outlet.
AC Power Switch
AC Power Input
Thumb
screw
Power
Supply Unit