
User Manual


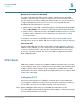

Table Of Contents
- Introduction
- Configuring Networking
- Configuring the Wireless Network
- Configuring the Firewall
- Configuring VPN
- Configuring Quality of Service (QoS)
- Administering Your Cisco RV110W
- Setting Password Complexity
- Configuring User Accounts
- Setting the Session Timeout Value
- Configuring Simple Network Management (SNMP)
- Using Diagnostic Tools
- Configuring Logging
- Configuring Bonjour
- Configuring Date and Time Settings
- Backing Up and Restoring the System
- Upgrading Firmware or Change the Language
- Restarting the Cisco RV110W
- Restoring the Factory Defaults
- Running the Setup Wizard
- Viewing the Cisco RV110W Status
- Using Cisco QuickVPN
- Where to Go From Here

Configuring the Firewall
Configuring Port Forwarding
Cisco RV110W Administration Guide 94
4
Some applications require that, when external devices connect to them, they
receive data on a specific port or range of ports in order to function properly. The
router must send all incoming data for that application only on the required port or
range of ports. The gateway has a list of common applications and games with
corresponding outbound and inbound ports to open. You can also specify a port
triggering rule by defining the type of traffic (TCP or UDP) and the range of
incoming and outgoing ports to open when enabled.
To add a port triggering rule:
STEP 1 Choose Firewall > Port Range Triggering.
STEP 2 In the Application field, enter the name of the application for which to configure
port forwarding.
STEP 3 In the Triggered Range fields, enter the port number or range of port numbers that
will trigger this rule when a connection request from outgoing traffic is made. If the
outgoing connection uses only one port, enter the same port number in both fields.
STEP 4 In the Forwarded Range fields, enter the port number or range of port numbers
used by the remote system to respond to the request it receives. If the incoming
connection uses only one port, then specify the same port number in both fields.
STEP 5 In the Enable field, check the Enable box to enable the rule.
STEP 6 Click Save.