
User Manual
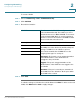
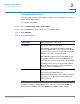


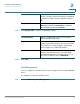

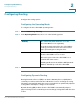
Table Of Contents
- Introduction
- Configuring Networking
- Configuring the Wireless Network
- Configuring the Firewall
- Configuring VPN
- Configuring Quality of Service (QoS)
- Administering Your Cisco RV110W
- Setting Password Complexity
- Configuring User Accounts
- Setting the Session Timeout Value
- Configuring Simple Network Management (SNMP)
- Using Diagnostic Tools
- Configuring Logging
- Configuring Bonjour
- Configuring Date and Time Settings
- Backing Up and Restoring the System
- Upgrading Firmware or Change the Language
- Restarting the Cisco RV110W
- Restoring the Factory Defaults
- Running the Setup Wizard
- Viewing the Cisco RV110W Status
- Using Cisco QuickVPN
- Where to Go From Here

Configuring Networking
Configuring the LAN Settings
Cisco RV110W Administration Guide 33
2
To c r e a t e a V L A N :
STEP 1 Choose Networking > LAN > VLAN Membership.
STEP 2 Click Add Row.
STEP 3 Enter this information:
STEP 4 Click Save.
To edit the settings of a VLAN, select the VLAN and click Edit. To delete a selected
VLAN, click Delete. Click Save to apply changes.
VLAN ID Enter the numerical VLAN ID to assign to endpoints
in the VLAN membership. The number you enter
must be between 3 to 4094. VLAN ID 1 is reserved
for the default VLAN, which is used for untagged
frames received on the interface. VLAN IDs 1 and 2
are reserved and cannot be used.
Description Enter a description to identify the VLAN.
Port 1 You can associate VLANS on the Cisco RV110W to
the LAN ports on the device. By default, all 4 ports
belong to VLAN1. You can edit these ports to
associate them with other VLANS. Choose the
outgoing frame type for each port:
Untagged—The interface is an untagged member
of the VLAN. Frames of the VLAN are sent
untagged to the port VLAN.
Tagge d—The port is a tagged member of the
VLAN. Frames of the VLAN are sent tagged to the
port VLAN.
Excluded—The port is currently not a member of
the VLAN. This is the default for all the ports when
the VLAN is first created.
Port 2
Port 3
Port 4