
User Manual
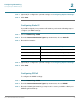
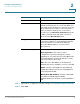
Table Of Contents
- Introduction
- Configuring Networking
- Configuring the Wireless Network
- Configuring the Firewall
- Configuring VPN
- Configuring Quality of Service (QoS)
- Administering Your Cisco RV110W
- Setting Password Complexity
- Configuring User Accounts
- Setting the Session Timeout Value
- Configuring Simple Network Management (SNMP)
- Using Diagnostic Tools
- Configuring Logging
- Configuring Bonjour
- Configuring Date and Time Settings
- Backing Up and Restoring the System
- Upgrading Firmware or Change the Language
- Restarting the Cisco RV110W
- Restoring the Factory Defaults
- Running the Setup Wizard
- Viewing the Cisco RV110W Status
- Using Cisco QuickVPN
- Where to Go From Here

Configuring Networking
Configuring the WAN Settings
Cisco RV110W Administration Guide 26
2
STEP 4 (Optional) To configure the optional settings, see Configuring Optional Settings.
STEP 5 Click Save.
Configuring L2TP
To configure the L2TP settings:
STEP 1 Choose Networking > WAN.
STEP 2 From the Internet Connection Type drop-down menu, choose L2TP.
Keep alive When you select this option, the Internet
connection is always on. In the redial period field,
enter the number of seconds after which the
Cisco RV110W attempts to reconnect if it is
disconnected.
Authentication Type Choose the authentication type:
Auto-negotiation—The server sends a
configuration request specifying the security
algorithm set on it. Then, the Cisco RV110W sends
back authentication credentials with the security
type sent earlier by the server.
PAP—The Cisco RV110W uses the Password
Authentication Protocol (PAP) to connect to the ISP.
CHAP—The Cisco RV110W uses the Challenge
Handshake Authentication Protocol (CHAP) when
connecting with the ISP.
MS-CHAP or MS-CHAPv2—The Cisco RV110W
uses Microsoft Challenge Handshake
Authentication Protocol when connecting with the
ISP.