
Specifications


Implementing RIP on Cisco IOS XR Software
How to Implement RIP on Cisco IOS XR Software
RC-323
Cisco IOS XR Routing Configuration Guide
Customize RIP
This task describes how to customize RIP for network timing and the acceptance of route entries.
SUMMARY STEPS
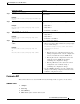
1. configure
2. router rip
3. auto-summary
4. timers basic update invalid holddown flush
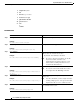
Step 5
interface
type
instance
Example:
RP/0/RP0/CPU0:router(config-rip)# interface pos
0/1/0/0
(Optional) Defines the interfaces on which the RIP routing
protocol runs.
Step 6
receive version {1 | 2 | 1 2}
Example:
RP/0/RP0/CPU0:router(config-rip-if)# receive
version 1 2
(Optional) Configures an interface to accept packets that
are:
• Only RIP v1
• Only RIP v2
• Both RIP v1 and RIP v2
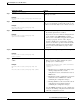
Step 7
send version {1 | 2 | 1 2}
Example:
RP/0/RP0/CPU0:router(config-rip-if)# send
version 1 2
(Optional) Configures an interface to send packets that are:
• Only RIP v1
• Only RIP v2
• Both RIP v1 and RIP v2
Step 8
end
or
commit
Example:
RP/0/RP0/CPU0:router(config-rip-if)# end
or
RP/0/RP0/CPU0:router(config-rip-if)# commit
Saves configuration changes.
• When you issue the end command, the system prompts
you to commit changes:
Uncommitted changes found, commit them before
exiting(yes/no/cancel)?
[cancel]:
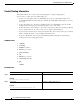
–
Entering yes saves configuration changes to the
running configuration file, exits the configuration
session, and returns the router to EXEC mode.
–
Entering no exits the configuration session and
returns the router to EXEC mode without
committing the configuration changes.
–
Entering cancel leaves the router in the current
configuration session without exiting or
committing the configuration changes.
• Use the commit command to save the configuration
changes to the running configuration file and remain
within the configuration session.
Command or Action Purpose