
Specifications


Implementing OSPF on Cisco IOS XR Software
How to Implement OSPF on Cisco IOS XR Software
RC-287
Cisco IOS XR Routing Configuration Guide
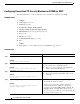
Configuring Label Distribution Protocol IGP Auto-Configuration for OSPF
This task explains how to configure LDP auto-configuration for an OSPF instance.
Optionally, you can configure this feature for an area of an OSPF instance.
SUMMARY STEPS
1. configure
2. router ospf process-name
3. mpls ldp auto-config
4. end
or
commit
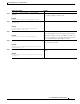
Step 5
area
area-id
Example:
RP/0/RP0/CPU0:router(config-ospf)# area 1
Enters area configuration mode and configures an area used
for multiple area adjacency.
• The area-id argument can be entered in dotted-decimal
or IPv4 address notation, such as area 1000 or
area 0.0.3.232. However, you must choose one form or
the other for an area. We recommend using the IPv4
address notation.
Step 6
multi-area-interface
type instance
Example:RP/0/RP0/CPU0:router(config-ospf)#
multi-area-interface POS 0/1/0/3
Enables multiple adjacencies for different OSPF areas and
enters multi-area interface configuration mode
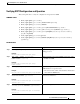
Step 7
end
or
commit
Example:
RP/0/RP0/CPU0:router(config-ospf-ar-if-mif)# end
or
RP/0/RP0/CPU0:router(config-ospf-ar-if-mif)#
commit
Saves configuration changes.
• When you issue the end command, the system prompts
you to commit changes:
Uncommitted changes found, commit them before
exiting(yes/no/cancel)?
[cancel]:
–
Entering yes saves configuration changes to the
running configuration file, exits the configuration
session, and returns the router to EXEC mode.
–
Entering no exits the configuration session and
returns the router to EXEC mode without
committing the configuration changes.
–
Entering cancel leaves the router in the current
configuration session without exiting or
committing the configuration changes.
• Use the commit command to save the configuration
changes to the running configuration file and remain
within the configuration session.
Command or Action Purpose