
Installation guide
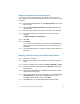
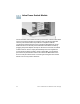
Table Of Contents
- Before You Begin
- Getting to Know the NSS322
- Installing the NSS322
- Installing the Disk Drives
- Locking and Unlocking the Disk Trays
- Connecting the Equipment
- Verifying the Hardware Installation
- Starting NAS Configuration
- Mapping a Network Drive
- Installing the Client Utility for Windows
- Installing the Client Utility for Mac
- Accessing the Management GUI Using a Web Browser
- Suggested Next Steps
- Reset Network Settings and Password
- Inline Power Switch Module
- Where to Go From Here

Cisco Small Business NSS322 Smart Storage 29
Set Up Cisco Access Now Remote Access
Cisco Access Now is the secure, easy-to-use way to access and manage
your Smart Storage devices from a web browser anywhere, anytime.
For more information, see the Cisco Small Business NSS300 Series
Smart Storage Administration Guide.
Reset Network Settings and Password
You can restore the network settings and password for your NAS device
using the reset button located on the back panel. The device should be
powered on for this procedure. Using a paper clip, press the reset button
for 3 seconds, until a beep is heard.
The following settings are reset to default:
• System administration password: admin
• Network settings:
– Obtain TCP/IP settings automatically via DHCP
– Disable Jumbo Frame
– System management port - 8080
• System tools: IP filter settings - Allow all connections
14