
Installation guide
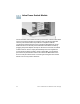
Table Of Contents
- Before You Begin
- Getting to Know the NSS322
- Installing the NSS322
- Installing the Disk Drives
- Locking and Unlocking the Disk Trays
- Connecting the Equipment
- Verifying the Hardware Installation
- Starting NAS Configuration
- Mapping a Network Drive
- Installing the Client Utility for Windows
- Installing the Client Utility for Mac
- Accessing the Management GUI Using a Web Browser
- Suggested Next Steps
- Reset Network Settings and Password
- Inline Power Switch Module
- Where to Go From Here

Cisco Small Business NSS322 Smart Storage 27
STEP 5 In the lower-right corner of the window, click the link Install NSS
Discovery Tool. The Welcome to the NSS Discovery Tool Setup
window opens.
STEP 6 The End-User License Agreement window opens. Click Agree to
accept this agreement.
STEP 7 Double-click NSS Discovery Tool to launch the software. The NSS
Discovery Tool window opens. From this window, you can
connect, configure, or view details for the listed devices.
STEP 8 7. C l i c k Exit to close the tool.
Accessing the Management GUI Using a
Web Browser
STEP 1 Open a web browser and enter the IP address of the NAS device. It
is important to include the port 8080 following the IP address.
For example:
http://<NAS IP address>:8080
STEP 2 When the login window opens, enter the administrator username
and password.
For more information about the Applications, Languages, and SSL
Login, see the Cisco Small Business NSS300 Series Smart
Storage Administration Guide.
12