
Installation guide
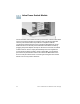
Table Of Contents
- Before You Begin
- Getting to Know the NSS322
- Installing the NSS322
- Installing the Disk Drives
- Locking and Unlocking the Disk Trays
- Connecting the Equipment
- Verifying the Hardware Installation
- Starting NAS Configuration
- Mapping a Network Drive
- Installing the Client Utility for Windows
- Installing the Client Utility for Mac
- Accessing the Management GUI Using a Web Browser
- Suggested Next Steps
- Reset Network Settings and Password
- Inline Power Switch Module
- Where to Go From Here

Cisco Small Business NSS322 Smart Storage 23
Mapping a Network Drive From Windows
NOTE If you are using Windows Vista, you might receive a security
warning and have to temporarily disable any security software on your
computer.
STEP 1 From the Windows desktop, click the My Computer icon to open
My Computer.
STEP 2 Choose Tools > Map Network Drive. The Map Network Drive
window opens.
STEP 3 From the drop-down lists, select the drive letter to be mapped.
STEP 4 In the Folder field, type the share name you want to map. For
example:
\\<NAS IP address>\<share name>
STEP 5 Click OK.
STEP 6 Click Finish.
NOTE If you are prompted to enter a username and password for
authentication, enter the administrator account username and
password.
STEP 7 Open Windows Explorer to view and use the network share as a
local drive.
Mapping a Network Drive from the Mac Setup Wizard
STEP 1 Insert the product CD.
STEP 2 Double-click the CD icon on the desktop to view the contents in
Finder.
STEP 3 From the …\MAC\ folder, double-click CISCO_NSSCD_V....dmg.
STEP 4 From the ..\AutoRun\ folder, double-click AutoRun to launch the
Setup Wizard.
STEP 5 Under First Time Installation, click Start. The End-User License
Agreement window opens.
STEP 6 To accept the End-User License Agreement, check the I accept
this agreement check box and click Next. The First Time
Installation Wizard window opens. Click Next.
STEP 7 Click Skip until you reach the Map Network Drive window.