
Specifications


© 2006 Cisco Systems, Inc.
All rights reserved.
Product Features 2-164
NAM / Traffic Analyzer v3.5 Tutorial
© 2006 Cisco Systems, Inc. All rights reserved.
Product Features 2-164
NAM / Traffic Analyzer v3.5 Tutorial
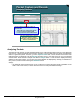
Packet Capture and Decode
Save to NAM Hard Disk (Local Disk)
Packet Capture and Decode
Save to NAM Hard Disk (Local Disk)
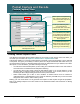
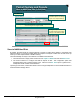
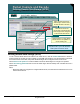
Capture Settings
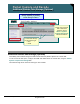
Two Methods
Two Methods
Selecting “Capture to Disk >
Local Disk” option as the storage
option in the Capture Settings
Selecting “Capture to Disk >
Local Disk” option as the storage
option in the Capture Settings
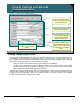
Selecting the capture from the list
of capture buffers and manually
saving it to the NAM Hard Disk
Selecting the capture from the list
of capture buffers and manually
saving it to the NAM Hard Disk
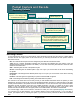
Selecting “No. Files” to be greater than 1, could create multiple files that
could be merged into a single file later
Selecting “No. Files” to be greater than 1, could create multiple files that
could be merged into a single file later
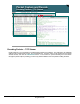
Save to NAM Hard Disk
By default, the NAM stores the captured packets in a buffer in RAM. Saving buffers to the NAM’s local
hard drive allows you to keep the traffic filtered and capture for analysis at a later time as well as free up
memory for other capture buffers or NAM monitoring.
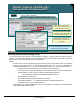
There are basically two ways to store buffers to the NAM’s local hard drive.
1. The first method is to simply select a buffer from the Capture > Buffers list and click Save to File.
2. The second method is to configure the NAM to Capture to Disk. This configuration option was
described earlier under “Capture Settings” topic. Note that if the No. Files option is greater than 1,
multiple files will be created on the hard drive.
Upcoming in this section, it will be discussed on how to merge multiple files on the local NAM hard drive or
a defined external storage device.