
Operating instructions


152 Cisco Systems Intelligent Gigabit Ethernet Switch Module
Step-by-step instructions to configure BladeServer2
Table 7-12 shows the step-by-step instructions used to configure BladeServer2.
Table 7-12 Configuring BladeServer2 for standard interface connections
Step-by-step instructions to configure BladeServer3
Table 7-13 shows the step-by-step instructions used to configure BladeServer3.
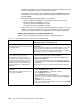
Table 7-13 Configuring BladeServer3 for access link with single VLAN, using SLB
Description and comments On BladeServer2
No BASP software, using physical access links on both Ethernet
ports
Step 4.2.1:
Configure IP addresses directly
on the desired interfaces
.
This step assumes that the user knows how
to add IP addressing information.
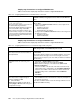
Note that the default gateways used are part
of the base HSRP config of the 6500s.
Also note that on production systems, you
would normally configure one or more DNS
servers. This was not included as part of this
environment but should be included in most
production networks.
This procedure will be no different from configuring a stand-alone server
with two NICs.
1. Select the Local Area Connection interface and configure the IP
address as follows:
– IP Address: 10.1.10.2
– Mask: 255.255.255.0
– Default Gateway: 10.1.10.254
2. Configure the Local Area Connection 2 interface and configure the
IP address as follows:
– IP Address: 10.1.20.2
– Mask: 255.255.255.0
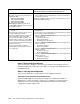
Description and comments On BladeServer3
BASP using VLANs on both Ethernet ports for SLB
Step 4.3.1:
Launch BASP software.
This step assumes the desired software is
already installed.
Click Start → Programs → Broadcom → Broadcom Advanced
Control Suite.
This assumes that the software used a default installation. You can also
launch this software through an icon in the lower-right corner of the
window near the clock (move your cursor until you find the icon labeled
“Control Suite”).
Step 4.3.2:
Create the team using both
NICs
.
1. Click Tools → Create a Team on the toolbar.
2. Enter ToBoth-VLAN30 in the name field and click Next.
Note: Leave the Team Type on the default value (Smart Load
Balance and Fail Over).
3. Select the first NIC on the left side of the window and click the top
right pointing arrow to add this NIC to the Load Balance Members.
4. Select the second NIC on the left side of the window and click the
top right pointing arrow to add this NIC to the Load Balance
Members.
5. Click Finish.
Step 4.3.4:
Save the changes made to BASP.
This step creates a single new logical
interface in Windows 2000:
ToBoth-VLA N30
Note: Exiting the BASP program without
clicking Apply or OK will result in losing your
configuration changes.
1. Click Apply at the main BASP window.
2. Click the Yes button when warned about a temporary interruption to
the network connections.
At this time, the BASP software creates the new logical interface for use
with Windows 2000 networking.