
Operating instructions


130 Cisco Systems Intelligent Gigabit Ethernet Switch Module
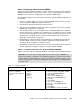
Step 3.2.3:
Configure 802.1Q
trunking toward 6500-3
.
Note that on the line allowing
specific VLANs, there cannot be
any spaces between the numbers
and the commas. (These may
appear wrapped in this example,
but should be on the same line as
the command).
Also note that VLAN 2 is the
native VLAN on these ports by
default.
int port-channel 1
description EtherChannel-To-6500-3
switchport trunk native vlan 2
switchport trunk allowed vlan
2,20,25
switchport mode trunk
(The VLAN numbers might be wrapped
in this example, but they should be on
the same line as the command.)
1. In the top menu bar, click VLAN →
VLAN.
2. Hold down the Ctrl key and click
ports Gi0/17 through Gi0/20.
3. Click Modify.
4. In the Trunk-Allowed VLAN field,
enter 2,20,25.
5. In the Native VLAN field, make
sure that it is set for 2.
6. Click OK.
7. Click Apply or OK.
Important: Due to a limitation in the
current version of CMS exists where it
will always include VLANs 1 and 1001
through 1005. This can cause a
mismatch with the setting on the 6500
side and result in the aggregation going
down. The only solution for now is to go
into the CLI and run the switchport
trunk allowed vlan command with the
desired settings, as shown in the CLI
section for this step.
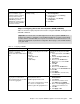
Step 3.2.4:
Configure 802.1Q
trunking to BladeServer1
connecting to CIGESM2
.
For this Cisco Systems IGESM,
only port g0/1, connecting to the
second NIC on BladeServer1, will
be trunking. The second NIC on
BladeServer2 will be an access
link (see the next step).
int g0/1
switchport trunk allowed vlan
2,20,25
Note that the VLAN numbers might be
wrapped in this document; they should
be on the same line as the command.
1. In the top menu bar, click VLAN →
VLAN.
2. Click port Gi0/1.
3. Click Modify.
4. In the Trunk-Allowed VLAN field,
enter 2,20,25.
5. Click OK.
6. Click Apply or OK.
Important: As noted in step 3.1.3, due
to a limitation in the current version of
CMS, it will always include VLAN 1 and
1001 through 1005. This can cause a
mismatch with the setting on the blade
server side and result in the trunk not
working as expected. The only solution
at this time is to go into the CLI and run
the switchport trunk allowed vlan
command with the desired settings, as
shown in the CLI section for this step.
Step 3.2.5:
Configure access link
to blade server’s CIGESM2
.
For this Cisco Systems IGESM,
only port g0/2, connecting to the
second NIC on BladeServer2, will
be an access link.
int g0/2
switchport mode access
switchport access vlan 20
end
This places BladeServer2’s second NIC
into VLAN 20.
1. In the top menu bar, click VLAN →
VLAN.
2. Click port Gi0/2.
3. Click Modify.
4. In the Administrative Mode field,
select Static Access.
5. In the Static-Access VLAN field,
enter 20.
6. Click OK.
7. Click Apply or OK.
Description and comments Actions via IOS CLI for CIGEMS2 Actions via CMS for CIGEMS2