
Programming instructions

159
Upgrades and FRUs
Installation Sequence
Install the R2 card in the following sequence:
• Program the card using the System Administration Tool (see the
Online Help for details)
• Install the interface assembly (see page 49)
• Install the R2 card
• Save the IMAT database onto the R2 card
• Connect the R2 card to the PSTN network
• Test the R2 card
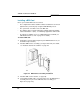
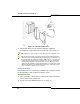
Install the R2 Card
The R2 card is installed in any empty DSU slot. The DSU cabinet supplies
the power for the card and provides a message interface back to the
control cabinet through the FIM interface and the fiber optic cable.
Save the IMAT Database to the R2 Card
Before you save the IMAT database to the R2 card, you need to configure
the R2 database and connect the computer to the R2 card. For more
information, refer to the IMAT online help.
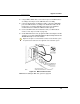
Connecting the R2 Card to the PSTN Network
To connect the R2 card to the PSTN network:
1. Unpack and inspect the R2 coaxial cables. See “R2 Card
Connections” on page 160. Retain the original package.
2. Plug the R2 cable(s) into the R2 port(s).
See Table 74 on page 292 for the R2 card RJ-45 connector pinout.