
Programming instructions

133
Upgrades and FRUs
14. Reconnect the controller to the network.
15. If you backed up your database in Step 1, restore the database (see
“Restore a Database” on page 63).
System ID Module
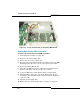
To replace the system ID module:
1. Power down the controller (see page 99).
2. Disconnect all cables.
3. Remove the controller cover (see page 99 or page 100).
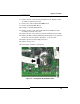
4. Remove the old System ID module from the main board:
- 100-user controller: behind slot 2.
-MX controller: behind slot 4.
- LX, 250, or 700-user controller: between slots 1 and 8.
5. Remove the cover from the new System ID module’s connector.
6. Install the new System ID module and secure with the screw provided.
7. Replace the controller cover (see page 99 or page 100).
8. Reconnect all the cables to the controller.
9. Power up the controller (see page 22).
System i-Button (CX/CXi and MXe)
To replace the system i-button in a CX, CXi, or MXe:
1. Power down the controller (see page 99).
2. Disconnect all cables.
3. Remove the controller cover (see page 101).
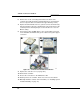
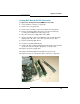
4. Remove the old system i-button from the main board. Slightly pull out
the metal clips holding the i-button in place.
5. Insert the system i-button in the twin tab connector located on the main
board (see Figure 21 on page 134).
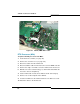
6. Replace the controller cover (see page 101).
Tip: If you replace with a new System ID, you must program the options (see
page 25) and then restore the database (see page 63).