
Programming instructions

121
Upgrades and FRUs
APC Hard Drive (CXi)
If you are installing the optional Application Processor Card, then you must
also install a hard drive to support the APC's operating system and
applications. If you are replacing an APC hard drive with one that does not
have the 6000 MAS software installed, refer to “Install 6000 MAS
Software” on page 87.
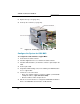
To install the APC hard drive in a CXi:
1. Unplug the ribbon cable and the power cable from the old hard drive.
2. Remove the screws connecting the bracket to the back of the
controller, then slide the bracket forward and remove it.
3. If a System hard drive is already installed in the upper bracket position,
unscrew it from the bracket and move it to the lower bracket position.
The power and IDE cables can remain connected.
4. Lower the APC hard drive into the upper bracket position. Ensure that
the hard drive jumpers are set to master.
5. Secure the hard drives to the bracket with the screws provided.
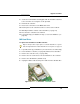
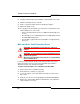
6. Connect the power and IDE cables to the corresponding connectors
on the hard drive and main board. The cables are keyed for proper
connection (see Figure 16).
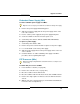
7. Slide the bracket back into the chassis, then fasten the screws
connecting the bracket to the back of the controller.
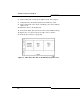
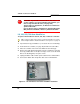
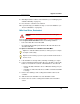
Figure 15: Remove protective strips from APC heat pads
Tip: Connect the System hard drive IDE cable to the main board connector
labeled MPC8270 HARDDRIVE. Connect the APC hard drive IDE cable to
the main board connector labeled ETX HARDDRIVE.