
User guide


3-2
Cisco WLAN Controller Web Interface User Guide
OL-7416-04
Chapter 3 WLANs Menu Bar Selection
WLANs
WLANs
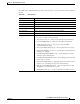
Click WLANs to navigate to this page.
This page shows a summary of the wireless local access networks (WLANs) that you have configured
on your network. From this page, you may add, remove or edit WLANs.
From the summary table, select Edit to modify the selected WLAN characteristics and the WLANs >
Edit page is displayed.
Select Remove from the summary table to delete the selected WLAN. You are prompted to confirm the
removal of the selected WLAN.
Command Buttons
• New: Click to add a WLAN on the WLANs > New page.
• Help: Request that the help page be displayed in a new browser window.
WLANs > New
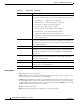
Use WLANs > New to navigate to this page.
To add a new wireless LAN, perform these steps:
Step 1 Select a WLAN ID from the drop-down menu.
Note Cisco access points can support up to 16 WLANs per controller. However some Cisco access
points do not support WLANs that have a WLAN ID greater than 8. In such cases, when you
attempt to create a WLAN you get a message that says
"Not all types of AP support WLAN
ID greater than 8, do you wish to continue?".
Clicking OK creates a WLAN with the
WLAN ID that you selected.
Note The WLANs that are not assigned to the access points are denoted with an asterisk (*) symbol.
Step 2 Enter a text name for the WLAN in the WLAN SSID box. (This is the SSID broadcast name for the
WLAN.)
Step 3 Click the Apply button to bring up the WLANs > Edit page, where you can continue configuring the
WLAN.
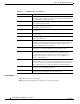
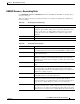
Table 3-1 Timer Descriptions
Parameter Description
WLAN ID Identification number of the WLAN.
WLAN SSID Definable name of the WLAN (text string).
Admin Status Status of the WLAN is either enabled or disabled.
Security Policies Security policies enabled on the WLAN.