
User Guide


1-12
Cisco Advanced Web Security Reporting Installation, Setup, and User Guide
Chapter 1 Installation and Setup
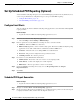
Set Up On-going Data Transfers
Step 5 Click Manual and then enter wsa_syslog in the Sourcetype field.
Step 6 Choose Cisco WSA - Advanced Reporting as the App Context.
Step 7 In the Host section, click Custom as the Method field, and then enter the Advanced Web Security
Reporting host name as the Host field value.
Step 8 Choose Default as the destination Index.
Step 9 Click Review and review the values you provided.
Step 10 Click Submit.
Step 11 Navigate to Settings > Data Inputs > TCP to confirm the new input entry.
Note With a multiple-appliance configuration, you must repeat these steps from the Advanced Web Security
Reporting application for each appliance. However, you also can configure multiple appliances by
editing the inputs.conf file.
Establish Log Transfers from A Web Security Appliance
Before You Begin
• Know the path to your log files: Create the Folder Structure for Access and Traffic Monitor
Log Files, page 1-9.
• Determine the frequency of transfers, no more than 60-minute increments.
• Open the web interface for the Web Security Appliance.
Step 1 In the Web interface for the Web Security Appliance, navigate to System Administration >
Log Subscriptions.
Step 2 Click Add Log Subscription, or click the name of an existing subscription to edit it.
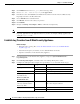
Step 3 Configure the subscription (this example refers specifically to access and traffic-monitor logs):
Setting Log Type Value
Log Type Access accesslogs
Traffic Monitor trafmonlogs
Log Name Either Name for the log directory.
(Depending on your
AsyncOS release)
Rollover by File Size
Maximum File Size
Either Recommend no more than 500 MB.
(Availability of this option
varies by AsyncOS release)
Rollover by Time
Either Recommend custom rollover interval of one hour
(1h) or more frequent rollovers.
Log Style Access Squid
Traffic Monitor N/A