Release Notes for Cisco CDA Visual Quality Experience Application Release 3.10 Last Updated: March 2015 In this release note, unless it is explicitly noted that text applies to a specific VQE 3.10.X release, all statements concerning Cisco VQE, Release 3.10, apply to each VQE 3.10 release (3.10.1, 3.10.2, and so forth).
New and Changed Features and Functionality VQE is part of an end-to-end solution from Cisco that builds video awareness into the network infrastructure. For VQE Release 3.10, Cisco VQE technology is intended for wireline operators who offer managed broadcast (multicast) IPTV services using xDSL. For a list of Cisco VQE documentation, see the “Related Documentation” section on page 27.
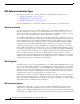
System Requirements System Requirements The VQE-S runs on either a CDE111/ CDE250 2V0. The VCPT and VCDS run on the same hardware. The CDE111 platform has two models: CDE111-2-146TXA-K9 and CDE111-2-146TXD-K9. The system comes with the software pre-installed—either VQE-S software or Tools (VCPT and VCDS) software. In each case, the required Linux, Apache web server, and other software is also pre-installed.
Limitations and Restrictions Deprecated sysctl Message Displayed on Serial Console On the serial console, the system will occasionally display a message of the form: process `sysctl' is using deprecated sysctl (syscall) net.ipv6.neigh.eth4.retrans_time; Use net.ipv6.neigh.eth4.retrans_time_ms instead. No workaround is needed. This has no known operational impact and is a Red Hat Linux binary message.
Limitations and Restrictions Workaround: Any time change performed on the VQE-S system should be done during a maintenance window. The procedures for changing the date and time vary depending on whether Network Time Protocol (NTP) or the Linux date command is used.
Limitations and Restrictions Performing a Date and Time Change with the Linux date Command When performing a time/date change with the Linux date command only, perform the following commands: Step 1 Log in as root. Step 2 Stop the VQE-S services by issuing the following command: [root@system]# service vqes stop Step 3 If needed, set the time zone with the vqe_cfgtool command’s -config option. Use the Configuration Tool’s System Parameters menu and the Timezone choice.
Resolved and Open Caveats Step 5 sed -i '/Banner/c\Banner /etc/issue.net' /etc/ssh/sshd_config Step 6 Restart sshd service. Note These steps must be done for every iso installation(clean/upgrade). Load Balancing May Not Work Correctly When More Than 16 Interfaces Are Attached to an Edge Router With Cisco routers, there is a limitation in the edge router: Only the first 16 route matches for Feedback Target addresses are considered when routing requests to the VQE-S servers from the access network.
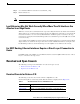
Resolved and Open Caveats Table 1 Resolved Caveats for Cisco VQE Release 3.10 Bug ID Description CSCur06775 Security Vulnerabilities CVE-2014-6271 and CVE-2014-7169 in VQE CSCus27500 NTP vulnerability Open Caveats for Release 3.10 There are no Open Caveats for Release 3.10. Accessing Bug Search This section explains how to use the Bug Toolkit to search for a specific bug or to search for all bugs in a release. Step 1 Go to https://tools.cisco.com/bugsearch/.
Installing VQE Release 3.10 Software Choose Fixed to view fixed bugs. To filter fixed bugs, uncheck the Fixed check box and select the appropriate suboption (Resolved or Verified) that appears below the Fixed check box. – Advanced—Check the Show only bugs containing bug details check box to view only those bugs that contain detailed information, such as symptoms and workarounds. – Modified Date—Choose this option to filter bugs based on the date when the bugs were last modified.
Installing VQE Release 3.10 Software VQE Software Installation Types The following sections provide overview information on the VQE software installation types: • “ISO Clean Installation” section on page 10 • “ISO Full Upgrade” section on page 10 • “VQE Incremental Upgrade” section on page 10 The term “ISO installation” comes from the ISO file system format that is used to burn the CD.
Installing VQE Release 3.10 Software /etc. For parameters that will be under the control of the VQE CMS, a VQE incremental upgrade restores the parameter values (from the existing /etc configuration files) in the set of newly installed /etc configuration files. A VQE incremental upgrade is done with an executable installer—a single executable file that includes all VQE-S packages needed for the upgraded VQE software version.
Installing VQE Release 3.10 Software Note • VQE incremental upgrade installs a limited set of files—only those files that are needed to upgrade to the VQE 3.7.X software. This is the recommended upgrade path because it is relatively fast (approximately a minute) and simple to perform. A VQE incremental upgrade preserves your earlier VQE 3.X configurations in VCDB and in the configuration files under /etc. If a configuration parameter is not configured by the earlier VQE 3.
Installing VQE Release 3.10 Software The easiest way to back up the /etc configuration files is to use the tar command to create a TAR file archive of all directories and files under /etc. Note Table 3 In addition to the files listed in these tables, there may be backup or alternate files in the /etc/opt/vqes directory or another location. These files must be backed up if you want them available on the upgraded CDE111/ CDE250 2V0.
Installing VQE Release 3.10 Software To run the VQE incremental upgrade installer to upgrade an earlier VQE Release 3.X release to Release 3.7.X, do the following: Caution Step 1 To be safe in case of a catastrophic failure, be sure to backup configuration files as described “Backing Up VQE Release 3.X Files Before Upgrading or Installing Software” section on page 12. If needed, log in as root on the CDE111/ CDE250 2V0 server where the VQE incremental upgrade installer was downloaded.
Installing VQE Release 3.10 Software 2. Note Backing Up VQE Release 3.X Files Before Upgrading or Installing Software, page 12 ISO full upgrades must be performed using the CDE111/ CDE250 2V0 serial port (not the CDE video and keyboard ports). For these installations, the serial port connection can be through a terminal server or through a directly connected PC.
Installing VQE Release 3.10 Software Note If there are manually edited files in the existing /etc directories, the changes were made by an administrator without the use of VCDB. If you want to continue to have these differences present in your configuration files, you need to carefully edit the relevant configuration files so that they include the items that are different. • Backs up the /etc configuration files to the vqe-release-hostname-timestamp.tar.
Installing VQE Release 3.10 Software You can now choose the new password or passphrase. A valid password should be a mix of upper and lower case letters, digits, and other characters. You can use an 8 character long password with characters from at least 3 of these 4 classes, or a 7 character long password containing characters from all the classes. An upper case letter that begins the password and a digit that ends it do not count towards the number of character classes used.
Installing VQE Release 3.10 Software An ISO clean installation installs a complete new set of VQE, Linux, Quagga, and other files. An ISO clean installation does not backup or restore your current VQE 3.X configurations. An ISO clean installation reformats the hard drive and reinstalls the operating system and other packages, such as the VQE software. All old configurations are removed. Before performing an ISO clean installation, perform the following tasks: Note 1.
Installing VQE Release 3.10 Software 3. Reboots. 4. Installs the add-on RPM of VQE packages and configuration files. 5. Performs installation post processing. a. Installs a new vcdb.conf.sample file in the /etc/opt/vqes/ directory. b. Saves the factory default configuration files under /etc to the directory /vqe-etc/etc-pristine. 6. Reboots the server. Step 4 Remove the ISO CD from the CDE111/ CDE250 2V0 CD/DVD Combo drive and close the drive tray.
Installing VQE Release 3.
Installing VQE Release 3.10 Software In addition to the above requirements, the version of the software of VQE should be upgraded to release 3.7.3 before undertaking a remote install to VQE software version 3.10.0. This is due to the constraint that VQE software 3.10 is based on a completely new version of RedHat OS. Note Once upgraded to VQE software version 3.10.0, downgrade of software is supported via remote installation directly from 3.
Installing VQE Release 3.10 Software The following example shows output from the script when an upgrade installation is selected. This script will perform the remote iso installation on this server. Please Enter Full Path of the ISO Image : /tmp/vqes-3.x.x-xx.xxx_xx.iso Please enter the installation type : clean/[upgrade] : Enter Setting up Second Disk for Remote ISO Installation...
Installing VQE Release 3.10 Software b. Saves the factory default configuration files under /etc to the directory /vqe-etc/etc-pristine. 6. Step 1 Reboots the server. When the CDE111/ CDE250 2V0 completes the final reboot, you are required to log in as root and change the password for root: localhost.localdomain login: root You are required to change your password immediately (root enforced) You can now choose the new password or passphrase.
Installing VQE Release 3.10 Software – Logs the names of files that have been manually changed. The log file is /var/log/upgrade.log. – Writes diff command output showing the manually changed items into the /vqe-etc/etc-diff file. Note If there are manually edited files in the existing /etc directories, the changes were made by an administrator without the use of VCDB.
Supporting Software Hardening Guides and VQE Step 1 When the CDE111/ CDE250 2V0 completes the final reboot, you are required to log in as root and change the password for root: localhost.localdomain login: root You are required to change your password immediately (root enforced) You can now choose the new password or passphrase. A valid password should be a mix of upper and lower case letters, digits, and other characters.
Supporting Software Hardening Guides and VQE Linux Security Checklist Document: Linux Security Checklist, Version 2 Document URL: http://www.sans.org/score/checklists/linuxchecklist.pdf For the Linux operating system, the following are SANS requirements where it appears that if the user were to follow the specific recommendations of the guide it would likely break behavior that VQE implements. • Page 2, item 2: “System Patches”.
Notices • Page 37, “Core Dumps”. The VQE-S stores crash related information in the core dump files. By removing the core file, valuable debugging information is discarded. Settings related to the creation and storage of core dumps should not be modified. Additionally, core dumps should only be removed after consultation with your Cisco Technical Support Contact. • Page 39, “Logs”. The VQE-S uses a customized version of syslogd in order to log VQE related messages.
Obtaining Documentation and Submitting a Service Request http://www.cisco.com/en/US/docs/video/cds/cde/regulatory/compliance/CDE_RCSI.html • Open Source Used in Visual Quality Experience 3.10 http://www.cisco.com/en/US/products/ps7127/products_licensing_information_listing.html The entire Content Delivery Systems documentation suite is available on Cisco.com at: http://www.cisco.com/en/US/products/ps7191/Products_Sub_Category_Home.
Obtaining Documentation and Submitting a Service Request Release Notes for Cisco CDA Visual Quality Experience Application Release 3.
Obtaining Documentation and Submitting a Service Request Cisco and the Cisco logo are trademarks or registered trademarks of Cisco and/or its affiliates in the U.S. and other countries. To view a list of Cisco trademarks, go to this URL: www.cisco.com/go/trademarks. Third-party trademarks mentioned are the property of their respective owners. The use of the word partner does not imply a partnership relationship between Cisco and any other company.