Cisco Unified Workforce Optimization Quality Management Service Information 2.4 October 2007 Americas Headquarters Cisco Systems, Inc. 170 West Tasman Drive San Jose, CA 95134-1706 USA http://www.cisco.
THE SPECIFICATIONS AND INFORMATION REGARDING THE PRODUCTS IN THIS MANUAL ARE SUBJECT TO CHANGE WITHOUT NOTICE. ALL STATEMENTS, INFORMATION, AND RECOMMENDATIONS IN THIS MANUAL ARE BELIEVED TO BE ACCURATE BUT ARE PRESENTED WITHOUT WARRANTY OF ANY KIND, EXPRESS OR IMPLIED. USERS MUST TAKE FULL RESPONSIBILITY FOR THEIR APPLICATION OF ANY PRODUCTS.
Contents Quality Management Service Information 5 ■ Quality Management Documentation 5 ■ Service Names and Executables 6 ■ Registry Entries 7 Site Setup 7 Ident 8 ■ Logs and Debugging 9 Setting the Default Debugger 9 Log Message Formats 11 Configuration Files 12 Enabling Debugging 13 Disabling Debugging 15 ■ ContactDelete Utility 17 Using the Utility 17 ■ Moving the Recording Storage Location 18 ■ Audit Trail Error Messages 21 ■ Troubleshooting 25 Index 31
Contents
Quality Management Service Information Quality Management Documentation The following documents contain additional information about QM 2.4: October 2007 ■ Quality Management Installation Guide ■ Quality Management Administrator User Guide ■ Quality Management Desktop User Guide ■ Quality Management Error Code Dictionary ■ Quality Management 2.
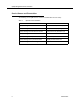
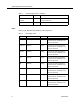
Quality Management Service Information Service Names and Executables The following are the QM services as listed in the Windows Services utility. Table 1. 6 QM services and executables Service Name Executable Quality Management CTI Service splkjservice.exe (ctiservice.jar) Quality Management DB Proxy Service splkjservice.exe (dbproxy.jar) Quality Management DB Cleaner Service splkjservice.exe (dbcleaner.jar) Quality Management LDAP Monitor Service LDAPMonSvr.
Registry Entries Registry Entries Site Setup HKEY_LOCAL_MACHINE\SOFTWARE\Spanlink\SQM\Site Setup Table 2.
Quality Management Service Information Table 2. Site setup registry entries — Continued Value Type Description LDAP Request Timeout dword Maximum time in seconds before an LDAP request times out LDAP Root string Root of the LDAP data Ident HKEY_LOCAL_MACHINE\SOFTWARE\Spanlink\SQM\Ident Table 3.
Logs and Debugging Logs and Debugging Applications and services use logging to report status and problems. Each application and service creates two files: ■ Log files (files with the *.log file extension) contain status messages and, if problems occur, warning and other error messages. All messages in log files are identified by an error code. See the Quality Management Error Code Dictionary for more information on error codes. ■ Debugging files (files with the *.
Quality Management Service Information To reset Dr. Watson as your default debugger: 1. On the server hosting the QM Database services, click Start > Run. 2. In the Open field, type drwtsn32.exe and click OK. Dr. Watson for Windows starts. 3. Configure the settings to match those shown in Figure 1. ■ Accept the default Log File Path and Crash Dump locations. ■ Set the Crash Dump Type to Full. ■ Clear the Visual Notification check box. 4. Click OK. Figure 1. 10 Dr. Watson configuration settings.
Logs and Debugging 5. Click Start > Run. 6. In the Open field, type drwtsn32.exe -i and click OK. You will see the confirmation dialog displayed in Figure 2. Figure 2. Dr. Watson confirmation dialog. 7. Click OK to close the dialog box. Dr. Watson is now set as your default debugger. Log Message Formats The following are the formats used by the various log and debug file messages. Each format is followed by an example. C++ and Java *.
Quality Management Service Information Configuration Files Each application and service has an associated configuration file that controls logging and debugging. These files can be edited in a text editor such as Windows Notepad to change the logging and debugging parameters. Configuration files are located in the …\Cisco\WFO_QM\config folder on the client or server computer. CAUTION: Edit configuration files only as described in this section.
Logs and Debugging Table 4. QM configuration and log files — Continued Service/Application Location Configuration File Log File QM Reporting server log4j_SQMR.properties† SQMR.log QM Uploader server dbUpload.properties dbUpload.log QM Uploader server SQMUploadController.cfg SQMUploadController0001.log Sync Service server DirAccessSynSvr.cfg DirAccessSynSvr0001.log True Update client splkUpdate.cfg splkUpdate0001.
Quality Management Service Information Table 5. Debugging Thresholds Threshold Description Debug Usually sufficient for diagnosing a problem. Will not affect system performance. Call Tracks function entry and exit. Trace Provides a large amount of diagnostic information. May affect system performance. Stack Provides only stacktraces, which give more debugging information when errors and warnings occur. Dump Provides a very large amount of detailed diagnostic information.
Logs and Debugging To enable debugging in log4j files: 1. In a text editor, open the desired configuration file. 2. Locate the line that starts with: log4j.rootLogger= … and replace with DEBUG or TRACE. 3. Save the configuration file. 4. Restart the application or service for the new setting to go into effect. Disabling Debugging It is important to disable debugging when it is no longer needed for diagnostic purposes.
Quality Management Service Information log4j.rootLogger= … and replace with INFO. 3. Save the configuration file. 4. Restart the application or service for the new setting to go into effect.
ContactDelete Utility ContactDelete Utility The ContactDelete utility (ContactDelete.exe) is a command line tool that is installed on the Database Services server in the following location: …\Cisco\WFO_QM\bin\ContactDelete.exe It is used to permanently delete a specified contact from the database. Once this utility is run on a record, no calculations or contact lists will include the deleted contact. Other than the log file, there is no audit trail indicating the record was deleted.
Quality Management Service Information Moving the Recording Storage Location Follow this procedure to change the location where voice and screen recordings are stored. ■ Voice Recordings: You can change the storage location to any local or external folder. It is not necessary that they be stored on the machine hosting the Voice Services. ■ Screen Recordings: You can change the storage location to any local or external folder.
Moving the Recording Storage Location Figure 3. Recording File Storage Location window. 6. Select if you want to store recordings in a local or external storage location, and then enter or browse to the desired location in the Storage Location field. ■ Local Storage Location. A location that is physically part of the voice or screen server, such as an internal or external hard drive. ■ External Storage Location.
Quality Management Service Information ■ The user must have read/write access to both the external drive location entered AND the location where QM is installed on the local server. 8. Click OK. 9. Copy the recording files from the audio folder and all subfolders (for voice recordings) or from the video folder and all subfolders (for screen recordings) at the old location (default location is C:\Program Files\Common Files\ QM\recordings\) to the new location.
Audit Trail Error Messages Audit Trail Error Messages Table 6 describes the audit trail error messages that can appear in the Service Status and System Status reports generated through QM Desktop. Table 6. Audit trail error messages Message Description/Action CCM detected is not configured in QM: . Description: The Cisco Unified CM detected is not configured in QM. No recording will take place.
Quality Management Service Information Table 6. Audit trail error messages — Continued Message Description/Action Free Space: Checking free space failed. Free space checking has been disabled. Description: At the startup of the Tomcat service on the Voice and Screen servers, if FTS is unable to run the free space check, it turns off future free space checks. Action: Troubleshoot why FTS was unable to run the free space check. Description: FTS Free space checking has been turned off by the user.
Audit Trail Error Messages Table 6. Audit trail error messages — Continued Message Description/Action QM recording software is ready to record. Description: QM Recording is ready to record. Action: None. Recorded (voice): . Description: The number of recorded voice files ready to be uploaded. Action: None. Recorded (voice/screen): Description: The number of recorded voice and screen files ready to be uploaded. Action: None.
Quality Management Service Information Table 6. Audit trail error messages — Continued Message Description/Action Uploads Stopped: Not enough free space . Description: FTS has stopped uploading recordings to because the location at is full. Action: Add more storage. Description: The logged-in user is not configured in QM. No recording will take place. Action: User QM Administrator to configure the user. Description: Voice device failed to start recording.
Troubleshooting Troubleshooting Problem Desktop recording fails. Symptom. No recording files are in the C:\Program Files\Common\QM\Recordings folder on the desktop where recording is failing, Cause. The DNS has not been configured to resolve IP addresses and host names. Solution From the PC where desktop recording is failing, open a command window and enter ping -a .
Quality Management Service Information Solution On the QM Base services server, start QM Configuration Setup. In Windows Explorer, navigate to the C:\Program Files\Cisco\WFO_ QM\bin folder and double-click PostInstall.exe. If Configuration Setup starts in Initial Mode, it was not completed correctly. Go through each window and make sure that all required data is entered, and then click Finish. If Configuration Setup starts in Update Mode, start QM Configuration Setup.
Troubleshooting is clicked, an error message displays indicating that no data is available. Cause. In Site Configuration, the Active Directory domains were added using the host name to identify the AD connection. The connection was validated and the domain configuration was saved. Solution Edit the domain configuration to change the host name to an IP address. Once changed, AD data can be found in the Link Selected Users window.
Quality Management Service Information Problem Reports in CSV, PDF, and XLS format do not open in Microsoft Internet Explorer 7. Symptom. A dialog to save the report opens but closes again very quickly. Solution Clear the Confirm open after download check box for the CSV, PDF, and XLS file types. To do this, follow these steps for each file type: 1. Double-click My Computer. 2. On the Tools menu, choose Folder Options. 3. Select the File Types tab. 4.
Troubleshooting Problem The message, “Conversion from raw to spx failed” is seen multiple times in the Service Status report, but all the recordings for the specified agent for that day were uploaded correctly. Solution If the staging process that occurs after the configured End Of Day is interrupted before it is completed, you might see this error message in the Service Status report. Part of the staging process involves converting the *.raw files to *.spx files. The *.
Quality Management Service Information If you are upgrading QM from an earlier version. If, after starting the SQL Browser Service, you still receive the error message, call technical support for assistance. If you are installing QM for the first time. If, after starting the SQL Browser Service, you still receive the error message, remove the following files from the C:\Program Files\Microsoft SQL Server\MSSQL.1\MSSQL\Data folder: ■ SQMDB.mdf ■ SQMDB_log.LDF ■ SQMREPORTDB.mdf ■ SQMREPORTDB_log.