
Installation Guide


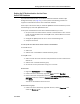


Table Of Contents
- Overview
- Installing QM
- Introduction
- Prerequisites
- Installing QM Services
- QM Configuration Setup
- Setting Up NT Authentication for the Cisco Unified CC Database
- Setting Up Named Pipes for the Cisco Unified CC Database
- Installing QM Desktop Applications
- Using Automated Package Distribution Tools
- Removing QM
- Index

Quality Management Installation Guide
48 June 2007
4. Verify that Named Pipes is in the list of enabled protocols.
5. Select Named Pipes and then click Properties to display the Named Pipes
dialog box.
6. Verify that the Default Pipe field displays \\.\pipe\sql\query or
\\<hostname>\sql\query.
3. To verify the connection:
1. On the QM Base Services server, start the Cisco Quality Management Sync
Service.
2. Open the DirAccessSyncServer.log file located in the C:\Program
Files\QM\log folder.
3. Verify that the follow message is in the log:
FCSS0021 SetServerStatus Change server to active.
and that there are no major or minor error messages present.