
Installation Guide


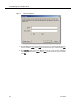


Table Of Contents
- Overview
- Installing QM
- Introduction
- Prerequisites
- Installing QM Services
- QM Configuration Setup
- Setting Up NT Authentication for the Cisco Unified CC Database
- Setting Up Named Pipes for the Cisco Unified CC Database
- Installing QM Desktop Applications
- Using Automated Package Distribution Tools
- Removing QM
- Index

QM Configuration Setup
June 2007 29
■ You can go backwards at any time to revisit a previous window.
■ Data you enter in a window is saved when you click Next.
NOTE: During Initial Mode, if a step fails, Configuration Setup will
stay at the existing window until the step succeeds or is
cancelled. The step attempts to run again every time you click
Next.
The program carries out any necessary processes and gives you the option of
starting the QM services.
6. When you have completed all the configuration windows in the tool, you will
see the message, “All QM servers are now installed”. Click OK.
7. The Status window is displayed. This window shows the version of all installed
QM components.
8. Click Finish to close Configuration Setup.
QM Configuration Setup Windows
The following are the windows you may see in the QM Configuration Setup utility.