Cisco Unified Wireless IP Phone 7921G Phone Guide for Cisco Unified Communications Manager 7.0 Americas Headquarters Cisco Systems, Inc. 170 West Tasman Drive San Jose, CA 95134-1706 USA http://www.cisco.
Contents Quick Reference vii Using the Phone vii Shortcut Keys and Buttons vii Common Phone Tasks vii Softkey Definitions viii Entering Text viii Phone Screen Icons viii Getting Started 1 Using this Guide 1 Finding Additional Information 2 Safety and Performance Information 2 Cisco Product Security Overview 6 Accessibility Features 6 Connecting Your Phone 7 Installing or Removing the Phone Battery 7 Charging the Phone Battery 8 Using the AC Power Supply to Charge the Battery 9 Using the USB Cable and USB Po
Understanding Feature Buttons and Menus 25 Accessing the Help System on Your Phone 26 Using Phone Buttons 27 Understanding Lines vs.
Picking Up a Redirected Call on Your Phone 52 Storing and Retrieving Parked Calls 53 Logging Out of Hunt Groups 54 Using a Shared Line 55 Understanding Shared Lines 55 Using Barge to Add Yourself to a Shared-Line Call 55 Understanding Barge Features 56 Using Barge Features 56 Preventing Others from Viewing or Joining a Shared-Line Call 57 Using BLF to Determine a Line State 57 Making and Receiving Secure Calls 58 Tracing Suspicious Calls 60 Prioritizing Critical Calls 60 Using Cisco Extension Mobility 61 Ma
Directory Dialing 76 Using Corporate Directory on Your Phone 77 Using Personal Directory on Your Phone 77 Cisco Unified CallManager Release 4.3 and Later 77 Cisco Unified Communications Manager Release 5.1 and Later 78 Using the Phone Book on Your Phone 80 Accessing Voice Messages 84 Accessing Your User Options Web Pages 85 Cisco Unified CallManager Release 4.
Common Phone Tasks Using the Phone Hold/resume a call Press Hold or Resume. Power on/off Press and hold the phone powers on or off. Transfer a call to a Choose Options >Trnsfer, new number enter a target number, then press Options >Trnsfer again. Redial a number Press twice or Options > Redial. Start a standard conference call Choose Options > Confrn. Dial a number, then choose Options > Confrn again. Repeat for each party. Forward your extension Choose Options > CFwdAll.
Softkey Definitions Entering Text Intercom line in one-way audio AbbrDial Dial using a speed dial index number Character—Press key one or more times. Intercom line in two-way audio Barge Add yourself to a call on a shared line CallBack Receive notification when a busy extension becomes available CFwdAll Set up/cancel call forwarding ConfList View conference participants Confrn Space—Press 0 . Line Features Number—Press the number key.
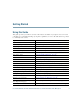
Getting Started Using this Guide This guide provides you with an overview of the features available on your phone. You can read it completely for a solid understanding of your phone capabilities, or refer to the table below for pointers to commonly used sections. If you want to... Then... Review safety information See Safety and Performance Information, page 2. Connect your phone to the network See Connecting Your Phone, page 7.
Finding Additional Information You can access the most current Cisco documentation on the World Wide Web at this URL: http://www.cisco.com/en/US/products/hw/phones/ps379/tsd_products_support_series_home.html You can access the Cisco website at this URL: http://www.cisco.com/ International Cisco websites can be accessed from this URL: http://www.cisco.com/public/countries_languages.shtml You can access the most current licensing information at this URL: http://www.cisco.
Getting Started Warning Voice over IP (VoIP) service and the emergency calling service do not function if power fails or is disrupted. After power is restored, you might have to reset or reconfigure equipment to regain access to VoIP and the emergency calling service. In the USA, this emergency number is 911. You need to be aware of the emergency number in your country.
Warning Do not dispose of the battery pack in fire or water. The battery may explode if placed in a fire. Caution The battery pack is intended for use only with this device. Caution Do not disassemble, crush, puncture, or incinerate the battery pack. Caution To avoid risk of fire, burns, or damage to your battery pack, do not allow a metal object to touch the battery contacts. Caution Handle a damaged or leaking battery with extreme care.
Getting Started Caution Use only the Cisco power supply that is compatible with your phone. To order your power supply, contact your local dealer and refer to the following list of Cisco part numbers: Australia—CP-PWR-7921G-AU= Central Europe—CP-PWR-7921G-CE= China—CP-PWR-7921G-CN= Japan—CP-PWR-7921G-JP= North America—CP-PWR-7921G-NA= United Kingdom—CP-PWR-7921G-UK= Note The battery and power supply are not provided with your phone.
• Shorten the length of the external device cable. • Apply ferrites or other such devices on the cables for the external device. Cisco cannot guarantee the performance of the system because Cisco has no control over the quality of external devices, cables, and connectors. The system will perform adequately when suitable devices are attached using good quality cables and connectors. Caution In European Union countries, use only external headsets that are fully compliant with the EMC Directive [89/336/EC].
Connecting Your Phone Connecting Your Phone Your system administrator will configure your new Cisco Unified Wireless IP Phone to connect to the corporate wireless network and the IP telephony network. A rechargeable Lithium ion battery powers the Cisco Unified Wireless IP Phone 7921G. Before you can use your phone, you must install the battery in the phone and then charge the battery.
1 2 2 2 180349 3 1 Locking catch—Push up to release the battery. 2 Battery catches—Insert these into the slots near the bottom of the phone at battery installation. 3 Metal contacts—Match the contacts on the battery to the contacts on the phone. Charging the Phone Battery You can charge the battery in your wireless IP phone by connecting the AC power supply or the USB cable to your phone.
Connecting Your Phone Note You can also charge your battery by using a desktop charger or a multi-charger. For more information, see the Cisco Unified Wireless IP Phone 7921G Accessory Guide. Using the AC Power Supply to Charge the Battery You can charge your battery quickly by connecting the AC power supply to the phone. To accommodate different AC power receptacles, you must insert the appropriate AC plug adapter on the AC power supply. You can use the phone while the battery is being charged.
To charge the battery in the phone using the AC power supply, use this diagram: 1 AC plug adapter—Insert the AC plug adapter into the slot on the power supply. 2 AC power supply—Insert into an AC outlet. 3 Phone connector on AC power supply cable—Insert into the connector slot at bottom of phone.
Connecting Your Phone Using the USB Cable and USB Port on the PC to Charge the Battery You can charge the battery in the phone by connecting your phone with a USB cable to a USB port on your PC. Charging takes longer when you use the USB port on the PC to charge the battery. To use the USB cable and USB port to charge the battery, use this diagram and follow the steps: 3 2 1@ 4 GHI 7 PQRS * 2 3 DEF ABC 5 JKL 6 MNO 8 TUV 0 9 WXYZ # 7921 180350 1 If you want to... Then...
If you want to... Then... Stop Found New Hardware Wizard from opening when connecting to USB port 1. Click Next to use the wizard dialog box. 2. In the Update New Software dialog, click No, not this time, and click Next. 3. Click Install the Software automatically (Recommended) and click Next. 4. After a few moments, the Cannot Install This Hardware dialog displays. Click Don't prompt me again to install this software. 5. Click Finish to close the dialog box.
Connecting Your Phone Setting Username and Passwords When powering on your phone for the first time, in some networks, you might need to set your username and password to access the wireless network. Ask your system administrator for assistance. If you want to... Then... Set username and password 1. Choose (Settings) > Network Profiles. 2. Highlight the current profile name (with Note ) and press View. icon displays indicating that this screen is locked.
If you want to... Then... Enter special characters and Press * symbols Press 0 Cancel editing mode to display and enter these symbols * + - / = \ : ; to display and enter these symbols space , . ‘ “ | _ ~ ’ Press # to display and enter these symbols # ? ( ) [ ] { } Press 1@ to display and enter these symbols ! @ < > $ % ^ & Choose Options > Cancel to return to the menu option or main screen.
Connecting Your Phone deployed, there is not a single “best” solution that is optimal for all environments. Cisco recommends that customers test the headsets that work best in their environment before deploying a large number of units in their network. In some instances, the mechanics or electronics of various headsets can cause remote parties to hear an echo of their own voice when they speak to Cisco Unified IP Phone users.
Securing the Phone with a Lock Set and Cable Lock You can secure the Cisco Unified Wireless IP Phone 7921G to a desk top by ordering the lock set from Cisco. For more information, refer to the Cisco Unified Wireless IP Phone 7921G Accessory Guide. To install the lock set, use the diagram and follow these steps: If you want to... Then... Install the lock set on the phone 1. Put the security cable around a post or through a hole in the desktop.
Connecting Your Phone 1 2 3 181319 4 You can secure your Cisco Unified Wireless IP Phone 7921G Desktop Charger by using a laptop cable lock. The lock connects to the security slot on the side of the desktop charger, and the cable can be secured to a desktop. The diagram shows where to insert the lock. Note The lock set does not include the cable lock. Cisco Unified Wireless IP Phone 7921G Phone Guide for Cisco Unified Communications Manager 7.
An Overview of Your Phone Your Cisco Unified Wireless IP Phone 7921G is a full-feature telephone that provides voice communication over the same wireless LAN that your computer uses, allowing you to place and receive phone calls, put calls on hold, transfer calls, make conference calls, and so on. In addition to basic call-handling features, your phone can provide enhanced productivity features that extend your call-handling capabilities.
An Overview of Your Phone Understanding Buttons and Hardware You can use the graphic below to identify buttons and hardware on your phone. 1 2 17 3 16 15 4 14 13 11 4 GHI * 2 3 DEF ABC 5 JKL 6 MNO 8 TUV 9 WXY 0 Z 8 # 9 7921 Indicator light (LED) 180258 1@ 7 PQRS 1 6 7 12 10 5 Provides these indications: • Solid red—Phone is connected to AC power source, and battery is charging. • Solid green—Phone is connected to AC power source, and battery is fully charged.
2 Headset port Port for plugging in a headset or ear bud. 3 Speaker button Toggles the speaker mode on or off for the phone. 4 Right softkey button Activates the Options menu for access to the list of softkeys. Sometimes displays a softkey label. 5 Navigation button Accesses these menus and lists from the main screen. Directory Line View Settings Services Allows you to scroll up and down menus to highlight options and to move left and right through phone numbers and text entries.
An Overview of Your Phone 10 Asterisk (*) key * Toggles between Ring and Vibrate mode. Allows you to enter these special characters when you are entering text: *+-/=\:; 11 Keypad Allows you to dial numbers, enter letters, and choose menu items by number. 12 One (1) key Enters “1” when dialing a number. Allows you to access the voice messaging system.
Understanding Phone Screen Features Because the Cisco Unified Wireless IP Phone 7921G has only two softkeys, the Options softkey displays the list of available feature options for the phone. The features in the Options list change depending on whether the phone is idle or in an active call. This is what your main phone screen looks like with the Options list open.
An Overview of Your Phone 1 Phone Status line Displays these icons (if active) and your directory number: Battery charge icon—Shows the level of charge in battery Battery removal icon—Shows the battery is removed or is not recognized Signal icon—Shows the degree of signal strength Key Lock icon—Indicates the keypad is locked Speaker icon—Indicates speaker mode is active Mute icon—Indicates mute is active Headset icon—Indicates headset is plugged in to phone Ringer Off icon—Indicates the phone alert is s
3 Options Menu Displays softkey features for the current call state 4 Softkey labels area Displays softkey options and provides access to the Options list of softkey features Ph Book - Options Displays the active navigation arrows for the menu or screen 5 Status and information Provides phone status or instructions Your current options 6 Main phone screen Displays four menu icons and Help Understanding the Home Screen Display The home screen is the display on your phone screen when it is idle
An Overview of Your Phone Home Screen in Line View This is a home screen in Live View. To access the main phone screen, press . Understanding Feature Buttons and Menus From the main phone screen, you can use the Navigation button to access feature menus. If you want to... Then... Open a feature menu Press an arrow on the Navigation button to access these menus from the main phone screen: Directory Line View Settings Services Scroll through a menu or list Press the Navigation button up or down.
If you want to... Then... Select a menu option Do one of these actions: • Press the keypad number key for the item. • Scroll to highlight the item, and then press the the navigation button). Go back one level in a feature menu Press Back. Reposition the cursor to edit a phone number or name Press the Navigation button left or right. Note To close the menu and return to the main phone screen, press from any menu level. Select a highlighted call Press or option Access Help button (center of .
An Overview of Your Phone Using Phone Buttons The phone keypad and buttons provide these shortcuts to frequently used functions. If you want to... Then... For more information, see... Lock the phone keypad Press and hold # until “Keypad Locked” displays on the status line and the icon appears at the top of the main screen. Setting the Keypad to Automatically Lock, page 73 Note Unlock the phone keypad Press Unlock. As soon as the screen displays “Unlock icon disappears.
Understanding Line and Call Icons This is what your main phone screen looks like with two active calls, one on hold (23827) and another connected (3956933). 1 2 3 4 1 Phone Status line Icons and your directory number 2 Call Activity area Calling party information, connection duration, and call state icon 3 Status line Status of the selected line 4 Softkey labels Call feature and Options list Your phone displays these icons to help you determine the line and call state.
An Overview of Your Phone Icon Line or call state Description Shared line in use A shared line is in use remotely. See Using a Shared Line, page 55. Incoming call, or BLF-monitored line is ringing (BLF Pickup) A call is ringing on one of your lines or on a BLF-monitored line. BLF-monitored line is idle See Using BLF to Determine a Line State, page 57. BLF-monitored line is in-use See Using BLF to Determine a Line State, page 57. For BLF Pickup, see Using BLF to Determine a Line State, page 57.
Understanding Feature Availability The operation of your Cisco Unified Wireless IP Phone 7921G and the features available to you may vary, depending on the call processing agent used by your company and also on how your company’s phone support team has configured your phone system. Therefore, some of the features included in this guide might not be available to you or might work differently on your phone system.
Basic Call Handling Basic Call Handling You can perform basic call-handling tasks using a range of features and services. Feature availability can vary; see your system administrator for more information. Placing a Call—Basic Options Here are some easy ways to place a call on your wireless IP phone. Note Your system administrator can configure your phone to alert you (by beeping) when it is out of range of the wireless network. You can only use your phone if it is within range of the wireless network.
If you want to... Then... For more information, see... Dial a number from the Phone Book 1. Choose > Phone Book or Ph Book (if available). Using the Phone Book on Your Phone, page 80 2. Highlight a contact name, then do one of the following: – Scroll left or right until you see the icon work for the phone number: phone, home phone, mobile phone, or other phone. – Choose Options > Details, highlight a phone number. 3. Press Dial from a call log 1. Press or Options > Dial. . 2.
Basic Call Handling • If parties on a call hear a beep tone, the call might be monitored or recorded. Ask your system administrator for more information. • If you hear a beep tone from your phone, you might be out of range of the wireless network. Move on the phone if you wish to use your to a location where you can see a strong signal icon phone. Placing a Call—Additional Options You can place calls using special features and services that might be available on your phone.
If you want to... Then... For more information, see... Dial from a corporate directory on your phone 1. Choose > Directory Services > Corporate Directory (name can vary). Directory Dialing, page 76 2. Use your keypad to enter a name. 3. Press Options > Submit. 4. Press the number key for the listing or scroll to a listing. 5. Press Dial or Use CallBack to receive notification when a busy or ringing extension is available . 1.
Basic Call Handling For more information, see... If you want to... Then... Place a call using your Extension Mobility profile 1. Choose vary). > EM Service (name can Using Cisco Extension Mobility, page 61 2. Enter log in information. Make a call from a cellular phone using Mobile Voice Access 1. Dial your assigned Mobile Voice access number. 2. Enter your cellular phone number (if requested) and PIN. Managing Business Calls Using a Single Phone Number, page 62 3.
Answering a Call You can answer a call by using several options, if they are available on your phone. If you want to... Then... Answer a call Press Silence the ring for an incoming call Press For more information, see... Using Any Key to Answer the Phone, page 72 . or . The call continues silently, then forwards to the no answer target. Switch from a connected Press or . call to answer a ringing call Doing so answers the new call and automatically puts the first call on hold.
Basic Call Handling If you want to... Then... For more information, see... Automatically connect to an Ask your system administrator to set incoming call after a ring or up the Auto Answer feature. After two ringing once or twice, the call automatically connects to the handset . or headset without pressing Using AutoAnswer, page 67 Answer a call on your mobile phone or other remote destination Managing Business Calls Using a Single Phone Number, page 62 Set up Mobile Connect and answer your phone.
Using Hold and Resume You can hold and resume calls. When you put a call on hold, the Hold icon caller ID in the call view. appears next to the If the Hold Reversion feature is enabled for your phone, calls that you leave on hold will revert back to ringing on your phone after a certain length of time. These “reverting” calls remain on hold until you resume them.
Basic Call Handling Using Mute With Mute enabled, you can hear other parties on a call, but they cannot hear you. You can use Mute with the phone or a headset. If you want to... Then... Toggle Mute on During a call, press on left side of phone. The at the top of the phone screen. Toggle Mute off Press . The icon displays icon disappears. Switching Between Multiple Calls You can switch between multiple calls on one or more lines.
If you want to... Then... Switch an in-progress call on your wireless IP phone to a mobile phone 1. Press Options > Mobility and select Send call to mobile. Switch an in-progress call from a mobile phone to your wireless IP phone 1. Hang up the call on your mobile phone to disconnect the mobile phone, but not the call. 2. Answer the in-progress call on your mobile phone. The calling party number appear on the wireless IP phone display.
Basic Call Handling If you want to... Then... Transfer two current calls to each other (direct transfer) without staying on the line 1. Scroll to highlight any call on the same line. 2. Choose Options > Select. displays by the selected call. 3. Scroll to highlight the other call on the same line. 4. Choose Options > DirTrfr. The two calls connect to each other and drop you from the call. Note If you want to stay on the line with the callers, use Join instead.
If you want to... Then... Verify that Call Forward All is enabled on your primary line Look for both of these indicators: Set up or cancel call forwarding remotely, or for a non-primary line on your phone 1. Log in to your User Options web pages. (See Accessing Your User Options Web Pages, page 87.) • The icon next to the primary line. • The call forward target number in the status line. 2. Access your call forwarding options. (See Controlling Line Settings on the Web, page 94.
Basic Call Handling • If both DND and auto-answer are enabled, only intercom calls will be auto-answered. If you want to... Then... Turn on DND Do one of the following: • Choose Options > DND. • Press on ( , then select the DND radio button to turn it ). “Do Not Disturb is active” displays on the phone and the ring tone is turned off. Turn off DND Do one of the following: • Choose Options > DND. • Press it off ( Customize DND settings , then select the DND radio button to turn ).
Using Conference Features You can create a conference in various ways, depending on your needs and the features that are available on your phone: • Conference—Allows you to create a standard (ad hoc) conference by calling each participant. Use the Confrn softkey. Conference is available on most phones. • Join—Allows you to create a standard (ad hoc) conference by combining existing calls. Use the Join softkey.
Basic Call Handling Tips • Calls must be on the same line before you can add them to a conference. If calls are on different lines, transfer them to a single line before using Confrn or Join. • Depending on how your phone is configured, if you leave a conference after initiating it, the conference might end. To avoid this, transfer the conference before hanging up. Using Join Join allows you to combine two or more existing calls to create a conference in which you are a participant. If you want to...
Tips • If you frequently join more than two parties into a single conference, you might find it useful to first select the calls that you want to join, then press Options > Join to complete the action. • When Join completes, caller ID changes to “Conference.” • You may be able to combine multiple conference calls by using the Join or DirTrfr softkeys. Check with your system administrator to see if this feature is available to you.
Basic Call Handling If you want to... Then... Start a Meet-Me conference 1. Obtain a Meet-Me phone number from your system administrator. 2. Distribute the number to participants. 3. When you are ready to start the meeting, choose Options > MeetMe. 4. Dial the Meet-Me conference number. 5. Press . Participants can now join the conference by dialing in. Note Join a Meet-Me conference Participants hear a busy tone if they call the conference before the initiator has joined.
If you want to... Then... See who initiated the conference While viewing the conference list, locate the participant listed at the bottom of the list with an asterisk (*) next to the name. Remove any conference participant While viewing the conference list, highlight the participant’s name and choose Options > Remove. You can remove participants only if you initiated the conference.
Basic Call Handling Tip If you log into your phone every day using your Extension Mobility profile, make sure that your system administrator configures your Extension Mobility profile to include the intercom feature. If you want to... Then... Place an intercom call to a preconfigured intercom target 1. Press Place an intercom call to any intercom number 1. Press . 2. Select (intercom line) to dial the target intercom number. After you hear the intercom-alert tone, begin speaking. 2.
Advanced Call Handling Advanced call-handling tasks involve special features that your system administrator might configure for your phone depending on your call-handling needs and work environment. Speed Dialing Speed dialing allows you to press a hot key or select from a listing to place a call.
Advanced Call Handling To make a call, select a speed dial ( ) from the Line View. For more information, see Using Speed Dial and Fast Dial, page 51 and Setting Up Speed Dials on the Web, page 88. Abbreviated Dial An Abbreviated Dial allows you to dial a number using an Abbreviated Dialing code. You set up Abbreviated Dials from the User Options web page. To make a call, use the Abbreviated Dialing code and the AbbrDial softkey.
If you want to... Then... Use speed-dial numbers to call other numbers (not in Phone Book) 1. Set up speed-dial numbers from your User Options web pages. Use Abbreviated Dial 2. To place a call, press . 3. Scroll to a speed-dial number with its label and press Note . The Line View displays your directory numbers, followed by your speed-dial numbers identified with . Six items (lines plus speed dials) can display. 1. Set up Abbreviated Dialing codes from your User Options web pages. 2.
Advanced Call Handling If you want to... Then... Answer a call that is ringing on another extension in your group or in an associated group 1. Choose Options > OPickUp. Answer a call that is ringing on a particular extension (line number) 1. Choose Options > GPickUp. If your phone supports auto-pickup, you are now connected to the call. 2. If the call rings, press Answer to connect to the call. 2. Enter the line number with the call that you want to pick up.
If you want to... Then... Store an active call using Call Park 1. During a call, choose Options > Park. 2. Note the call park number that displays on your phone screen. 3. Press . Retrieve a parked call Enter the call park number from any Cisco Unified IP Phone in your network to connect to the call. Direct and store an active call at a directed call park number 1. During a call, press Transfer. 2. Choose a speed-dial number with a park-unoccupied icon speed dial the directed call park number.
Advanced Call Handling Using a Shared Line Your system administrator might ask you to use a shared line if you: • Have multiple phones and want one phone number • Share call-handling tasks with coworkers • Handle calls on behalf of a manager Understanding Shared Lines Remote-in-Use The “In Use Remote” message and icon display on your phone when another phone that shares your line has a connected call and Privacy is disabled. You can place and receive calls as usual on the icon displays.
Understanding Barge Features cBarge and Barge Depending on how your phone is configured, you can add yourself to a non-private call on a shared line using either Barge or cBarge. • cBarge converts the call into a standard conference, allowing you to add new participants. (See Making Conference Calls, page 43 for more information about standard conferences.) • Barge allows you to add yourself to the call but does not convert the call into a conference or allow you to add new participants.
Advanced Call Handling Preventing Others from Viewing or Joining a Shared-Line Call If you share a phone line, you can use the Privacy feature to prevent others who share the line from viewing or barging (adding themselves to) your calls. If you want to... Then... Prevent others from viewing or barging calls on a shared line 1. Choose Options > Private. Allow others to view or barge calls on a shared line 1. Choose Options > Private. 2.
If you want to... Then... See the state of a line listed in a call log or directory Look for one of these indicators next to the line number: Line is in-use. Line is idle. Line is in Do Not Disturb state. Line is ringing. BLF indicator unavailable for this line. See the state of a line listed in a speed-dial line Look for one of these indicators next to the line number: Line is in-use. Line is idle. Line is in Do Not Disturb state. Line is ringing (BLF Pickup only).
Advanced Call Handling Your phone can support these types of calls: • Authenticated call—The identities of all phones participating in the call have been verified. • Encrypted call—The phone is receiving and transmitting encrypted audio (your conversation) within the Cisco IP network. Encrypted calls are also authenticated. • Protected call—The phone is receiving and transmitting encrypted audio (your conversation) with another phone.
Tracing Suspicious Calls If you are receiving suspicious or malicious calls, your system administrator can add the Malicious Call Identification (MCID) feature to your phone. This feature enables you to identify an active call as suspicious, which initiates a series of automated tracking and notification messages. If you want to... Then... Notify your system administrator about a suspicious or harassing call Choose Options > MCID. Your phone plays a tone and displays the message, “MCID successful.
Advanced Call Handling If you... Then... Want to accept a higher-priority call Answer the call as usual. If necessary, end an active call first. Hear a continuous tone interrupting your call You or the other party are receiving a call that must preempt the current call. Disconnect immediately to allow the higher priority call to ring through. Tips • When you make or receive an MLPP-enabled call, you will hear special ring tones and call-waiting tones that differ from the standard tones.
Tips • EM automatically logs you out after a certain amount of time. You system administrator establishes this time limit. • Changes that you make to your EM profile (from the User Options web pages) take effect the next time that you log in to EM on a phone. • Settings that are controlled on the phone only are not maintained in your EM profile.
Advanced Call Handling If you want to... Then... Make a call from your mobile phone See Placing a Call—Additional Options, page 33. Turn off Mobile Connect from your mobile phone 1. Dial your assigned Mobile Voice access number. 2. Enter your mobile phone number (if requested) and PIN. 3. Press 3 to disable Mobile Connect. 4. Choose whether to turn Mobile Connect off for all configured phones or just one: – All phones—Enter 2.
The Application Button can also be configured to start an application immediately after you press it, or only after you hold it for several seconds. For more information, see your system administrator. Using the Push to Talk Service The Push to Talk service provides immediate communication (similar to a two-way radio) with members of your organization. Your system administrator must set up the Push to Talk service by using an XML application, and then you must subscribe to this service. If you want to...
Using a Handset, Headset, and Speakerphone Using a Handset, Headset, and Speakerphone You can use your phone as a mobile handset, a speakerphone, with a headset, or with the speakerphone in the desktop charger. If you want to... Then... Use the handset Press Use a wired headset Plug the headset connector into the headset port. The icon displays on the phone status line. Place and answer calls as usual. ; to hang up, press . If you use AutoAnswer, see Using AutoAnswer, page 67 for exceptions.
If you want to... Then... Switch to the desktop charger speakerphone 1. Place the wireless IP phone in the desktop charger cradle. “AC connected!” displays on the screen. 2. Press down on the top of the phone. “Docking connected!” displays on the screen and the displays on the phone status line. icon The desktop charger speaker and microphone are connected. 3. Place and receive calls. Use all the buttons on your phone, including and .
Using a Handset, Headset, and Speakerphone Obtaining Headsets Your phone supports wired headset jack types with a 2.5 mm, 3-band/ 4 connector. For information about purchasing headsets, see Headset Information, page 14. Using AutoAnswer You might use AutoAnswer if you receive a high volume of incoming calls or handle calls on behalf of others. Your system administrator configures AutoAnswer to work with either your speaker mode or headset. If you... Then...
Changing Phone Settings You can personalize your wireless IP phone by adjusting sound settings, volume levels, display options, and keypad settings. You can also view your Network Profiles from the Settings menu. Customizing Rings You can customize your phone by choosing a ring type for each line. If you want to... Then... View the ring tone settings on your lines 1. Choose > Phone Settings > Sound Settings. 2. Select Ring Tone > Current Settings. 3. Press View to see the current line settings.
Changing Phone Settings If you want to... Then... Change the way the phone rings 1. Choose > Sound Settings > Alert Pattern. 2. Select one of the following: • Ring Only • Vibrate Only • Silent • Vibrate, Then Ring • Vibrate And Ring The appears next to your selection. 3. Press Save to make the change, or Cancel. Note This change applies only to the handset and not the desktop charger. Tips • You cannot modify the Ring Settings for the wireless IP phone from the User Options web pages.
If you want to... Then... Adjust the phone volume level 1. Choose > Phone Settings > Sound Settings > Volumes. 2. Select Handset. 3. Press to increase the volume or to decrease the volume. 4. Press Save to make the change or Cancel. Adjust the headset volume level 1. Choose > Phone Settings > Sound Settings. 2. Select Headset. 3. Press to increase the volume or to decrease the volume. 4. Press Save to make the change or Cancel. Adjust the desktop charger speaker volume level 1.
Changing Phone Settings Customizing the Phone Screen You can customize the left softkey (when the phone is idle), your phone screen display brightness, and the language on your phone screen. If you want to... Then... Set up the left softkey to open the Phone Book 1. Choose > Phone Settings > Customize Home Page. 2. Press Change. 3. Select Phone Book. 4. Press Save. The left softkey will be displayed as “Ph Book” when the phone is idle. Set up the left softkey to access your messages 1.
If you want to... Then... Change the LED indication for service coverage 1. Choose > Phone Settings > Display Settings. 2. Highlight LED Coverage Indicator, then press or Change. 3. Select one of the following: • Enable (default setting) • Disable 4. Press Save to make the change or Cancel. Change the language on your phone screen 1. Log in to your User Options web pages. (See Accessing Your User Options Web Pages, page 85.) 2. Change the language setting.
Changing Phone Settings Setting the Keypad to Automatically Lock To keep from pressing keys and redialing calls accidentally, use the keypad auto lock feature. You can set the length of time before your phone keypad automatically locks after completing a call. If you want to... Then... Automatically lock the keypad after using the phone 1. Choose > Phone Settings > Keypad Settings. 2. Select Keypad Auto Lock. 3. Select one of these time intervals: • 15 seconds • 30 seconds • 60 seconds 4.
Changing the Keypad Tones You can enable or disable the tones when you press a key on your keypad. Change the keypad tone level 1. Choose > Phone Settings > Keypad Settings. 2. Select Keypad Tone. 3. Select one of the following: • Disable—Plays no keypad tone. • Normal—Plays tone when keys are pressed. • Loud—Plays louder tone when keys are pressed. The icon appears next to your selection. 4. Press Save to make the change or Cancel.
Using Call Logs and Directories Using Call Logs and Directories This section describes how you can use call logs and directories in the Directory menu. Using Call Logs Your phone maintains records of your missed, placed, and received calls. If you want to... Then... View your call logs 1. Press . 2. Choose Missed Calls, or Received Calls, or Placed Calls. Each call log stores up to 100 records. Dial from a call log 1. Press . 2. Choose Missed Calls, or Received Calls, or Placed Calls. 3.
If you want to... Then... Erase all call records in all call logs 1. Press to display call logs. 2. Press Clear. Doing so erases all call logs, or choose Options > Exit. See if the line in the Look for Busy Lamp Field indicators. See Using BLF to Determine a Line State, page 57. call log is busy before placing a call to that line Tip • Your phone might be set up for international call logging, which is indicated by a “+” symbol on the call logs, redial, or call directory entries.
Using Call Logs and Directories Using Corporate Directory on Your Phone You can use a corporate directory to place calls to coworkers. If you want to... Then... Dial from a corporate directory (while not on another call) 1. Choose vary). > Directory Services > Corporate Directory (name can 2. Use your keypad to enter a search criteria such as a name. 3. Choose or Options > Submit. 4. Scroll to a listing.
Cisco Unified Communications Manager Release 5.1 and Later This section describes how to set up and use Personal Directory on your phone when you are connected to a Cisco Unified Communications Manager 5.0 or later. Alternately, see Using Personal Directory on the Web, page 89. If you want to... Then... Access Personal Directory (for PAB and Fast Dial codes) 1. Choose > Directory Services > Personal Address Book (PAB) Service (exact name may vary). 2.
Using Call Logs and Directories If you want to... Then... Add a new PAB entry 1. Access Personal Address Book. 2. Access the Search page and choose Options > Submit. (You do not need to input search information first.) 3. Choose Options > New. 4. Use the keypad to enter a name or nickname. 5. Press Phones and use the keypad to enter phone numbers. Be sure to include any necessary access codes such as a 9 or 1. 6. Press Submit to add the entry to the database. Assign a Fast Dial code to a PAB entry 1.
Tips • Your system administrator can provide the user ID and PIN that you need to log in to Personal Directory. • Personal Directory automatically logs you out after a certain amount of time. This time limit can vary. Ask your system administrator for more information. • Use the numbers on your keypad to enter characters on your phone screen. Use the Navigation button on your phone to move between input fields.
Using Call Logs and Directories If you want to... Then... Add a contact to your phone book 1. Choose > Phone Book or press Ph Book (if available). 2. Do one of the following: – Press New (if Phone Book is empty). – Choose Options > New (if Phone Book is not empty). 3. At the New Contact screen, fill in contact information. 4. When finished, press Options, then choose Save to save the information, or press Cancel. Assign a primary number for a contact 1.
If you want to... Then... Search for a contact in your phone book 1. Choose > Phone Book or press Ph Book (if available). 2. Choose Options > Mode and enter the text to search. You can search for first name, last name, nickname, and company name. Note You can enter search text in one of two ways: by pressing a key one or more times until you see the letter or number you need, or by having possible matches automatically display after pressing one or more keys (predictive text).
Using Call Logs and Directories If you want to... Then... Copy a phone number from a call log or directory to an existing phone book contact 1. Choose > Missed Calls, or Received Calls, or Placed Calls. 2. Scroll to a phone number, choose Options > Store > Use Existing Contact. 3. On the Phone Book contacts list, highlight a name. 4. Select the phone type to store the number. Assign a speed dial to a contact number in your phone book (from the Speed Dial screen) 1. Choose > Speed Dials. 2.
Accessing Voice Messages When the phone displays “You Have VoiceMail” or a red blinking light, you can access your messages from your phone. Note Your company determines the voice message service that your phone system uses. For the most accurate and detailed information, refer to the documentation that came with your voice message service. If you want to... Then... Set up and personalize your voice message service 1. Press Message or press and hold 1@ . 2. Follow the voice instructions.
Accessing Your User Options Web Pages Accessing Your User Options Web Pages Your wireless IP phone is a network device that can share information with other network devices in your company, including your personal computer. You can use your computer to log in to your Cisco Unified Communications Manager User Options web pages, where you can control features, settings, and services for your wireless IP phone. This section includes information for: • Cisco Unified CallManager Release 4.
Tips for Navigating the User Options Web Pages • Select your device from the menu page to see all of your options. • Click Update to apply and save your changes. • Click Return to the Menu to get back to the context-sensitive menu. • Click Log Off to exit the User pages. Subscribing to Phone Services Before you can access subscription phone services on your phone, you need to subscribe to them by using your computer to access the User Options web pages. See Accessing Your User Options Web Pages, page 87.
Accessing Your User Options Web Pages Cisco Unified Communications Manager Release 5.1 and Later User Options Web Pages This section describes how to access your User Options web pages and how to subscribe to phone services when you are connected to a Cisco Unified Communications Manager 5.1 or later system.
If you want to... Then do this... Configure phone settings Choose toolbar buttons to access these phone-specific options: • Line settings • Speed dials • Phone services • Service URL Return to the Device Configuration page Choose User Options > Device from any page to verify that you are configuring the correct device or to change devices. Tip Use the Device Configuration page to access all of the configuration options available for your phone (other pages might not provide access to all options).
Accessing Your User Options Web Pages Note For help using speed-dial features, see Speed Dialing, page 50. If you want to... Then do this after you log in... Set up Line View speed-dial numbers 1. Select the name for the Cisco Unified Wireless IP Phone 7921G device. 2. Click Speed Dials. 3. Enter a phone number as you would dial it. 4. Enter a label for the speed-dial number that is 11 characters or less. 5.
Note You can also access PAB and Fast Dials from your phone. See Using Personal Directory on Your Phone, page 77. Using Your Personal Address Book on the Web This section describes how to use your PAB from your User Options web pages. If you want to... Then, do this after you log in... Add a new PAB entry 1. Choose User Options > Personal Address Book. 2. Click Add New. 3. Enter information for the entry. 4. Click Save. Search for a PAB entry 1. Choose User Options > Personal Address Book. 2.
Accessing Your User Options Web Pages If you want to... Then, do this after you log in... Assign a Fast Dial code to a phone number (without using a PAB entry) 1. Choose User Options > Fast Dials. 2. Click Add New. 3. Change the Fast Dial code, if desired. 4. Enter a phone number. 5. Click Save. Search for a Fast Dial entry 1. Choose User Options > Fast Dials. Edit a Fast Dial phone number 1. Choose User Options > Fast Dials. 2. Specify search information and click Find. 2.
Setting Up Phone Services on the Web Phone services can include special phone features, network data, and web-based information (such as stock quotes and movie listings). You must first subscribe to a phone service before accessing it on your phone. If you want to... Then do this after you log in... Subscribe to a service 1. Select the name for the Cisco Unified Wireless IP Phone 7921G device. 2. Click Phone Services. 3. Click Add New. 4. Choose a service from the drop-down list and click Next. 5.
Accessing Your User Options Web Pages If you want to... Then do this after you log in... Add a service to an available screen slot 1. Select a device. 2. Click Service URL. Note If you do not see this option, ask your system administrator to configure a service URL button for your phone. 3. Choose a service from the Button Service drop-down list. 4. If you want to rename the service, edit the label fields.
If you want to... Then do this after you log in... Change the language (locale) for your User Options web pages 1. Choose User Options > User Settings. 2. In the User Locale area, choose an item from the Locale drop-down list. 3. Click Save. Change the language (locale) for your phone screen 1. Go to the Device Configuration page by choosing User Options > Device. 2. Choose an item from the User Locale drop-down list. 3. Click Save.
Accessing Your User Options Web Pages If you want to... Then do this after you log in... Change the voice message indicator setting per line 1. Select your device. 2. Click Line Settings. 3. If you have more than one directory number (line) assigned to your phone, verify that the appropriate line is selected or choose a new one. 4. In the Message Waiting Lamp area, choose from various settings.
If you want to... Then... Use WebDialer with your User Options directory 1. Log in to your User Options web pages. See Accessing Your User Options Web Pages, page 87. 2. Choose User Options > Directory and search for a coworker. 3. Click the number that you want to dial. 4. If this is your first time using WebDialer, set up preferences and click Submit. (See the last row in this table for details.) 5. If the Make Call page appears, click Dial.
Accessing Your User Options Web Pages If you want to... Then... Set up, view, or change WebDialer preferences Access the Preferences page. The Preferences page appears the first time that you use WebDialer (after you click the number that you want to dial). To return to Preferences in the future, click the preferences icon from the Make Call or Hang Up page. The Preferences page contains the following options: • Preferred language—Determines the language used for WebDialer settings and prompts.
If you want to... Then do this after you log in... Create an access list 1. Choose User Options > Mobility Settings > Access Lists. 2. Click Add New. 3. Enter a name to identify the access list and a description (optional). 4. Choose whether the access list will allow or block specific calls. 5. Click Save. 6. Click Add Member to add phone numbers or filters to the list. 7. Select an option from the Filter Mask drop-down list box.
Accessing Your User Options Web Pages If you want to... Then do this after you log in... Add a new remote destination 1. Choose User Options > Mobility Settings > Remote Destinations. 2. Click Add New. 3. Enter the following information: – Name—Enter a name for the mobile (or other) phone. – Destination Number—Enter your mobile phone number. 4. Select your remote destination profile from the drop-down list box.
Understanding Additional Configuration Options Your system administrator can configure your phone to use specific softkey templates along with special services and features, if appropriate. The table below provides an overview of some configuration options that you might want to discuss with your system administrator based on your calling needs or work environment. Note You can locate User Guides and other documents listed in this table from the following URL: http://www.cisco.
Understanding Additional Configuration Options If you... Then... For more information... Share phones or office space with coworkers Consider using: Ask your system administrator about these features and see the: • Call Park to store and retrieve calls without using the transfer feature. • Call Pickup to answer calls ringing on another phone. • Tracing Suspicious Calls, page 60. • A shared line to view or join coworkers calls. • Using a Shared Line, page 55.
Troubleshooting Your Phone This section provides troubleshooting information for your wireless IP phone. General Troubleshooting This section provides information to help you troubleshoot general problems with your phone. For more information, see your system administrator. Symptom Explanation You cannot complete a call One or more of the following factors might apply: • Your phone is out of the wireless network access point service area.
Troubleshooting Your Phone Symptom Explanation The softkey that you want to use does not appear One or more of the following factors might apply: • You must press Options and scroll to reveal additional softkeys. • You must change the line state (for example, place a call or have a connected call). • Your phone is not configured to support the feature associated with that softkey.
Using the Quality Reporting Tool Your system administrator may temporarily configure your phone with the Quality Reporting Tool (QRT) to troubleshoot performance problems. You can choose Options > QRT to submit information to your system administrator.
Cisco One-Year Limited Hardware Warranty Terms Cisco One-Year Limited Hardware Warranty Terms There are special terms applicable to your hardware warranty and various services that you can use during the warranty period. Your formal Warranty Statement, including the warranties and license agreements applicable to Cisco software, is available on Cisco.com at the following URL: http://www.cisco.com/en/US/docs/general/warranty/English/1Y1DEN__.
106 OL-16131-01
Index A business calls, managing using single number 62 abbreviated dialing 88 access lists button answer/send 21 creating 98 application 21 accessibility 6 left softkey 21 accessories for phone 14 mute 21 ad hoc conference, See conference calls navigation 20, 25 answer/send button 21 power/end 20 answering calls 36 right softkey 20 application button 21 select 20 authenticated calls 58 shortcuts 27 auto keylock 73 speaker 20, 65 AutoAnswer, using 67 volume 21 B C barge and privacy
call pickup 52 accessories 14 call waiting 36 buttons and keys 19 CallBack 34 cleaning 30 call-handling, advanced 50 connecting 7 call-handling, basic 31 description of 18 calls feature configuration for 30, 100 answering 36 healthcare environments 5 blocking 42 online help for 26 compared to lines 27 power supply 5 conference features for 43 powering on 12 ending 37 registering 14 forwarding 41, 94 regulatory domains 5 handling multiple 39 safety and performance 2 holding and resu
removing phone from 66 H using 66 dialing, options for 31, 33 handset using 65 directory corporate, using 77 hanging up, options for 37 option descriptions 76 headset personal, using 77 choosing ringer volume 68, 69 using from Communications Manager web page 96 mode, using 65 ordering 15 directory numbers, viewing 22 port 20 DND 42 quality 14 Do Not Disturb 42 using 14, 65 documentation, accessing 2 using external devices 5 wired 65, 67 headset specifications 67 E healthcare environment
line state 28 line view icon 27 signal strength 12 text label for 94 icons, for call states 28 viewing 27 indicator light voice message indicator setting 94 blink rates 19 blinks green 12 colors 19 locking phone 16 log out of hunt group 54 in service 12 installing, Cisco Unified Wireless IP Phone 7 intercom line 49 M Malicious Call Identification (MCID) 60 Meet-Me conferences 44, 46 K menu keylock 27 accessing items 26 keypad lock accessing main menus 25 auto keylock feature 73 menus, usi
Multilevel Precedence and Preemption (MLPP) 60 phone buttons multiple calls, handling 39 phone lines description 19 mute button 21 description of 27 mute, using 39 viewing 22 phone screen N active call 28 changing display brightness 71 navigation button 20, 25 changing display timeout 71 network configuration data, locating 103 changing language 71 network profile changing LED indication 71 locked 74 cleaning 30 viewing 74 feature descriptions 22 features of 22 O icons 23 menus 25 onl
button 64 levels of 59 using 64 making and receiving secure calls 58 verifying non-secure calls 59 Q Quality Reporting Tool (QRT), using 104 select button description 20 using 26 selecting calls 28 services, subscribing to 92 R shared lines received calls, records of 75 and In Use Remote message 55 redial 31 description of 55 regulatory domains 5 with barge 56 remote destination 62 with privacy 57 creating 99 signal strength 12 ring schedule 99 softkey buttons turn off access 63 labels
status line, viewing 24 line view speed dial, configuring 88 subscriptions, for phone services 92 password, changing 93 suspicious calls, tracing 60 Personal Directory, using from web page 89 switching calls 39 PIN, changing 93 switching in-progress calls 62 using a speed-dial hot key 33 T V TABSynch 91 vibration mode TAPS, using 14 icon 27 text setting 27 editing 13 voice message indicator entering 13 changing setting 94 special characters 14, 20, 21 voice messages Tool for Auto-Reg
wired headset icon 65 port 65 using 65 wireless network data, locating 103 8 OL-16131-01
Americas Headquarters Cisco Systems, Inc. San Jose, CA Asia Pacific Headquarters Cisco Systems (USA) Pte. Ltd. Singapore Europe Headquarters Cisco Systems International BV Amsterdam, The Netherlands Cisco has more than 200 offices worldwide. Addresses, phone numbers, and fax numbers are listed on the Cisco Website at www.cisco.com/go/offices.