Installation and Upgrade Guide for Cisco Unified Intelligence Center Release 8.5(2) July 2011 Americas Headquarters Cisco Systems, Inc. 170 West Tasman Drive San Jose, CA 95134-1706 USA http://www.cisco.
THE SPECIFICATIONS AND INFORMATION REGARDING THE PRODUCTS IN THIS MANUAL ARE SUBJECT TO CHANGE WITHOUT NOTICE. ALL STATEMENTS, INFORMATION, AND RECOMMENDATIONS IN THIS MANUAL ARE BELIEVED TO BE ACCURATE BUT ARE PRESENTED WITHOUT WARRANTY OF ANY KIND, EXPRESS OR IMPLIED. USERS MUST TAKE FULL RESPONSIBILITY FOR THEIR APPLICATION OF ANY PRODUCTS.
Table of Contents Preface ...........................................................................................................................................................1 Purpose .....................................................................................................................................................1 Audience ....................................................................................................................................................
About Migrations.......................................................................................................................................41 Backing up data from the Cisco Unified IC Release 8.0(3)......................................................................41 Installing Cisco Unified IC Release 8.0(3) over a Virtual Machine...........................................................42 Restoring the backed up data on the Cisco Unified IC Virtual Machine..................................
List of Figures Figure 1: Virtual Machine Install Screen.........................................................................................................................23 Figure 2: License Screen.................................................................................................................................................26 Figure 3: Cryptographic Screen..................................................................................................................................
Installation and Upgrade Guide for Cisco Unified Intelligence Center Release 8.
Preface Purpose This guide explains how to install Cisco Unified Intelligence Center (CUIC) Release 8.5(2). Starting with Release 8.5(2), you can migrate from a previous release of Cisco Unified Intelligence Suite Release 7.x to Cisco Unified Intelligence Center Release 8.x on a UCS B-Series or C-Series Server (Virtual Machines). Audience This guide is prepared for partners, specialists, and system administrators who are responsible for the installation of Unified IC.
Preface Conventions This Chapter Covers Chapter 2, Beginning the The media check and the hardware check Installation - All Nodes (page The basic configuration screens for all nodes 11) Chapter 3, Configuring the Controller (page 21) Configuration steps for the Controller node Chapter 4 - Installation (page Processes that occur during the installation.
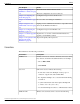
Preface Obtaining Documentation and Submitting a Service Request Convention Description • Text as it appears in code or that the window displays. Example:
Cisco Systems,Inc. < > Angle brackets are used to indicate the following: • For arguments where the context does not allow italic, such as ASCII output. • A character string that the user enters but that does not appear on the window such as a password.Preface Documentation Feedback Installation and Upgrade Guide for Cisco Unified Intelligence Center Release 8.
Chapter 1 Before You Install This chapter contains the following topics: • • • • • About Cisco Unified Intelligence Center, page 5 Prerequisites and Important Considerations, page 6 Completing the Configuration Worksheet, page 7 Installation Sequence and Time, page 8 Navigating the Installation Wizard, page 9 About Cisco Unified Intelligence Center Unified IC can be installed as a standalone server or as a cluster of a maximum of eight server nodes.
Chapter 1: Before You Install Prerequisites and Important Considerations Refer to the Cisco Unified Intelligence Center Hardware and System Software Specification (Bill of Materials) (http://www.cisco.com/en/US/products/ps9755/ products_user_guide_list.html) for server requirements and version compatibility. Refer to the Cisco Unified Intelligence Center Solution Reference Network Design (SRND) Guide, available at in the Design Guides category at http://www.cisco.
Chapter 1: Before You Install Completing the Configuration Worksheet – You must enter the same security password on all nodes in the cluster. Keep a record of this password; you will need to use it if you replace or add a server in the future or if you want to replace the old secutiry password with a new one. – Use the default Maximum Transmission Unit (MTU) setting, which is 1500, for all nodes in the cluster.
Chapter 1: Before You Install Installation Sequence and Time Configuration Data Your Entry Location:__________________________ State:__________________________ Country:__________________________ NTP Server Host Name or IP Address NTP Server 1: __________________________ NTP Server 2: __________________________ NTP Server 3: __________________________ NTP Server 4: __________________________ NTP Server 5: __________________________ Database Access Security Password Servers in the cluster use the securit
Chapter 1: Before You Install Navigating the Installation Wizard Navigating the Installation Wizard Much of the installation requires no action on the part of the person who runs it. When user input is required, use the following keyboard navigation and selection actions. The installation wizard screens do not recognize a mouse or a touchpad.
Chapter 1: Before You Install Navigating the Installation Wizard Installation and Upgrade Guide for Cisco Unified Intelligence Center Release 8.
Chapter 2 Preparing to Install Unified IC on a Virtual Machine Starting with Release 8.0(3), you can either perform a fresh installation of Cisco Unified Intelligence Center Release 8.0(3) or migrate from a previous release of Cisco Unified Intelligence Center Release 8.0(1) or 8.0(2) to Release 8.0(3) on a UCS B-Series or C-Series Server (Virtual Machines). The initial steps for both scenarios are common. Wherever there is a change, it is noted as such in this document.
Chapter 2: Preparing to Install Unified IC on a Virtual Machine Step 3 Step 4 Use the instructions mentioned in the appropriate server documentation to install VMWare ESXi on your UCS server: a. To install ESXi on a UCS B-series server, refer to Cisco UCS B-Series Servers VMware Installation Guide (http://www.cisco.com/en/US/docs/unified_computing/ucs/sw/b/os/ vmware/install/bseries-vmware-install.html) b.
Chapter 2: Preparing to Install Unified IC on a Virtual Machine Specify the location of the Unified IC installable Step 1 Select the newly added Virtual Machine. Step 2 From the Inventory menu, select Virtual Machine > Edit Settings. Step 3 In the Hardware tab, select CD/DVD Drive 1. Step 4 Select one of the following option to specify the location where you have the bootable Unified IC installer file: a.
Chapter 2: Preparing to Install Unified IC on a Virtual Machine Install Unified IC on the virtual Machine Step 1 Select the virtual machine and click Power > Power On from the shortcut menu. Alternatively, from the Inventory menu, select Power > Power On. Step 2 The virtual machine powers on and Unified IC installation starts up automatically. Follow the steps mentioned in Beginning the Installation (page 15) to complete the Unified IC installation.
Chapter 3 Beginning the Installation - All Nodes The installation for Unified IC is delivered on DVD media. Run the DVD installation on each node and use the same DVD for all nodes. Note: All nodes in a must be running the same version of Unified IC. This chapter contains the following topics: • Media and Hardware Check, page 15 • Basic Install Configuration Information, page 17 Media and Hardware Check Every installation begins with an optional pre-install media check and includes a hardware check.
Chapter 3: Beginning the Installation - All Nodes If Then can safely skip the media check when you install the Members. If the media check fails, the DVD is ejected and the installation terminates. Contact your support provider for assistance. You want to skip the media check. Select No. A message displays at the bottom of the monitor: Running the Cisco Unified Communications 8.0 system installer. Please Wait... Then the Product Deployment Selection screen opens. Proceed to Step 3.
Chapter 3: Beginning the Installation - All Nodes Basic Install Configuration Information The Basic Install launches a series of screens that present questions and options pertinent to the platform and the setup configuration. There is online help for each wizard screen. Note: You can change many of the basic installation configuration settings after the installation using the Set commands in the Command Line Interface (CLI).
Chapter 3: Beginning the Installation - All Nodes Your selection of No opens the DHCP Configuration screen. Step 5 In the DHCP Configuration screen, select No to open the Static Network Configuration screen. Step 6 At the Static Network Configuration screen, enter static network configuration values as follows, referring to the Configuration Worksheet (page 7) if necessary: Step 7 Step 8 Step 9 Step 10 a. Enter the Hostname. b. Enter the IP Address. c. Enter the IP Mask. d.
Chapter 3: Beginning the Installation - All Nodes If Then Continue to Step 1 in Chapter 3 (page 21). You are installing and configuring Select No to open the First Node Configuration Warning a secondary node (a Unified IC screen. Member). Continue to Completing the Configuration for the Member Node (page 33). Installation and Upgrade Guide for Cisco Unified Intelligence Center Release 8.
Chapter 3: Beginning the Installation - All Nodes Installation and Upgrade Guide for Cisco Unified Intelligence Center Release 8.
Chapter 4 Configuring the Controller Completing the Configuration for the First Node When you complete the basic install configuration and select Yes to indicate that you are installing the first node, perform the following steps to complete the configuration for the Controller. The first screen you see is the Network Time Protocol Client Configuration screen.
Chapter 4: Configuring the Controller Step 4 Step 5 In the Security Configuration screen: a. Enter the Database Access Security password. This is the password that servers in the cluster use to communicate with each another. You must enter the same security password for all servers. b. Select OK to open the SMTP Host Configuration screen.
Chapter 4: Configuring the Controller Figure 1: Virtual Machine Install Screen Select Yes and click OK to continue installation. The system displays the following message: The system will reboot momentarily to continue with the installation. After the reboot, the system will automatically proceed with the installation. Installation and Upgrade Guide for Cisco Unified Intelligence Center Release 8.
Chapter 4: Configuring the Controller Installation and Upgrade Guide for Cisco Unified Intelligence Center Release 8.
Chapter 5 Installation Installation Duration The installation can take from 60 to 75 minutes to complete and can run unattended for most of that time.
Chapter 5: Installation Installation Processes • Application Pre Install Progress Bars • Configure and Setup Network Progress Bars Note: If a Network Connectivity Failure screen opens during the Configure and Setup Network process, click Review. Then click OK at the Errors screen. Follow the prompts to reenter your hostname, IP Address, and so forth. The installation will continue when the connection information is complete. • Member Nodes only - Connection Validation message.
Chapter 5: Installation Installation Failure Figure 3: Cryptographic Screen • Application Post-Install Progress Bars The installation ends at a login prompt, at which you can enter CLI commands. To access the web interface, you need to open a browser and enter the URL http://Controller hostname or IP/oamp and User ID/Password of the System Application (page 54) user.
Chapter 5: Installation After the Installation If Then hostname or IP/oamp). This opens the Administration Console. Sign in using the System Application (page 54) credentials. 2. Upload the license. (page 29) If you have installed a Controller, and you intend to install a Member 1. Open a browser and enter the URL for your Controller ( http://Controller hostname or IP/oamp). This opens the Administration Console. 2. Sign in using the System Application (page 54) credentials. 3. Upload the license.
Chapter 6 Sign in to the Administration Console After you install the Controller, you must sign in to the Administration Console to perform tasks as explained in this chapter. To sign in, open a browser and enter the URL for your Controller (http:///oamp), where HostAddress is the host name or IP Address of the Controller. This opens the Administration Console. Sign in using the System Application (page 54) credentials.
Chapter 6: Sign in to the Administration Console Verify the Controller is Synchronized with the NTP Server Define the Member Node in the Administration Console If you intend to add a Member node, you must define the Member in the Administration console before you run the installation for the Member. Step 1 To access the Administration console, direct a browser to the URL http:/// oamp where HOST ADDRESS is the IP Address or Hostname of your server.
Chapter 6: Sign in to the Administration Console Verify the Controller is Synchronized with the NTP Server 1. Access the Command Line Interface on the Controller node directly, by using the monitor and keyboard at the server console. At the login prompt: – Enter the ID for the System Administrator (page 53) user (created during Basic Install configuration). – When prompted, enter the password for the System Administration user. 2. Enter this command: utils ntp status.
Chapter 6: Sign in to the Administration Console Verify the Controller is Synchronized with the NTP Server Installation and Upgrade Guide for Cisco Unified Intelligence Center Release 8.
Chapter 7 Configuring the Member Begin the Installation and Configuration for the Member Node Note: All configured nodes in a cluster must be up and running before you install a new Member node.
Chapter 7: Configuring the Member Begin the Installation and Configuration for the Member Node Step 4 In the Network Connectivity Test Configuration screen, you have the option to verify the connection of this node to the first node (the Controller). Note: This screen refers to the first node as the "publisher," in reference to its role in database replication. The first node publishes or replicates, the databases to the Member nodes, which are referred to as subscribers of the database replication.
Chapter 8 Upgrades and Migrations This section explains how to upgrade Unified IC software with engineering specials, minor releases, and maintenance releases as they become available and to migrate an older version of Unified IC Release 8.0(1) or 8.0(2) to Unified IC Release 8.0(3) running on a Virtual Machine. An upgrade typically happens inplace and requires no hardware change whereas a migration involves change in hardware. To continue with Upgrade, see About Upgrades (page 35).
Chapter 8: Upgrades and Migrations Obtaining the Upgrade File Before starting the software upgrade, back up your system data using the Disaster Recovery System application. For more information on backup, see the Administration Console User Guide for Cisco Unified Intelligence Center (http://www.cisco.com/en/US/products/ps9755/ prod_maintenance_guides_list.html). Upgrade and restart the controller node first. Then upgrade and restart the member(s). All nodes must be on the same version of Unified IC.
Chapter 8: Upgrades and Migrations Accessing Cisco Unified OS Administration 7. Click Cisco Unified Intelligence Suite and Intelligence Center Software. This opens a tree of all releases. 8. Navigate to the folder and subfolder for the release you want. 9. Select the .exe file and click Download Now. 10. Log in. 11. Review the download cart, select the Release Note document 12. Scroll down to select Proceed with Download. 13. Click Agree at the Download Rules page. 14.
Chapter 8: Upgrades and Migrations Accessing Cisco Unified OS Administration 2. Sign in using the User Name and Password of the System Administrator account (page 53). 3. Select Software Upgrades > Install/Upgrade to display the Software Installation/Upgrade page. Figure 6: Software Upgrade page 4. Select source: DVD/CD (page 38) or Remote Filesystem (page 39). Upgrading from DVD/CD Follow these steps if DVD/CD is the source for your Install/Upgrade.
Chapter 8: Upgrades and Migrations Accessing Cisco Unified OS Administration Step 8 If you want to install the upgrade and automatically reboot to the upgraded partition, choose Reboot to upgraded partition. The system restarts running the upgraded software. Step 9 If you want to install the upgrade and then manually reboot to the upgraded partition at a later time, do the following: a. Choose Do not reboot after upgrade. b. Click Next.The Upgrade Status window displays the Upgrade log. c.
Chapter 8: Upgrades and Migrations Accessing Cisco Unified OS Administration Step 9 When the download completes, click Next. Step 10 If you want to install the upgrade and automatically reboot to the upgraded partition, choose Reboot to upgraded partition. The system restarts running the upgraded software. Step 11 If you want to install the upgrade and then manually reboot to the upgraded partition at a later time, do the following: a. Choose Do not reboot after upgrade. b. Click Next.
Chapter 8: Upgrades and Migrations About Migrations This opens the Version Settings screen, which shows the software version on both the active and inactive partitions. To switch versions and restart, click Switch Versions. When the system restarts, it boots to the now-active (formerly inactive) partition with your migrated data in place. Note: It takes about a half-hour to complete the Switch Version and the restart.
Chapter 8: Upgrades and Migrations Installing Cisco Unified IC Release 8.0(3) over a Virtual Machine with the backup .tar files. You must remember this security password or take a backup immediately after the security password change/reset. Step 6 Use the Backup History to confirm that the backup was copleted without any errors. The Backup History window displays only the last 20 backup jobs.
Chapter 8: Upgrades and Migrations Installing Cisco Unified IC Release 8.0(3) over a Virtual Machine Step 3 Navigate to the Backup > Backup Device. The Backup Device List window displays. Step 4 To configure a new backup device, click Add New. The Backup Device window displays. Step 5 Enter the backup device name in the Backup device name field. Step 6 Choose Network Directory as the backup device and provide the details of the network shared location where the previously taken Unified IC release 8.
Chapter 8: Upgrades and Migrations Installing Cisco Unified IC Release 8.0(3) over a Virtual Machine Step 18 When all the subsequent nodes have rebooted and are running the restored version of Cisco Unified Intelligence Center, reboot the first node. Note: Database replication on the subsequent nodes may take an hour or more to complete after the publisher reboots, depending on the size of the cluster.
Chapter 9 Frequently Asked Questions about the Installation This chapter contains the following topics: • • • • • • • • • • • • • • • • • • • • • Can I Install on a Virtual Machine?, page 45 Can My Cisco Support Provider Log In to Assist Me?, page 46 Error Message about "No Such File or Directory", page 46 How Do I Access Log Files?, page 46 How Do I Add or Replace a Device in the Cluster?, page 47 How Do I Find the Server MAC Address?, page 47 How Do I Sign In to the Administration Console?, page 47 How D
Chapter 9: Frequently Asked Questions about the Installation Can My Cisco Support Provider Log In to Assist Me? Can My Cisco Support Provider Log In to Assist Me? Yes. There is a utility that allows Cisco technicians to troubleshoot your system, its configurations, and databases. You can set up and enable a time-limited access account to your system using the CLI commands under the utils remote_account command.
Chapter 9: Frequently Asked Questions about the Installation How Do I Add or Replace a Device in the Cluster? How Do I Add or Replace a Device in the Cluster? To add a device (for example, to add an additional Member to the cluster): 1. Verify that the new or replacement device meets the hardware requirements outlined in the Hardware and System Software Specification (Bill of Materials). 2. Make sure that the other devices in the cluster are up and running. 3.
Chapter 9: Frequently Asked Questions about the Installation How Do I Sign In to Unified IC Reporting? How Do I Sign In to Unified IC Reporting? There are two ways to do this: 1. From the browser: – Direct a browser to the URL for the Reporting application. The URL is http://
Chapter 9: Frequently Asked Questions about the Installation How Do I Test Server Connectivity? 1. Enter the ID for the System Administrator account created during install. See What Accounts and Passwords are Defined During the Installation? (page 53) 2. When prompted, enter the password for the System Administrator account. The CLI is documented in the Administration Console User Guide for Cisco Unified Intelligence Center (http://www.cisco.com/en/US/products/ps9755/ prod_maintenance_guides_list.html).
Chapter 9: Frequently Asked Questions about the Installation How is Data Handled During an Upgrade? How is Data Handled During an Upgrade? Data migration occurs during an upgrade installation (page 56). This includes the database, configuration properies, and licensing files. Warning: Do not make configuration changes from the start of the upgrade process until you have activated the inactive partition and rebooted the system.
Chapter 9: Frequently Asked Questions about the Installation Unified IC Licenses • Cannot install member nodes. How To Obtain Your License To acquire a license: 1. Go to the Cisco Product License Registration website at this URL: https://tools.cisco.com/ SWIFT/Licensing/PrivateRegistrationServlet 2. If you do not have a PAK, click the available licenses link (https://tools.cisco.com/SWIFT/ Licensing/PrivateRegistrationServlet?DemoKeys=Y). 3.
Chapter 9: Frequently Asked Questions about the Installation Unified IC Licenses How to Upload the License Upload the license in the Unified IC Administration interface. To do this, select Cluster Configuration > License Management . Refer to the online help for instructions. License Types Unified Intelligence Center has four license types: Demo, Lab/Trial, Standard, and Premium. TYPE EXPIRATION NODES DEMO/LAB Valid for 90 days. Controller and all No limit Member nodes (a maximum of 8 nodes).
Chapter 9: Frequently Asked Questions about the Installation What Accounts and Passwords are Defined During the Installation? Feature Standard Premium Import and run reports created with Intelligence Center Premium Change report filters (date, time, items in category) with Save As Rename columns with Save As Add computed fields to Report Definitions with Save As Create or modify Report Definitions queries to build new reports Create Drilldowns in the Report Definition with Save As - Rename column
Chapter 9: Frequently Asked Questions about the Installation What Accounts and Passwords are Defined During the Installation? The System Administrator for the Controller can access: – The CLI for the Controller. – The Cisco Systems tools on the Navigation dropdown in the Administration console: Disaster Recovery System, Cisco Unified Serviceability, and Cisco Unified OS Administration interfaces. The System Administrator has no access to functions in the Unified IC reporting application.
Chapter 9: Frequently Asked Questions about the Installation What if the Installation Fails? What if the Installation Fails? If the installation fails, you see a screen asking if you want to copy diagnostic information to a device. Figure 7: Installation Failed Screen Insert a USB key. Select Yes. Select Continue at the next two screens. Note: The CLI command to view the install logs is file view install.
Chapter 9: Frequently Asked Questions about the Installation What To Do if the Upgrade Stalls output to that port. If you dump the logs into that file, these characters will corrupt the .tar format of the file. In order to create a valid .tar file, you must connect the serial port to a new and empty file just before you dump the logs to it. Step 3 Return to the Virtual Machine console and proceed to dump the logs to the serial port.
Chapter 9: Frequently Asked Questions about the Installation Where is an Upgrade Installation Installed? Upgrade versions are installed on the inactive partition. To complete the upgrade, you switch partitions. You do this using the CLI command utils system switch-version. You can also do this from the Cisco Unified Communications Operating System Administration screen. Navigate to Settings > Version.
Chapter 9: Frequently Asked Questions about the Installation Where is an Upgrade Installation Installed? Installation and Upgrade Guide for Cisco Unified Intelligence Center Release 8.
Index switch version....40 Index Cisco Unified Serviceability....54 CLI Administration console access to....48, 54 adding member node....30 changing configuration after installation....17 logging in....29, 47 documentation....48 uploading license....29 system administration user....31 auto-negotiation....17 basic install wizard configuration changing in CLI....17 auto-negotiation settings....17 first node (controller)....21 case sensitivity....6 member nodes....33 configuration worksheet..
Index failure....27, 55 migrations length of....8, 25 and backups....41 log files....27, 46, 55 length of....41 on re-purposed server....6 MTU....7, 17 on virtual machine....45 network connectivity....34, 49 processes....25 network settings....18 Product Licensing screen....26 Network Time Protocol (NTP)....21 sequence....8 NIC duplex setting....17 uninstall....49 NIC speed....17 user accounts....53 NTP server....8, 21 user interface....9 partitions IP address and mask....
Index and CLI access....48 configuring at installation....53 system application user....8, 22, 30, 54 configuring at installation....22 password....22, 47, 48 timezone....17 UBS B Series/C Series installation....11 Unified IC reporting interface logging in....48 uninstall....49 upgrade files accessing....36 upgrades....16, 35, 50, 56 and backups....35 from DVD....38 from remote filesystem....39 length of....35 troubleshooting....56 user accounts configured at installation....18, 53 version....