
Maintenance Manual


Chat Template Sets 45
Changing Agent and Customer Images
The Chat Customer Console contains a static agent and customer image, which is displayed next to each chat
message in the chat area. You can replace the out-of-the-box images with custom images.
Before you begin, get the new images that you want to use. The height of the new images should be 28 pixels
and the width should be 26 pixels.
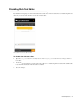
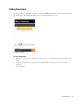
Out-of-the-box customer and agent images
To change the customer image:
1. Place the new image in the Cisco_Home
\eService\templates\
Template_Folder
\chat\img
folder.
2. Open the
Cisco_Home
\eService\templates\
Template_Folder
\chat\less\chat-main.less
file in a
text editor.
3. Locate the
&.customer
class and in it locate the
.author > &.typing
class.
4. Change the value of the
background-image
property.
5. Save the changes.
6. Clear the browser cache and access the chat link to test the changes.
To change the agent image:
1. Place the new image in the Cisco_Home
\eService\templates\chat\
Template_Folder
\chat\img
folder.
2. Open the
Cisco_Home
\eService\templates\
Template_Folder
\chat\less\chat-main.less
file in a
text editor.
3. Locate the
.eg-chat-message, .eg-chat-temporary-message
class and in the
.author
and
&.typing
classes change the value of the
background-image
property.