
Maintenance Manual


Chat Template Sets 25
The following table describes the files that can be changed. All the files are available on the web server at
Cisco_Home
\eService\templates\chat\
Template_Name.
Creating Template Set Folders
You need access to the web server to perform this task.
Create a separate template set for each of the following types of activities:
Standalone chat activities
Integrated chat activities
To create a new template set:
1. On the web server, browse to Cisco_Home
\eService\templates\chat.
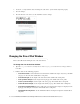
2. Create a copy of the Sunburst folder and rename the folder.
3. The new template set is created. You can now edit the files in the template folder to configure your template
settings and to customize the look of your templates. Except for the following files, all the files can be
changed.
connection.js
session.js
Use To
\Properties
\
chat_
Locale
.properties
Update the text displayed on the chat pages.
\
eGainLiveConfig.js
Change the fields displayed on the login page.
Enable anonymous chats.
Enable auto login.
Show emoticons.
Configure the height of the chat window.
Configure the maximum length allowed for customer messages.
Configure sound alert for chat messages.
Hide rich text editor.
css\
transcript.css,
mailtranscript.css
\chat\less\chat-main.less
Configure the look and feel of the chat pages, the chat typing area, and the text
editor toolbar.
\
chat.html
Change the layout of the chat page.
Images folders:
Template_Name
\
images
Template_Name
\templates\chat\
img
Change the images used.
Note: The size of the custom images should match the size of the default images.
However, if you are changing the size of the chat windows, you can adjust the
images size to match the new windows.
Important: Anytime you update or create new templates, you must copy the templates files on all
web servers in your installation.