
Maintenance Manual


Entry Points 29
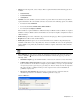
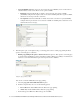
5. In the Properties pane, on the Options tab, the Cobrowse section is enabled only if the installation includes
Cobrowse, and if cobrowse is enabled for the entry point.
6. Click the Save
button.
After creating the entry point, set the notifications and transcript emails (page 35), test the entry point
(page 34), and add the help link to your website (page 38).
Creating Entry Points for Chats Integrated with Unified CCE
To create an entry point for chats integrated with Unified CCE:
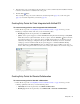
Follow all the steps in the “Creating Entry Points for Standalone Chats” on page 26. In Step 3, for the
Routing type and Queue fields, make sure you set the following values:
Routing type: From the dropdown list, select Unified CCE.
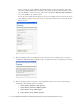
Queue: Select a queue mapped to a Unified CCE Media Routing Domain that belongs to CIM_WIM
Media Class. This is required information. To select a queue, click the Assistance
button. From the
Select Queue window, select a queue. The queues available in this window are decided based on the
subactivity and routing type configured for the queue. When the subactivity selected is chat and the
routing type selected is Unified CCE, only the queues mapped to a Unified CCE Media Routing
Domain that belong to CIM_WIM Media Class are displayed. The queues available can be active or
inactive. If the entry point is marked as active, then an active queue must be selected for the entry point.
Set general properties
Creating Entry Points for Blended Collaboration
To create an entry point for blended collaboration:
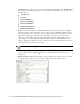
Follow all the steps in the “Creating Entry Points for Standalone Chats” on page 26. In Step 3, for the
following eight fields, make sure you set the following values:
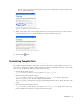
Subactivity: From the dropdown list, select Blended Collaboration.
Routing type: From the dropdown list, select Unified CCE or Automatic Call Distributor.