
Manual
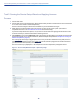
Table Of Contents
- Preface
- Introduction
- Process Summary
- Prerequisites
- Run the Service Setup Wizard
- VCS System Configuration
- Routing Configuration
- Pre-search Transforms
- Search Rules
- Task 8: Configuring Transforms
- Task 9: Configuring Local Zone Search Rules
- Task 10: Configuring the Traversal Zone
- Neighboring Between VCS Clusters
- Task 11: Configuring Traversal Zone Search Rules
- Task 12: Configuring the DNS Zone
- Task 13: Configuring DNS Zone Search Rules
- Task 14: Configuring External (Unknown) IP Address Routing
- Endpoint Registration
- System Checks
- Maintenance Routine
- Optional Configuration Tasks
- Appendix 1: Configuration Details
- Appendix 2: DNS Records
- Appendix 3: Firewall and NAT Settings
- Appendix 4: Advanced Network Deployments
- Obtaining Documentation and Submitting a Service Request
- Cisco Legal Information
- Cisco Trademark

5. On the Option Keys page, click the Product License Registration Portal link to go to the licensing portal. (For
this step you need to work away from the wizard to obtain the necessary licenses, and you need the serial
number of the system.) In the licensing portal, enter the necessary details for the required licenses.
Detailed information about using the licensing portal is in the online help or the VCS Administrator Guide. An
ordering guide for our products is available on the Cisco Collaboration Ordering Guides page.
6. Wait for system-generated emails from the licensing portal with the release key and option keys for your
selected services.
7. Back in the wizard, paste the text from the release key email into the first text area. The system reads the
release key out of the pasted text and displays it next to the text area.
8. Paste the text from the option keys email into the second text area. The system reads the option keys out of
the pasted text and displays them next to the text area.
9. Add new text areas if you have more email text to paste in, such as your room or desktop system registration
license keys.
10. Click Add Keys.
The License status table groups the keys that are possible on this system, and indicates whether they are
loaded or not loaded. The keys are grouped as follows:
— Required:If any keys in this section are not yet loaded, you see status Required and will not be able to
continue through the wizard.
— Optional:Shows keys that may or may not be useful, but are not strictly required for the services you chose.
— Unrelated:These keys won't harm the system if they are loaded, but will not provide any benefit for the
services you chose.
— Incompatible:These keys cannot work with the selected services. You must remove them or choose
different services before you can continue.
11. Click Continue.
12. Review the network configuration and modify the settings if necessary. Save any changes before you
continue the wizard.
13. Click Finish.
14. Restart the system when prompted.
Result: When you log in, the user interface is tailored to match your service selections. You only see menus
and pages for the services you chose.
What to do next
The wizard is complete for the VCS Control element. Now you need to run it on the VCS Expressway. For typical
deployments with the VCS Expressway the services you are most likely to select with the wizard include Mobile and
remote access and Business to business calls. When the VCS Expressway is done, go to the next section in this
guide, "VCS System Configuration."
17
Cisco VCS Expressway and VCS Control - Basic Configuration Deployment Guide