Cisco Meeting Server Cisco Meeting Server Release 2.0 Deployments with Call Control November 18, 2016 Cisco Systems, Inc. www.cisco.
Contents 1 Introduction 3 1.1 How to Use this Guide 3 1.1.1 Commands 5 1.1.2 Terminology 5 2 Configuring a SIP Trunk to Cisco Unified Communications Manager 2.1 Configuring a secure SIP trunk 6 6 2.1.1 Configuration required on the Meeting Server 6 2.1.2 Configuration required on the Cisco Unified Communications Manager 8 2.2 Configuring a non-secure SIP trunk 10 2.2.1 Configuration required on the Meeting Server 10 2.2.
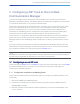
1 Introduction 1 Introduction The Cisco Meeting Server was formerly called the Acano Server. The Cisco Meeting Server is now hosted on a new preconfigured version of a Cisco UCS server, called the Cisco Meeting Server 1000. It can also be hosted on the Acano X-Series hardware, or on a specification based VM server. Note: The term Meeting Server in this document means either a Cisco Meeting Server 1000, an Acano X-Series Server or the software running on a virtual host.
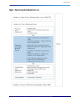
1 Introduction Figure 1: Cisco Meeting Server documentation set Cisco Meeting Server Release 2.
1 Introduction 1.1.1 Commands In this document, commands are shown in black and must be entered as given - replacing any parameters in <> brackets with your appropriate values. Examples are shown in blue and must be adapted to your deployment. 1.1.2 Terminology Throughout this document the conferencing types mentioned are those as defined in Table 1.
2 Configuring a SIP Trunk to Cisco Unified Communications Manager 2 Configuring a SIP Trunk to Cisco Unified Communications Manager This chapter explains how to set up a SIP Trunk between Cisco Unified Communications Manager and a Meeting Server. The Meeting Server must either be configured as a Core server in a split server deployment, or as a single combined server.
2 Configuring a SIP Trunk to Cisco Unified Communications Manager Cisco Unified Communications Manager has some requirements on what TLS certificates it will accept. You should ensure that "cucm.csr" has the SSL client and SSL server purposes enabled. This is done during the certificate signing stage. 4. Submit "cucm-trust.csr "to the CA (public CA or internal CA) for signing. An internal CA signed certificate is acceptable. 5.
2 Configuring a SIP Trunk to Cisco Unified Communications Manager Note: For more information on creating and uploading certificates to the Meeting Server, see the appropriate Cisco Meeting Server Certificate Guidelines. 2.1.2 Configuration required on the Cisco Unified Communications Manager Our testing has been done on trunks without Media Termination Point (MTP) configured. Therefore: n Disable MTP if this will not negatively affect your deployment.
2 Configuring a SIP Trunk to Cisco Unified Communications Manager a. Log into Cisco Unified Communications Manager Administration. b. Go to System > Security > SIP Trunk Security Profile. c. Click Add New. d. Complete the fields as follows: l Name = type in a name, e.g. "CMS_SecureTrunk" l Device Security Mode =select Encrypted l Incoming Transport Type = select TLS l Outgoing Transport Type = select TLS l X.509 Subject Name = enter the CN of the Call Bridge certificate.
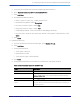
2 Configuring a SIP Trunk to Cisco Unified Communications Manager Field Description Outbound Calls > Calling Party Transformation CSS Select as appropriate. SIP Information>Destination address Enter the FQDN of the Meeting Server, it must match the CN of the Meeting Server certificate SIP Information>Destination Port Enter 5061 for TLS SIP Trunk Security Profile Select the security profile that you created in step 3.
2 Configuring a SIP Trunk to Cisco Unified Communications Manager 1. Create the SIP trunk 2. a. In Cisco Unified Communications Manager, go to Device >Trunk. b. Click Add New. c. Configure these fields: l Trunk Type = SIP trunk l DeviceProtocol =SIP l Trunk Service Type = None (default) d. Click Next e. Configure the destination information for the SIP trunk, see Table 2 below. Table 3: Destination information for the SIP Trunk Field Description Device name Type in a name e.g.
3 Setting up scheduled and rendezvous calls 3 Setting up scheduled and rendezvous calls After setting up a secure SIP trunk (Section 2.1 ) or non-secure SIP trunk (see Section 2.2), follow the steps in Section 3.1 and Section 3.2 to enable rendezvous and scheduled calls to be made from the Meeting Server to Cisco Unified Communications Manager. 3.1 Configuring the Meeting Server 1.
3 Setting up scheduled and rendezvous calls e. For Local from domain, enter the domain that you want the call to be seen as coming from (the Caller ID). Note: If you leave Local from domain blank, the domain used for the Caller ID defaults to that entered in the Local contact domain, in this case blank. f. For Trunk type select Standard SIP. g. Set the Priority as required. h. Select Add New. 3.2 Configuring Cisco Unified Communications Manager 1.
3 Setting up scheduled and rendezvous calls d. Complete the following: l l Route pattern = 7.! (The ! means anything. The dot is useful for a later option below.) Route partition = the route partition you want this rule to belong to - see the note below l Description = any appropriate text l Gateway/route list = the trunk you have already configured l Route this pattern = ensure that this option is selected Further down the page you can set various transforms e.g.
4 Setting up escalated ad hoc calls 4 Setting up escalated ad hoc calls After setting up the secure SIP trunk (see Section 2.1), follow the steps in Section 4.1 and Section 4.2 to enable the escalation of a 2-way call on Cisco Unified Communications Manager to a conference on the Meeting Server.
A Configuring a SIP Trunk to an Avaya CM A Configuring a SIP Trunk to an Avaya CM This appendix provides an example of setting up a SIP trunk between the Cisco Meeting Server and the Avaya Communications Manager (Avaya CM) and may need to be adapted. Note: If you are not your organization's Avaya CM administrator, then Cisco strongly advises you to seek the advice of your local administrator on the best way to implement the equivalent on your server’s configuration.
A Configuring a SIP Trunk to an Avaya CM 5. Add a dial plan entry for the Avaya CM – see the example below. The highlighted IP address below matches the C-LAN or Processor Ethernet address on the CM side and represents the CM interface used in the Signaling Group created later. 6. Click Add New. A.3 Avaya CM Configuration 1. Add a node name for the Meeting Server signaling interface. 2.
A Configuring a SIP Trunk to an Avaya CM 3. Add an Avaya Trunk Group with the following: l Group Type = SIP l Direction = two way l Service Type = tie l Additional settings may vary, but see the examples below for possible configuration Cisco Meeting Server Release 2.
A Configuring a SIP Trunk to an Avaya CM Cisco Meeting Server Release 2.
A Configuring a SIP Trunk to an Avaya CM 4. Add an Avaya Route Pattern to routes calls to trunk group 105 and delete the first two digits (deletes the prefix digits 49). Cisco Meeting Server Release 2.
A Configuring a SIP Trunk to an Avaya CM 5. Add a Uniform Dial Plan to provide a routing for a 6-digit number with a prefix of 49. These calls must be set to be routed to AAR tables in Avaya. 6. Add an AAR setting to routes all calls of 6 digits in length and beginning with 49 (i.e. 498320) to route pattern 105 (the Meeting Server Trunk Group). 7. Assign an Extension and DID.
B Configuring a Polycom DMA for the Cisco Meeting Server B Configuring a Polycom DMA for the Cisco Meeting Server For calls from a Polycom DMA environment to the Cisco Meeting Server, create an External SIP Peer on the Polycom DMA that will point to the Meeting Server, and then configure a Dial Rule on the Polycom DMA that will direct calls to it. The following is an example of configuring theMeeting Server for the Polycom DMA, and may need to be adapted.
B Configuring a Polycom DMA for the Cisco Meeting Server l Port: 5060 l User Route Header: selected l Type: Other l Transport Type: TCP 3. Leave the Domain List page blank. 4. In the Postliminary page Header Options section configure the following: a. Copy All Parameters: Checked b. Format: Use original request's To 5. In the Postliminary page Request URI options section configure the following: a.
B Configuring a Polycom DMA for the Cisco Meeting Server 6. In the Authentication page configure the following: a. Authentication: Pass authentication b. Proxy authentication: Pass Proxy authentication 7. Click Save. B.2 Creating the Dial Rule In the Polycom DMA: Cisco Meeting Server Release 2.
B Configuring a Polycom DMA for the Cisco Meeting Server 1. Go to Admin > Call Server > Dial Rules > Add. 2. In the Edit Dial Rule for Authorized Calls page, configure the following (see below): a. Description: Cisco 3. Select Enabled. 4. Select the Cisco Systems SIP Peer in the left pane and click the arrow to move it to the Selected SIP Peers. 5. In the Preliminary page create a string to represent how calls will match this rule (see below). Cisco Meeting Server Release 2.
B Configuring a Polycom DMA for the Cisco Meeting Server Consult the DMA Admin Guide for more detail. The example below matches any call that begins with a 6 and sends it to the [[[Undefined variable BrandingTypeVariables.solution or server]]]. if(!DIAL_STRING.match(/sip:6/)) { return NEXT_RULE; } 6. Click OK. You should now be able to dial from any SIP-enabled Polycom DMA endpoint to the Cisco Meeting Server using the rule created. Cisco Meeting Server Release 2.
Cisco Legal Information Cisco Legal Information THE SPECIFICATIONS AND INFORMATION REGARDING THE PRODUCTS IN THIS MANUAL ARE SUBJECT TO CHANGE WITHOUT NOTICE. ALL STATEMENTS, INFORMATION, AND RECOMMENDATIONS IN THIS MANUAL ARE BELIEVED TO BE ACCURATE BUT ARE PRESENTED WITHOUT WARRANTY OF ANY KIND, EXPRESS OR IMPLIED. USERS MUST TAKE FULL RESPONSIBILITY FOR THEIR APPLICATION OF ANY PRODUCTS.
Cisco Legal Information PRESENTED WITHOUT WARRANTY OF ANY KIND, EXPRESS OR IMPLIED. USERS MUST TAKE FULL RESPONSIBILITY FOR THEIR APPLICATION OF ANY PRODUCTS. THE SOFTWARE LICENSE AND LIMITED WARRANTY FOR THE ACCOMPANYING PRODUCT ARE SET FORTH IN THE INFORMATION PACKET THAT SHIPPED WITH THE PRODUCT AND ARE INCORPORATED HEREIN BY THIS REFERENCE. IF YOU ARE UNABLE TO LOCATE THE SOFTWARE LICENSE OR LIMITED WARRANTY, CONTACT YOUR CISCO REPRESENTATIVE FOR A COPY.
Cisco Legal Information INCLUDING, WITHOUT LIMITATION, THOSE OF MERCHANTABILITY, FITNESS FOR A PARTICULAR PURPOSE AND NONINFRINGEMENT OR ARISING FROM A COURSE OF DEALING, USAGE, OR TRADE PRACTICE.