
Manual

1-, 2-, and 4-Port T1/E1 HWICs and 8-Port T1/E1 Network Module
How to Configure T1/E1 HWICs and Network Module
5
Cisco IOS Release 12.4(11)XW5, and 12.4(20)T
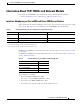
3. no card type {t1 | e1} slot subslot
4. card type {t1 | e1} slot subslot
5. write
6. reload
7. boot
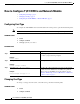
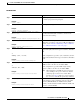
DETAILED STEPS
Command or Action Purpose
Step 1
enable
Example:
Router> enable
Enables privileged EXEC mode.
• Enter your password if prompted.
Step 2
configure terminal
Example:
Router# configure terminal
Enters global configuration mode.
Step 3
no card type {t1 | e1} slot subslot
Example:
Router(config)# no card type t1 0 2
Optional. Removes the previously configured card type for
the HWIC or network module.
Step 4
card type {t1 | e1} slot subslot
Example:
Router(config)# card type e1 0 2
Specifies T1 or E1 connectivity for the HWIC or network
module.
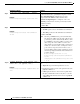
Step 5
write
Example:
Router(config)# write
Rebuilds the router configuration.
Step 6
reload
Example:
Router(config)# reload
Reloads router so that changes can take affect.
After this command executes, the router will go to ROM
monitor (rommon) mode.
Step 7
boot
Example:
Router(rommon)# boot
Boots the router for the configuration with the newly
selected card type.