
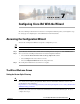
Installation Guide


7-5
Cisco Intelligent Automation for Cloud Installation Guide
OL-29971-02
Chapter 7 Configuring Cisco IAC With the Wizard
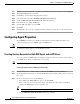
Configuring Agent Properties
Tip If you do not see “REX Set REX Agent Properties” in the list, scroll down or use the pagination
at the bottom to navigate to the other pages. Or, sort by agent name by clicking the Name column
heading.
Step 2 Click the red icons next to REX Set REX Agent Properties.
Step 3 Click the Start Chosen button up at the top right corner of the page.
• The red icons turn to green, indicating that they are now sending and receiving.
Note In some cases, you may need to refresh the page before you see the colors change. To do so, click
the Refresh icon.
Step 4 Close AFC.
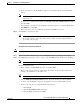
Setting REX Agent Configuration
Configure all of the REX agent properties, then verify that the agents are configured correctly.
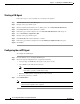
Step 1 From the Wizard, choose Set REX Agent Configuration
Step 2 On the Set REX Agent Configuration form, enter the REX account login name, then enter and re-enter
the REX account password.
Step 3 Enter the URL to the Prime Service Catalog Request Center server in the Cloud Portal Request Center
URL field.
Tip The URL should include http or https, the hostname and port number, and the pathname to
ServiceCatalog. For example, http://localhost:8080/ServiceCatalog.
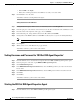
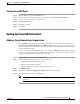
Step 4 Click Submit Order to submit the form and display the Order Confirmation page for the service that
you ordered.
Step 5 Click on the number in the Requisition Number field to display the details.
Step 6 In the Requisition Details pane, click the requisition number in the Requisition Number field to refresh
the status.
Tip Repeat this refresh process as many times as needed until the status is Completed.
Step 7 Click Close to return to the Configuration Wizard.