
Installation Guide


G-4
Cisco Intelligent Automation for Cloud Installation Guide
OL-29971-02
Appendix G Upgrading Cisco PPM to the Full License
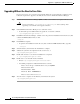
Upgrading Without the Need to Save Data
If you do not need to save your data created with the trial/demo version during the evaluation period,
follow the steps below to upgrade to the fully licensed version of Prime Performance Manager.
Step 1 Download Prime Performance Manager (PPM) 1.5 FCS version and the 1.5.1 update from Cisco.com.
Caution You need to back up /opt/CSCOppm-gw/etc/amqpConfig.xml before starting. After
upgrading, restore the file to the upgraded instance.
Step 2 Uninstall Prime Performance Manager 1.5.1 evaluation version.
• To uninstall a previous build without any questions, execute this command:
/opt/CSCOppm-gw/bin/ppm uninstall -n
Step 3 Install Prime Performance Manager 1.5 FCS version. To perform an installation from the directory that
contains the PPM installation files, do this:
./setup.sh
Step 4 Install PPM 1.5.1 update.
• To perform an installation from the directory that contains the PPM installation files, type this:
./setup.sh
Step 5 Start the Gateway and Unit after the installation is complete.
Step 6 Validate the system has been updated and the version is 1.5.1:
/opt/CSCOppm-gw/bin/ppm version
Step 7 Enable SSL and user access after the installation has completed:
• /opt/CSCOppm-gw/bin/ppm ssl enable
Step 8 Enable user access after SSL has been installed:
• Execute /opt/CSCOppm-gw/bin/ppm useraccess enable
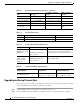
• You will be prompted for additional information, as shown:
Please choose the type of authentication to use: [local] linux
Enter username: cisco
Enter First Name : Cisco
Enter Last Name : Administrator
Enter access level for user cisco: 5
Step 9 After the restore completes for the Gateway and Unit start the system
/opt/CSCOppm-gw/bin/ppm start