
User Guide


28-37
AsyncOS 9.1.2 for Cisco Email Security Appliances User Guide
Chapter 28 Using Email Security Monitor
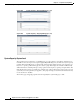
Managing Reports
Your appliance ships with a default set of scheduled reports —you can use, modify, or delete any of them.
Related Topics
• Scheduling a Report to be Generated Automatically, page 28-37
• Editing Scheduled Reports, page 28-37
• Deleting Scheduled Reports, page 28-38
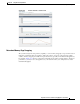
Scheduling a Report to be Generated Automatically
Procedure
Step 1 On the Monitor > Scheduled Reports page, click Add Scheduled Report.
Step 2 Select a report type. Depending on the report type you select, different options may be available.
For more information about the available types of scheduled reports, see Scheduled Report Types,
page 28-35.
Step 3 Enter a descriptive title for the report. AsyncOS does not verify the uniqueness of report names. To avoid
confusion, do not create multiple reports with the same name.
Step 4 Select a time range for the report data. (This option is not available for Outbreak Filters reports.)
Step 5 Select a format for the report:
• PDF. Create a formatted PDF document for delivery, archival, or both. You can view the report as a
PDF file immediately by clicking Preview PDF Report.
For information about generating PDFs in languages other than English, see the “Notes on Reports”
section on page 28-36.
• CSV. Create an ASCII text file that contains the tabular data as comma-separated values. Each CSV
file may contain up to 100 rows. If a report contains more than one type of table, a separate CSV file
is created for each table.
Step 6 Specify the report options, if available. Some reports do not have report options.
Step 7 Specify scheduling and delivery options. If you do not specify an email address, the report is archived
but is not sent to any recipients.
Note If you are sending reports to an external account (such as Yahoo or Gmail, etc.), you may need
to add the reporting return address to the external account’s whitelist to prevent report emails
from being incorrectly classified as spam.
Step 8 Click Submit. Commit your changes.
Editing Scheduled Reports
Procedure
Step 1 Click the report title in the listing on the Services > Centralized Reporting page.
Step 2 Make your changes.