
User Guide


19-8
AsyncOS 9.1.2 for Cisco Email Security Appliances User Guide
Chapter 19 S/MIME Security Services
Signing, Encrypting, or Signing and Encrypting Outgoing Messages using S/MIME
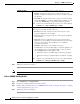
Note An S/MIME signing certificate can contain both Subject Alternative Name (Domains) and
Subject Alternative Name (Email).
Step 5 Click Next to view the certificate and signature information.
Step 6 Depending on your requirements, do the following:
• Enter a name for the certificate.
• If you want to submit a CSR for the self-signed certificate to a certificate authority, click Download
Certificate Signing Request to save the CSR in PEM format to a local or network machine.
Step 7 Submit and commit your changes.
Note Use the certconfig command to generate self-signed S/MIME certificates using CLI.
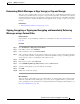
Importing an S/MIME Signing Certificate
If you already have an S/MIME certificate for signing messages, you can add it to the appliance by
importing it.
Before You Begin
Make sure that the S/MIME certificate that you plan to import meets the requirements described in
S/MIME Certificate Requirements, page 19-20.
Procedure
Step 1 Click Network > Certificates.
Step 2 Click Add Certificate.
Step 3 Choose Import Certificate.
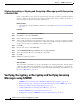
Step 4 Enter the path to the certificate file on your network or local machine.
Step 5 Enter the password for the file.
Step 6 Click Next to view the certificate’s information.
Step 7 Enter a name for the certificate.
Step 8 Submit and commit your changes.
Note Use the certconfig command to import S/MIME certificates using CLI.