
Instruction manual


Administrator Procedures
INTER-TEL
®
5000 ADMINISTRATOR GUIDE – Issue 2.3, September 2007
Page 44 Trunk Programming
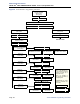
4. To Program an Individual Trunk: Press or the INDIVIDUAL TRUNK menu button.
Then program trunk options as follows:
• The display shows
ENTER TRUNK EXTENSION. Enter the extension number of
the trunk to be programmed using one of the methods described on page 43.
• The display shows
INDIVIDUAL TRUNK OPTION. Enter one of the following
options. To view the last two options on a display endpoint, press the arrow (
<< or
>>) menu button at the bottom of the display.
– Answer Supervision: To program the answer supervision for the trunk, press
or the
ANS SUPERVISION menu button. When the display shows ANS
SUPERVISION OPTION, press or the POLARITY REVERSE menu but-
ton for the polarity-reversal supervision type. Or, press or the
VALID
CALL
menu button for Valid Call timer supervision. Or, press or the
VALID + POLARITY menu button for Valid Call timer with Polarity Reversal
supervision. Then press or
ACCEPT to continue.
– Caller ID: To enable or disable Caller ID, press or the
CALLER ID menu
button. When the display shows
SET CALLER ID, press or ON to enable
the feature, or press or
OFF to disable it. Then press or ACCEPT to
continue.
– Hybrid Balance: To set the hybrid balance of the trunk to normal or short,
press or the
HYBRID BALANCE menu button. When the display shows
HYBRID BALANCE OPTION, press or the NORMAL menu button, or
press or the
SHORT menu button. Then press or ACCEPT to con-
tinue.
– DTMF/Dial-Pulse Signaling: To set the trunk for DTMF or dial-pulse signal-
ing, press or the
SIGNALING menu button. When the display shows
ENTER SIGNALING OPTION, press or the DTMF menu button, or press
or the
PULSE menu button. Then press or ACCEPT to continue.
– Trunk Group Number: To assign the trunk to a trunk group, press or the
TRUNK GROUP menu button. When the display shows ENTER TRUNK
GRP EXTENSION
, enter the trunk group number you want using one of the
methods described on page 43.
– Busy Trunk: To temporarily remove the trunk from service, press or the
BUSY TRUNK menu button. When the display shows MARK TRUNK BUSY,
press or the
ON menu button, or press or the OFF menu button. Then
press or
ACCEPT to continue.
• To exit, press or
ACCEPT to move backward through the prompts until you
reach the
ENTER DATABASE OPTION prompt.
1
1
1
2
3
#
2
1
2
#
3
1
2
#
4
1
2
#
5
6
1
2
#
#