
Installation Guide


14
Upgrade to ASA 8.4 and ASDM 6.4
MASTER FILES
Upgrading the Software
Wait for the secondary unit to finish loading. Use the show failover command to verify that both failover
groups are in the Standby Ready state.
Step 14 Force both failover groups to become active on the secondary unit:
no failover active group 1
no failover active group 2
Step 15 Reload the primary unit:
reload
If the failover groups are configured with the preempt command, they automatically become active on
their designated unit after the preempt delay has passed. If the failover groups are not configured with
the preempt command, you can return them to active status on their designated units using the failover
active group command.
For ASDM:
Step 1 (If there is a configuration migration) In ASDM, back up your existing configuration using the Tools >
Backup Configurations tool.
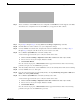
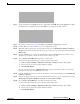
Step 2 On the primary unit, in the main ASDM application window, choose Tools > Upgrade Software from
Local Computer.
The Upgrade Software dialog box appears.
Step 3 From the Image to Upload drop-down list, choose ASDM.
Step 4 In the Local File Path field, enter the local path to the file on your computer or click Browse Local Files
to find the file on your PC.
Step 5 In the Flash File System Path field, enter the path to the flash file system or click Browse Flash to find
the directory or file in the flash file system.
Step 6 Click Upload Image. The uploading process might take a few minutes.
Step 7 You are prompted to set this image as the ASDM image. Click Yes .