
Specifications


18 Input/Output Controller Replacement Instructions
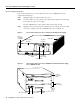
Removing and Replacing the Input/Output Controller
• The router is connected to a network supporting a file server (remote host).
• The remote host supports the TFTP application.
• You have the name or address of the remote host.
Complete the following steps to copy the router’s configuration file to a remote host:
Step 1 Make sure you are at the privileged level of the EXEC command interpreter (check the
system prompt for a pound sign [#]). If the system prompt does not have a pound sign (#),
enter enable, and then your password.
Step 2 Use the ping command to check the connection between the router and the remote host.
Step 3 Enter the show running-config command to display the router’s running configuration.
Ensure that the configuration information is complete and correct. If it is not, use the
configure command to add or modify the existing configuration. Then enter the
copy running-config startup-config command to save the retrieved configuration in
NVRAM. NVRAM uses lithium batteries to maintain its contents when disconnected
from power.
Note Refer to the appropriate software documentation listed in the “If You Need More
Information” section on page 2 for descriptions of the configuration options available for
the system and individual interfaces, and for specific configuration instructions.
Step 4 Enter the copy startup-config tftp command. The EXEC command interpreter prompts
you for the name or IP address of the remote host that is to receive the configuration file.
(The prompt might include the name or address of a default file server.)
Router# copy startup-config tftp
Remote host []?
Step 5 Enter the name or IP address of the remote host. In the following example, the name of
the remote server is servername:
Router# copy startup-config tftp
Remote host []? servername
Translating "servername"...domain server (1.1.1.1) [OK]
Step 6 The EXEC command interpreter prompts you for the name of the file that will contain the
configuration. By default, the system appends -confg to the router’s name to create the
new filename. Press Return to accept the default filename, or enter a different name for
the file before pressing Return. In the following example, the default is accepted:
Name of configuration file to write [Router-confg]?
Write file Router-confg on host 1.1.1.1? [confirm]
Writing Router-confg.....
Step 7 Before the router executes the copy process, it displays the instructions you entered for
confirmation. If the instructions are not correct, enter n (no), and then Return to stop the
process. To accept the instructions, press Return, or y, and then Return; the system
begins the copy process. In the following example, the default is accepted:
Write file Router-confg on host 1.1.1.1? [confirm]
Writing Router-confg: !!!! [ok]