ADMINISTRATION GUIDE Cisco Small Business WAP4410N Wireless-N Access Point with Power Over Ethernet
CCDE, CCSI, CCENT, Cisco Eos, Cisco HealthPresence, the Cisco logo, Cisco Lumin, Cisco Nexus, Cisco Nurse Connect, Cisco Stackpower, Cisco StadiumVision, Cisco TelePresence, Cisco WebEx, DCE, and Welcome to the Human Network are trademarks; Changing the Way We Work, Live, Play, and Learn and Cisco Store are service marks; and Access Registrar, Aironet, AsyncOS, Bringing the Meeting To You, Catalyst, CCDA, CCDP, CCIE, CCIP, CCNA, CCNP, CCSP, CCVP, Cisco, the Cisco Certified Internetwork Expert logo, Cisco IO
Contents About This Document vi Audience vi Organization vi Finding Information in PDF Files vii Finding Text in a PDF vii Finding Text in Multiple PDF Files viii Chapter 1: Introduction 1 Chapter 2: Planning Your Wireless Network 3 Network Topology 3 Roaming 3 Network Layout 4 Example of a Simple Wireless Network 4 Chapter 3: Getting to Know the Wireless-N Access Point 6 Front Panel 6 Back Panel 7 Antennas and Positions 8 Chapter 4: Connecting the WAP4410N Access Point 9
Contents Chapter 5: Setting Up the WAP4410N Wireless-N Access Point 14 Launching the Web-Based Configuration Utility 14 Navigating the Utility 15 Setup 15 Wireless 15 AP Mode 16 Administration 16 Status 16 Chapter 6: Configuring the WAP4410N Wireless-N Access Point Setting Up Your Access Point 18 18 Configuring Basic Setup Settings 19 Configuring Time Settings 22 Configuring Advanced Settings 23 Wireless 24 Configuring Basic Settings 25 Configuring Security 27 Configuring Conn
Contents Configuring Status Settings 61 Checking Local Network Status 61 Checking the Wireless Status 63 Checking System Performance 64 Appendix A: Troubleshooting and Help 66 Frequently Asked Questions 66 Windows Help 72 TCP/IP 72 Shared Resources 73 Network Neighborhood/My Network Places 73 Appendix B: Wireless Security 74 Security Precautions 74 Protecting Your Network 75 Appendix C: Upgrading Firmware 77 Appendix D: Specifications 79 Appendix E: Where to Go From Here 82
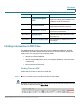
Preface About This Document This guide describes the concepts and tasks necessary to install, configure, and manage the WAP4410N Access Point. Audience The audience for this document includes wireless network users, administrators, and managers. Organization This table describes the contents of each chapter in this document. Chapter Title Description Chapter 1 Introduction Introduces the access point and its capabilities.
Preface Chapter Title Description Appendix A Troubleshooting and Help Provides solutions to problems that may occur during the installation and operation of the access point. Appendix B Wireless Security Discusses security considerations when using a wireless network. Appendix C Upgrading Firmware Provides instructions to upgrade the access point’s firmware. Appendix D Specifications Lists the formal specifications of the access point.
Preface STEP 2 Optionally, click the arrow next to the Find text box to refine your search by choosing special options such as Whole Words Only. STEP 3 Press Enter. STEP 4 Acrobat displays the first instance of the search term. STEP 5 Press Enter again to continue to more instances of the term. Finding Text in Multiple PDF Files The Search window lets you search for terms in multiple PDF files that are stored on your PC or local network. The PDF files do not need to be open.
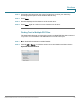
Preface STEP 3 In the Search window, complete the following steps: a. Enter the text that you want to find. b. Choose All PDF Documents in. From the drop-down box, choose Browse for Location. Then choose the location on your computer or local network, and click OK. c. If you want to specify additional search criteria, click Use Advanced Search Options, and choose the options you want. d. Click Search.
1 Introduction Thank you for choosing the Cisco WAP4410N Wireless-N Access Point with Power over Ethernet. This access point allows you to network wirelessly better than ever. An access point allows for greater range and mobility within your wireless network while also allowing you to connect the wireless network to a wired environment. The Wi-Fi Protected Setup (WPS) feature is also supported to help you simplify the setting up and configure security on a wireless network.
1 Introduction Use the instructions in this guide to help you connect the access point, set it up, and configure it to bridge your different networks. These instructions should be all you need to get the most out of the access point.
2 Planning Your Wireless Network Network Topology A wireless network is a group of computers, each equipped with one or more wireless adapters. Computers in a wireless network must be configured to share the same radio channel to talk to each other. Several computers equipped with wireless cards or adapters can communicate with each other to form an ad-hoc network without the use of an access point.
Planning Your Wireless Network Network Layout 2 Network Layout The Wireless-N Access Point has been designed for use with 802.11n, 802.11g and 802.11b products. The access point is compatible with 802.11n, 802.11g and 802.11b adapters, such as the notebook adapters for your laptop computers, PCI adapters for your desktop PCs, and USB adapters for all PCs when you want to enjoy wireless connectivity. These wireless products can also communicate with a 802.11n, 802.11g or 802.
Planning Your Wireless Network Example of a Simple Wireless Network 2 The wireless access points are connecting to a Cisco switch that provides them with power. Each access point can connect multiple wireless devices to the network. This network provides connectivity among wireless network devices and computers that have a wired connection to the switch. The switch connects to a router that connects to the Internet.
3 Getting to Know the Wireless-N Access Point This chapter describes the external features of the WAP4410N Access Point. Front Panel The access point’s front panel LEDs display information about network activity. POWER LED—(Green) Lights up and remains lit when the device is powered on. PoE LED—(Green) Lights up when the access point is powered through an Ethernet cable. WIRELESS LED—(Green) Lights up when the wireless module is active on the access point.
Getting to Know the Wireless-N Access Point Back Panel 3 Back Panel The ports of the access point are located on the back panel of the switch. RESET Button—There are two ways to reset the access point to the factory default configuration. Either press the Reset button for approximately 10 seconds or restore the defaults using the web-based utility of the access point. ETHERNET Port—Connects to Ethernet network devices, such as a switch or router that may or may not support PoE.
Getting to Know the Wireless-N Access Point Antennas and Positions 3 Antennas and Positions The WAP4410N Access Point has three detachable 2dBi omni-directional antennas. These antennas are located on the back of the device. The three antennas have a base that can rotate 90 degrees when in the standing position. The three antennas support 3X3 “multiple in, multiple out” (MIMO) diversity in wireless-N mode.
4 Connecting the WAP4410N Access Point This chapter describes how to place and connect the WAP4410N Access Point to your network. Depending on your application, you might want to set up the device first before mounting it. Placement Options You can place the WAP4410N Access Point horizontally on its rubber feet, vertically in a stand, or mount it on the wall. Desktop Option For desktop mounting, place the access point horizontally on a surface so it sits on its four rubber feet.
4 Connecting the WAP4410N Access Point Placement Options 2-15/16 STEP 3 251580 Wall mount slots Place the wall-mount slots over the screws and slide the WAP4410N Access Point down until the screws fit snugly into the wall-mount slots. 235601 Stand Option To place the access point vertically in a stand, follow these steps. STEP 1 Locate the left side panel of the WAP4410N Access Point.
Connecting the WAP4410N Access Point Connecting the WAP4410N Access Point to the Network 4 Connecting the WAP4410N Access Point to the Network You can connect the WAP4410N Access Point to your network in one of the following ways: • Using a PoE switch • Using a standard switch WAP4410N Wireless-N Access Point with Power Over Internet 11
Connecting the WAP4410N Access Point Connecting the WAP4410N Access Point to the Network 4 Using a PoE Switch to Connect the WAP4410N Access Point to the Network To connect the WAP4410N Access Point to your network using a PoE switch, simply connect the Ethernet port of the access point to a PoE port on the PoE switch. The LEDs on the front panel light up as soon as the WAP4410N Access Point powers on.
Connecting the WAP4410N Access Point Connecting the WAP4410N Access Point to the Network 4 Using a Standard Switch to Connect the WAP4410N Access Point to the Network To connect the WAP4410N Access Point to your network using a standard switch, follow these steps. STEP 1 Use the supplied Ethernet cable to connect the Ethernet port of the access point to an Ethernet port on the switch. STEP 2 Connect the included power adapter to the Power port of the WAP4410N Access Point.
5 Setting Up the WAP4410N Wireless-N Access Point The WAP4410N Access Point works right out of the box with the default settings. However, you can change these settings to suit your needs by accessing the access point using a web-based configuration utility. NOTE: Make sure you have Enabled TCP/IP on your computers prior to proceeding. Computers communicate over the network with this protocol.
Setting Up the WAP4410N Wireless-N Access Point Navigating the Utility STEP 6 5 Click Log in. Navigating the Utility The web-based utility consists of the following main screens: • Setup • Wireless • Security Monitor • Administration • Status Setup This screen allows you to configure the host name and IP address settings and to set the time. This screen consists of the following screens: • Basic Setup—Configures the host name and IP address settings for this access point.
Setting Up the WAP4410N Wireless-N Access Point Navigating the Utility 5 • VLAN & QoS—Configures the 802.1Q VLAN and the Quality of Service (QoS) settings. • Advanced Wireless Settings—Configures the access point’s more advanced wireless settings (for example, load balancing and channel bandwidth). AP Mode This screen allows you to select the mode of operation for the access point. The default mode is Access Point. Administration This screen allows you to manage the access point.
Setting Up the WAP4410N Wireless-N Access Point Navigating the Utility • 5 System Performance—Displays the current traffic statistics of this access point for both wireless and LAN ports.
6 Configuring the WAP4410N Wireless-N Access Point This chapter describes how to configure your WAP4410N Access Point using the web-based configuration utility.
Configuring the WAP4410N Wireless-N Access Point Setting Up Your Access Point 6 Configuring Basic Setup Settings The Setup > Basic Setup page displays the general settings of the access point.
Configuring the WAP4410N Wireless-N Access Point Setting Up Your Access Point 6 Configuring Device Setup Settings To configure the device setup settings of the access point, follow these steps: STEP 1 Click Setup > Basic Setup. STEP 2 In the Device Setup section, enter the following information: • Host Name—Enter the host name of the access point. You can use the host name to access the web-based configuration utility through the network if a record of the host name exists in your DNS server.
Configuring the WAP4410N Wireless-N Access Point Setting Up Your Access Point STEP 3 STEP 4 STEP 5 6 If you select Static IP Address from the IP Settings drop-down menu, enter the following information in the IP4V section of the screen: • IP Address—Enter a unique IP address for your access point. The default IP address is 192.168.1.245. • Subnet Mask—Enter the same subnet mask used in your network. The default is 255.255.255.0. • Default Gateway—Enter the IP address of your Gateway or Router.
Configuring the WAP4410N Wireless-N Access Point Setting Up Your Access Point 6 Configuring Time Settings The Time screen displays the time settings of the access point. By setting up the correct time, you can help your network administrator search the system log to identify problems. To configure the time settings for the access point, follow these steps: STEP 1 Click Setup > Time. STEP 2 To manually configure the time settings: a. Select Manually. b. In the Date field enter the date. c.
Configuring the WAP4410N Wireless-N Access Point Setting Up Your Access Point 6 d. To get the time from a local NTP server, in the User Defined NTP Server field, click Enabled. e. In the NTP Server IP field, enter the IP address of the NTP server. STEP 4 • User Defined NTP Server—Enable this option if you have set up local NTP server. Default is Disabled. • NTP Server IP—Enter the IP address of user defined NTP Server. Click Save.
Configuring the WAP4410N Wireless-N Access Point Wireless 6 To configure the advanced setup settings of the access point, follow these steps: STEP 1 Click Setup > Advanced. STEP 2 To enable Bonjour, click Enabled. STEP 3 To enable HTTP redirect settings: a. In the HTTP Redirect Settings field, click Enabled. b. In the URL field, enter the URL to redirect the HTTP settings to. STEP 4 To enable 802.1X supplicant settings: a. In the 802.1x Supplicant field, click Enabled. b.
Configuring the WAP4410N Wireless-N Access Point Wireless 6 Configuring Basic Settings The Wireless > Basic Settings page displays the basic wireless network settings. To configure the basic attributes for this access point, follow these steps: STEP 1 Click Wireless > Basic Settings. STEP 2 From the Wireless Network Mode field, select one of the following modes: • Disabled—Disables wireless connectivity completely. This might be useful during system maintenance.
Configuring the WAP4410N Wireless-N Access Point Wireless STEP 3 6 From the Wireless Channel drop-down menu, select the appropriate channel to be used among your access point and client devices. The default is channel 6. You can also select Auto from the Wireless Channel drop-down menu so that your access point selects the channel with the lowest amount of wireless interference while the system is powering up. Automatic channel selection starts when you click Save.
Configuring the WAP4410N Wireless-N Access Point Wireless 6 Configuring Security The Wireless > Security page displays the wireless security settings of the access point. To configure the wireless security settings of the access point, follow these steps: STEP 1 Click Wireless > Security. STEP 2 To configure wireless isolation between SSIDs: a. From the Select SSID drop-down menu select an SSID. b. To isolate wireless clients from each other, click Enabled. Otherwise, click Disabled.
Configuring the WAP4410N Wireless-N Access Point Wireless STEP 4 STEP 5 6 To enable wireless security, from the Security Mode drop-down menu, select one of the following security modes and provide the required information, as described in the sections below.
Configuring the WAP4410N Wireless-N Access Point Wireless 6 Configuring WAP-Personal Security Wi-Fi Protected Access (WPA) Personal (WAP-Personal) is a security standard stronger than WEP encryption and forward compatible with IEEE 802.11e. WPAPersonal is also known as WAP-PSK. To enable wireless WPA-Personal security, follow these steps: STEP 1 Click Wireless > Security. STEP 2 From the Security Mode drop-down menu, select WAP-Personal.
Configuring the WAP4410N Wireless-N Access Point Wireless 6 Configuring WAP2-Personal Security This security mode supports the WPA2-Personal protocol. To enable wireless WPA2-Personal security, follow these steps: STEP 1 Click Wireless > Security. STEP 2 From the Security Mode drop-down menu, select WAP2-Personal. STEP 3 To enable wireless isolation within the SSID, click Enabled.
Configuring the WAP4410N Wireless-N Access Point Wireless 6 Configuring WPA2-Personal Mixed Security This security mode supports the transition from WPA-Personal to WPA2-Personal. You can have client devices that use either WPA-Personal or WPA2-Personal. The access point will automatically choose the encryption algorithm used by each client device. To enable wireless WPA2-Personal Mixed security, follow these steps: STEP 1 Click Wireless > Security.
Configuring the WAP4410N Wireless-N Access Point Wireless 6 Configuring WPA-Enterprise Security The WPA-Enterprise mode features WPA used in coordination with a RADIUS server for client authentication. ! CAUTION Use this mode only when a RADIUS server is connected to the access point. To enable wireless WPA-Enterprise security, follow these steps: STEP 1 Click Wireless > Security. STEP 2 From the Security Mode drop-down menu, select WPA-Enterprise.
Configuring the WAP4410N Wireless-N Access Point Wireless STEP 5 6 • Primary/Backup Shared Secret—Enter the Shared Secret key used by the access point and RADIUS server. The backup Radius server is used only if the primary server is unavailable. • WPA Algorithms—WPA offers two encryption methods, TKIP and AES for data encryption. Select one of these algorithms from the drop-down menu. The default is TKIP.
Configuring the WAP4410N Wireless-N Access Point Wireless STEP 1 Click Wireless > Security. STEP 2 From the Security Mode drop-down menu, select WPA2-Enterprise. STEP 3 To enable wireless isolation within the SSID, click Enabled. STEP 4 Provide the following information: STEP 5 6 • Primary/Backup RADIUS Server—Enter the IP address of the RADIUS server. The Backup Radius server is used only if the primary server is unavailable.
Configuring the WAP4410N Wireless-N Access Point Wireless 6 Configuring WPA2-Enterprise Mixed Security This security mode supports the transition from WPA-Enterprise to WPA2Enterprise. You can have client devices that use either WPA-Enterprise or WPA2Enterprise. The access point will automatically choose the encryption algorithm used by each client device. ! CAUTION Use this mode only when a RADIUS server is connected to the access point.
Configuring the WAP4410N Wireless-N Access Point Wireless STEP 4 STEP 5 6 Provide the following information: • Primary/Backup RADIUS Server—Enter the IP address of the RADIUS server. The Backup Radius server is used only if the primary server is unavailable. • Primary/Backup RADIUS Server Port—Enter the port number used by the RADIUS server. The default is 1812. The backup Radius server is used only if the primary server is unavailable.
Configuring the WAP4410N Wireless-N Access Point Wireless 6 Configuring RADIUS Security This option features a RADIUS server for client authentication. ! CAUTION Use this mode only when a RADIUS server is connected to the access point. To enable wireless Remote Authentication Dial-In User Service (RADIUS) security, follow these steps: STEP 1 Click Wireless > Security. STEP 2 From the Security Mode drop-down menu, select RADIUS. STEP 3 To enable wireless isolation within the SSID, click Enabled.
Configuring the WAP4410N Wireless-N Access Point Wireless STEP 4 STEP 5 6 Provide the following information: • Primary/Backup RADIUS Server—Enter the IP address of the RADIUS server. The Backup Radius server is used only if the primary server is unavailable. • Primary/Backup RADIUS Server Port—Enter the port number used by the RADIUS server. The default is 1812. The backup Radius server is used only if the primary server is unavailable.
Configuring the WAP4410N Wireless-N Access Point Wireless 6 To enable wireless Wired Equivalent Privacy (WEP) security, follow these steps: STEP 1 Click Wireless > Security. STEP 2 From the Security Mode drop-down menu, select WEP. STEP 3 To enable wireless isolation within the SSID, click Enabled. STEP 4 Provide the following information: STEP 5 • Authentication Type—Choose Open System or Shared Key as the 802.11 authentication type. The default is Open System.
Configuring the WAP4410N Wireless-N Access Point Wireless 6 Disabling Connection Control You can use the Wireless > Connection Control Settings page to disable connection control. . To disable wireless connection control for your access point, follow these steps: STEP 1 Click Wireless > Connection Control. STEP 2 Click Disabled. STEP 3 Click Save.
Configuring the WAP4410N Wireless-N Access Point Wireless 6 Enabling Local Connection Control To enable local connection control for your access point, follow these steps: STEP 1 Click Wireless > Connection Control. STEP 2 Click Local. There are two ways to control the connection (association) of wireless client devices. You can either prevent specific devices from connecting to the access point, or you can allow only specific client devices to connect to the access point.
Configuring the WAP4410N Wireless-N Access Point Wireless 6 Enabling RADIUS Connection Control To enable RADIUS connection control for your access point, follow these steps: STEP 1 Click Wireless > Connection Control. STEP 2 Click RADIUS. STEP 3 Provide the following information: • Primary/Backup RADIUS Server—Enter the IP address of the RADIUS server. The Backup Radius server is used only if the primary server is unavailable.
Configuring the WAP4410N Wireless-N Access Point Wireless STEP 4 6 Click Save. Configuring Wi-Fi Protected Setup The Wireless > Wi-Fi Protected Setup page allows you to configure the Wi-Fi Protected Setup (WPS) settings for the access point. WPS was designed to help standardize and simplify ways of setting up and configuring security on a wireless network by typing a PIN (numeric code) or pushing a button (Push-Button Configuration, or PBC).
Configuring the WAP4410N Wireless-N Access Point Wireless STEP 3 6 Click Save. Configuring VLAN & QoS This Wireless > VLAN & QoS page allows you to configure the Qos and VLAN settings for the access point. The Quality of Service (QoS) feature allows you to specify priorities for different types of traffic. Lower priority traffic will be slowed down to allow greater throughput or less delay for high priority traffic. The 802.1Q VLAN feature allows traffic from different sources to be segmented.
Configuring the WAP4410N Wireless-N Access Point Wireless 6 To configure the wireless VLAN and QoS settings of the access point, follow these steps: STEP 1 Click Wireless > VLAN & QoS. STEP 2 To configure VLAN settings: NOTE You can enable this feature only if the hubs/switches on your network support the VLAN standard. a. To enable VLAN, click Enabled. b. Provide the following information: STEP 3 • Default VLAN ID—Enter the default VLAN ID.
Configuring the WAP4410N Wireless-N Access Point Wireless 6 Configuring Advanced Settings The Wireless > Advanced page allows you to configure the advanced and load balancing settings for the access point. The Wireless-N adopts several new parameters to adjust the channel bandwidth, and guard intervals to improve the data rate dynamically. We recommend you let your access point automatically adjust the parameters for maximum data throughput.
Configuring the WAP4410N Wireless-N Access Point Wireless 6 • Channel Bandwidth—Select the channel bandwidth for Wireless-N connections. If you choose 20MHz, only the 20MHz channel is used. If you choose 40MHz, Wireless-N connections use the 40MHz channel, but Wireless-B and Wireless-G connections still use the 20MHz channel. The default is 20MHz. • Guard Interval—Select a guard interval for Wireless-N connections. The three options are Auto, Short (400ns) and Long (800ns). The default is Auto.
Configuring the WAP4410N Wireless-N Access Point Wireless STEP 3 STEP 4 6 In the Load Balancing section, configure the following advanced parameters for this access point: • Load Balancing—Enable this feature to spread work between two or more access points to get optimal resource utilization, throughput, or response time. • Utilization Threshold—Enter the desired utilization value for the SSID. • Current Utilization—Display the current value of the utilization. Click Save.
Configuring the WAP4410N Wireless-N Access Point Configuring the AP Mode 6 Configuring the AP Mode The AP Mode > AP Mode Settings page displays the AP mode settings for the access point.
Configuring the WAP4410N Wireless-N Access Point Configuring the AP Mode 6 To configure the AP mode of the access point, follow these steps: STEP 1 Click AP Mode > AP Mode. STEP 2 Configure the AP Mode settings. • Access point—Select this option to let the device operate as a normal access point.
Configuring the WAP4410N Wireless-N Access Point Administration • STEP 3 6 Wireless Monitor—Allows the access point to detect unauthorized (rogue) access points on your network. - No Security—Check this check box to identify any access point operating with security disabled as a rogue access point. - Not in Legal AP List—Check this check box to flag any access point not listed in the Legal AP List as a rouge access point. If you check this check box, you must maintain the Legal AP List.
Configuring the WAP4410N Wireless-N Access Point Administration 6 Configuring Administration Settings The Administration > Management page allows you to configure the password, Web Access, and SNMP settings. You should change the username/password that controls access to the access point’s web-based utility to prevent unauthorized access. To change the management settings of the access point, follow these steps: STEP 1 Click Administration > Management. STEP 2 Configure the management settings.
Configuring the WAP4410N Wireless-N Access Point Administration • • Web Access—Enable HTTPS to increase the security on accessing the web-based utility. Once enabled, users need to use https:// when accessing the Web-based Utility. - Web HTTPS Access—Enable HTTPS if needed. The default is Disabled. - Wireless Web Access—Allow or deny wireless clients to access webbased utility. The default is Enabled.
Configuring the WAP4410N Wireless-N Access Point Administration STEP 3 6 Click Save. Configuring Administration Log The Administration > Log page configures the log settings and provides alerts for particular events. To configure the log settings of the access point, follow these steps: STEP 1 Click Administration > Log. STEP 2 Configure the log settings. • Log—Allows you to have logs that keep track of the access point’s activities.
Configuring the WAP4410N Wireless-N Access Point Administration • - E-Mail Address for Logs—Enter the e-mail address that will receive logs. - Log Queue Length—Enter the length of the log that will be e-mailed to you. The default is 20 entries. - Log Time Threshold—Enter how often the log will be emailed to you. The default is 600 seconds (10 minutes). Syslog Notification—Syslog is a standard protocol used to capture information about network activity.
Configuring the WAP4410N Wireless-N Access Point Administration 6 Diagnosing Access Point Problems The Administration > Diagnostics page allows you to use the access point to perform a ping. The activity can be useful in solving network problems. To perform a ping test to help diagnose problems with the access point, follow these steps: STEP 1 Click Administration > Diagnostics. STEP 2 Set up the ping test: • IP or URL Address—Enter the IP address you want to ping.
Configuring the WAP4410N Wireless-N Access Point Administration 6 Restoring Factory Default Settings The Administration > Factory Default page allows you to restore the access point’s factory default settings. To restore factory default settings of the access point, follow these steps: STEP 1 Open the Restore Factory Default page (Administration > Factory Default). STEP 2 Restore the Factory Default settings. Restoring Factory Defaults Note any custom settings before you restore the factory defaults.
Configuring the WAP4410N Wireless-N Access Point Administration 6 Upgrading the Firmware The Administration > Firmware Upgrade page allows you to upgrade the access point’s firmware. ! CAUTION Do not upgrade the firmware unless you are experiencing problems with the access point or the new firmware has a feature you want to use. ! CAUTION Upgrading the firmware deletes all custom settings.
Configuring the WAP4410N Wireless-N Access Point Administration STEP 2 6 Upgrade the access point’s firmware: a. Download the firmware upgrade file from: www.cisco.com/en/US/products/ps10052/index.html b. Extract the firmware upgrade file. c. Click Administration > Firmware Upgrade. d. In the File field, enter the location of the firmware upgrade file or click the Browse button to locate the file. e. Click Upgrade and follow the on-screen instructions.
Configuring the WAP4410N Wireless-N Access Point Administration 6 To reboot the access point, follow these steps: STEP 1 Click Administration > Reboot. STEP 2 In the Device Reboot field, click Yes. STEP 3 Click Save. Managing the Access Point’s Configuration The Administration > Config Management page allows you to create a backup configuration file or upload a configuration file to the access point.
Configuring the WAP4410N Wireless-N Access Point Configuring Status Settings 6 To manage the configuration for the access point, follow these steps: STEP 1 Click Administration > Config Management. STEP 2 To create a backup configuration file, click Save Configuration to File and follow the on-screen instructions. STEP 3 To restore the configuration of your access point: a. Make sure that the configuration file for the access point is on your computer. b.
Configuring the WAP4410N Wireless-N Access Point Configuring Status Settings 6 To check local network status, follow these steps: STEP 1 Click Status > Local Network. This page displays the status information of your access point: • • STEP 2 Information - Hardware Version—The version of the access point’s current hardware. - Software Version—The version of the access point’s current software. - Local MAC Address—The MAC address of the access point’s local network interface.
Configuring the WAP4410N Wireless-N Access Point Configuring Status Settings 6 Checking the Wireless Status The Status > Wireless page displays the access point’s current status information for the wireless network. To check wireless network status of the access point, follow these steps: STEP 1 Click Status > Wireless. This page displays the status of the wireless network: • Mode—The access point’s wireless network mode. • Channel—The access point’s channel setting.
Configuring the WAP4410N Wireless-N Access Point Configuring Status Settings STEP 2 6 To update the wireless status information, click Refresh. Checking System Performance The Status > System Performance page displays the access point’s status information for its current settings and data transmissions. To check system performance of the access point, follow these steps: STEP 1 Click Status > Systems Performance.
Configuring the WAP4410N Wireless-N Access Point Configuring Status Settings • STEP 2 6 - Packets Sent—The number of packets sent. - Bytes Received—The number of bytes received. - Bytes Sent—The number of bytes sent. - Error Packets Received—The number of error packets received. - Drop Received Packets—The number of packets being dropped after they were received. Wireless—The statistics for the wireless network. - Name—The wireless network/SSID the statistics refer to.
A Troubleshooting and Help This appendix provides solutions to problems that might occur during the installation and operation of the WAP4410N Access Point. Read the descriptions below to help solve your problems. If you can't find an answer here, check the Cisco.com website at www.cisco.com/en/US/support/ tsd_cisco_small_business_support_center_contacts.html. Frequently Asked Questions Q. Can the access point act as my DHCP Server? No.
A Troubleshooting and Help standard states a maximum data transfer rate of 11Mbps and an operating frequency of 2.4 GHz. Q. What is the IEEE 802.11g standard? It is one of the IEEE standards for wireless networks. The 802.11g standard allows wireless networking hardware from different manufacturers to communicate, provided that the hardware complies with the 802.11g standard. The 802.11g standard states a maximum data transfer rate of 54Mbps and an operating frequency of 2.4GHz. Q. What is the IEEE 802.
A Troubleshooting and Help • Power Management Q.
Troubleshooting and Help A Q. What is roaming? Roaming is the ability of a portable computer user to communicate continuously while moving freely throughout an area greater than that covered by a single access point. Before using the roaming function, the workstation must make sure that it is set to the same channel number as the access point of the dedicated coverage area. To achieve true seamless connectivity, the wireless LAN must incorporate a number of different functions.
Troubleshooting and Help A Q. What is Spread Spectrum? Spread Spectrum technology is a wideband radio frequency technique developed by the military for use in reliable, secure, mission-critical communications systems. It is designed to trade off bandwidth efficiency for reliability, integrity, and security.
Troubleshooting and Help A Q. What is WEP? WEP is Wired Equivalent Privacy, a data privacy mechanism based on a 40-bit shared-key algorithm, as described in the IEEE 802.11 standard. Q. What is a MAC Address? The Media Access Control (MAC) address is a unique number assigned by the manufacturer to any Ethernet networking device, such as a network adapter, that allows the network to identify it at the hardware level. For all practical purposes, this number is usually permanent.
Troubleshooting and Help A Q. What is the maximum number of users the access point can handle? No more than 63, but this depends on the volume of data and may be fewer if many users create a large amount of network traffic. Q. How do I configure multiple WAP4410N access points with the same configuration? STEP 1 Configure one access point and then save the configuration file through its web page.
Troubleshooting and Help A Shared Resources If you wish to share printers, folder, or files over your network, Windows Help provides complete instructions on utilizing shared resources. Network Neighborhood/My Network Places Other PCs on your network will appear under Network Neighborhood or My Network Places (depending upon the version of Windows you're running). Windows Help provides complete instructions on adding PCs to your network.
B Wireless Security This appendix lists safety precautions that you should keep in mind when setting up or using your wireless network. Security Precautions The following is a list of security precautions to take to protect your wireless network: • Change the default SSID. • Disable SSID broadcasting. • Change the default password for the Administrator account. • Change the SSID periodically. • Use the highest encryption algorithm possible. Use WPA if it is available.
B Wireless Security Protecting Your Network Wireless networks are easy to find. Hackers know that to join a wireless network, wireless networking products first listen for “beacon messages.” These messages can be easily decrypted and contain much of the network’s information, such as the network’s SSID (Service Set Identifier). Here are steps you can take to protect your network: • Change the administrator’s password regularly.
B Wireless Security • MAC Addresses. Enable MAC address filtering. MAC address filtering allows you to provide access to only those wireless nodes with certain MAC addresses. This makes it harder for a hacker to access your network with a random MAC address. • WEP Encryption. WEP is often looked upon as a cure-all for wireless security concerns. This is overstating WEP’s ability. Again, this can only provide enough security to make a hacker’s job more difficult.
C Upgrading Firmware The Administration > Firmware Upgrade page allows you to upgrade the access point’s firmware. ! CAUTION Do not upgrade the firmware unless you are experiencing problems with the access point or the new firmware has a feature you want to use. ! CAUTION Upgrading the firmware deletes all custom settings.
C Upgrading Firmware To upgrade the firmware of the access point, follow these steps: STEP 1 Back up the configuration settings of your access points (see “Managing the Access Point’s Configuration” on page 60). STEP 2 Upgrade the access point’s firmware: a. Download the firmware upgrade file from: www.cisco.com/en/US/products/ps10052/index.html b. Extract the firmware upgrade file. c. Click Administration > Firmware Upgrade. d.
D Specifications This appendix details the specifications of the Cisco WAP4410N Wireless-N Access Point with Power Over Ethernet. WAP4410N Specifications Model WAP4410N Standards Draft IEEE802.11n, IEEE802.11g, IEEE802.11b, IEEE802.3, IEEE802.3u, IEEE802.3af (Power Over Ethernet), 802.1x (Security Authentication), 802.
D Specifications WAP4410N Specifications (Continued) Multiple BSSID Supports up to 4 BSSIDs allowing creating of multiple virtual access points VLANs Supports 802.1q - up to 4 VLANs SSID to VLAN mapping Supports mapping of SSIDs to VLANs to securely separate workgroups across wireless and wired domains 802.1x Supplicant Supports 802.1x Supplicant on the Ethernet port to allow the AP to authenticate itself to the network Spanning Tree Supports 802.
D Specifications WAP4410N Specifications (Continued) Rogue AP Detection New access points detected, which have not been categorized as known, are logged as rogue access points. This allows the administrator to control unapproved devices in the network. QoS 4 queues, 802.1p VLAN priority, WMM Wireless priority, Mapping of 802.1p priority to WMM priority to maintain end-to-end QoS Spec/Modulation Radio and Modulation Type: 802.
E Where to Go From Here Cisco provides a wide range of resources to help you and your customer obtain the full benefits of the Cisco WAP4410N Wireless-N Access Point with Power Over Ethernet. Product Resources Resource Location Technical Documentation www.cisco.com/en/US/products/ps10047/ tsd_products_support_series_home.html Firmware Downloads www.cisco.com/en/US/products/ps10052/index.html Customer Support www.cisco.com/en/US/support/ tsd_cisco_small_business_support_center_contacts.
E Where to Go From Here Related Documentation For hardware setup for the Cisco WAP4410N access point, see the Cisco Small Business Model WAP4410N Wireless-N Access Point with Power Over Ethernet Quick Start Guide.