Cisco 7600 Series Router Supervisor Engine and Route Switch Processor Guide January 2008 Americas Headquarters Cisco Systems, Inc. 170 West Tasman Drive San Jose, CA 95134-1706 USA http://www.cisco.
THE SPECIFICATIONS AND INFORMATION REGARDING THE PRODUCTS IN THIS MANUAL ARE SUBJECT TO CHANGE WITHOUT NOTICE. ALL STATEMENTS, INFORMATION, AND RECOMMENDATIONS IN THIS MANUAL ARE BELIEVED TO BE ACCURATE BUT ARE PRESENTED WITHOUT WARRANTY OF ANY KIND, EXPRESS OR IMPLIED. USERS MUST TAKE FULL RESPONSIBILITY FOR THEIR APPLICATION OF ANY PRODUCTS.
C O N T E N T S Preface vii Contents vii Document History vii Document Organization viii Document Conventions viii Warning Definition ix Related Documentation ix Obtaining Documentation, Obtaining Support, and Security Guidelines CHAPTER 1 Cisco 7600 Product Overview x 1-1 Cisco 7600 Series Routers 1-1 Supported Hardware 1-2 Features 1-3 Port Addresses 1-5 Physical Interface Addresses MAC Addresses 1-6 CHAPTER 2 1-5 Route Switch Processors and Supervisor Engines Overview 2-1 2-2 Rout
Contents Supervisor Engine 2 CHAPTER 2-14 Installing and Configuring Route Switch Processors and Supervisor Engines 3 Preparing for Installation or Removal 3-1 Safety Precautions for Module Installation and Removal Preventing Electrostatic Discharge Damage 3-2 Tools Required for Module Installation 3-3 Determining Module Location 3-2 3-3 Installing a Supervisor Engine or Route Switch Processor 3-4 Removing a Supervisor Engine or Route Switch Processor 3-7 Hot Swapping (OIR) Modules 3-1 3-8 R
Contents Identifying a Rollover Cable B-7 DB-9 Adapter (for Connecting to a PC) B-8 DB-25 Adapter (for Connecting to a Terminal) B-9 Modem Adapter B-9 Console Port Mode 2 Signaling and Pinouts (Sup2 Only) B-10 RJ-45 Connector B-10 Fiber-Optic Connectors B-12 SC Connectors B-12 MT-RJ Connectors B-13 LC Connectors B-14 Cleaning the Fiber-Optic Connectors B-15 LX/LH GBIC and MMF Cable Considerations B-16 Patch Cord B-16 Patch Cord Configuration Example B-16 Patch Cord Installation B-17 INDEX Cisco 7600 S
Contents Cisco 7600 Series Router Supervisor Engine and Route Switch Processor Guide vi OL-10100-04
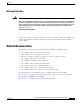
Preface This guide describes the route switch processors and supervisor engines supported by Cisco 7600 series routers. It also provides technical specifications for these modules and describes cable and connector specifications. Caution Only trained and qualified service personnel (as defined in IEC 60950 and AS/NZS3260) should install, replace, or service the equipment described in this document.
Preface Document Organization Table 1 Document History (continued) Revision Date Change Summary OL-10100-02 February 2007 Added information about the Route Switch Processor 720 (a new supervisor engine) introduced in Cisco IOS Release 12.2SRB. OL-10100-01 May 2006 Initial release of the document.
Preface Related Documentation Warning Definition Warning IMPORTANT SAFETY INSTRUCTIONS This warning symbol means danger. You are in a situation that could cause bodily injury. Before you work on any equipment, be aware of the hazards involved with electrical circuitry and be familiar with standard practices for preventing accidents. Use the statement number provided at the end of each warning to locate its translation in the translated safety warnings that accompanied this device.
Preface Obtaining Documentation, Obtaining Support, and Security Guidelines Obtaining Documentation, Obtaining Support, and Security Guidelines For information on obtaining documentation, obtaining support, providing documentation feedback, security guidelines, and also recommended aliases and general Cisco documents, see the monthly What’s New in Cisco Product Documentation, which also lists all new and revised Cisco technical documentation, at: http://www.cisco.com/en/US/docs/general/whatsnew/whatsnew.
CH A P T E R 1 Cisco 7600 Product Overview This chapter provides an overview of the Cisco 7600 series routers and describes interface and port addresses on the routers. It contains the following sections: Note • Cisco 7600 Series Routers, page 1-1 • Port Addresses, page 1-5 This document does not contain instructions for installing the router. For instructions on how to install the router, see the Cisco 7600 Series Router Installation Guide.
Chapter 1 Cisco 7600 Product Overview Cisco 7600 Series Routers Supported Hardware Cisco 7600 series routers support the following hardware: • A supervisor engine (such as the Sup720, Sup32, or Sup2) or Route Switch Processor (RSP720) with modular Gigabit Ethernet uplink ports. Each supervisor engine or RSP has two integrated daughter cards: a policy feature card (PFC) and a multilayer switch feature card (MSFC). See the “Overview” section on page 2-2 for details.
Chapter 1 Cisco 7600 Product Overview Cisco 7600 Series Routers Features Table 1-1 lists some key features of the Cisco 7600 series routers. Table 1-1 Cisco 7600 Series Routers Key Features Feature Description Performance and configuration For detailed information about the features supported on Cisco 7600 series routers, see the Cisco 7600 Series Router Cisco IOS Software Configuration Guide for the version of software being used on the router.
Chapter 1 Cisco 7600 Product Overview Cisco 7600 Series Routers Table 1-1 Feature Memory components Cisco 7600 Series Routers Key Features (continued) Description • Electrically erasable programmable read-only memory (EEPROM) on the supervisor engine or route switch processor stores module-specific information, such as the serial number, part number, controller type, hardware revision, configuration information, and other details unique to each module. • NVRAM for storing configuration information.
Chapter 1 Cisco 7600 Product Overview Port Addresses Port Addresses Each port (or interface) in the Cisco 7600 series router has several different types of addresses. The physical interface address is the actual physical location (slot and port) of the interface connector within the chassis. The system software uses the physical addresses to control activity within the router and to display status information.
Chapter 1 Cisco 7600 Product Overview Port Addresses Figure 1-1 Cisco 7609 Router Port Address Examples FAN STATUS AT CO E R PW OL E PW OL NS NS EM CO ST 1 EM SY US ST WS-X6K-SUP2-2GE ST SY US R MG MT SE T RE MT SE MG RE T CONSOLE CONSOLE NK 2 3 4 LI NK LI NK 3 NK 3 LI NK LI 4 SE NK LI IER M RE RR CA AR AL RE K T RR CA AR AL LIN T SE SE T RE T T SE SE RE RE NK LI IER M RR CA AR AL NK LI 4 NK 4 NK NK 4 LI 4 LI CONSOLE PORT MODE LI
CH A P T E R 2 Route Switch Processors and Supervisor Engines This chapter describes the route switch processors and supervisor engines supported on Cisco 7600 series routers and provides instructions for performing basic tasks on the modules.
Chapter 2 Route Switch Processors and Supervisor Engines Overview Overview The supervisor engine or route switch processor (RSP) is a module that is installed in one of the card slots in the router. The supervisor engine or RSP provides switching and local and remote management for the router and also contains the uplink ports for the router. Both types of modules (supervisor engine and RSP) perform the same functions in the router.
Chapter 2 Route Switch Processors and Supervisor Engines Overview Table 2-1 lists the RSP and supervisor engine configurations supported on Cisco 7600 series routers. Specific combinations of processors and modules may not be supported in your chassis. See the release notes for your software version for information about supported combinations.
Chapter 2 Route Switch Processors and Supervisor Engines Overview Table 2-1 Route Switch Processor and Supervisor Engine Configurations (continued) Product Number Note Description See the “QoS on the RSP720-10GE” section on page 2-10 for more information about the QoS port architecture on the uplink ports.
Chapter 2 Route Switch Processors and Supervisor Engines Overview Table 2-1 Route Switch Processor and Supervisor Engine Configurations (continued) Product Number WS-SUP720-3B WS-SUP720-3BXL Note Description • Two Gigabit Ethernet uplink ports: port 1 supports a 1-Gbps SFP module; port 2 is configurable with either a 1-Gbps SFP module or a 10/100/1000-Mbps RJ-45 connector • Integrated 720-Gbps switch fabric • PFC3B and MSFC3 with 2-MB NVRAM, 512-MB DRAM, and 64-MB bootflash (see note below) •
Chapter 2 Route Switch Processors and Supervisor Engines Route Switch Processor 720 Table 2-1 Route Switch Processor and Supervisor Engine Configurations (continued) Product Number WS-X6K-S2-MSFC2 WS-X6K-S2U-MSFC2 WS-X6K-S2-PFC2 WS-X6500-SFM2 Note Description • Two dual-port 1000BASE-X GBIC uplinks, 16-MB bootflash, 128-MB DRAM on supervisor engine and 128 MB on MSFC2 • PFC2 and MSFC2 • Fabric enabled to support optional switch fabric module (SFM2) • QoS port architecture (Rx/Tx): 1p1q4t/1p2
Chapter 2 Route Switch Processors and Supervisor Engines Route Switch Processor 720 Figure 2-1 Route Switch Processor 720 (RSP720-3C-GE) Front Panel STATUS LEDs CompactFlash Type II slots LINK LEDs 191402 RSP720-3C-GE RSP 720 WITH INTEGRATED SWITCH FABRIC/3C-GE Disk LEDs Gigabit Ethernet uplink port CONSOLE port 10/100/1000 uplink port RSP720 Features The RSP720 provides several new features and enhancements, which are summarized here.
Chapter 2 Route Switch Processors and Supervisor Engines RSP720 with 10GE Uplink Ports RSP720 with 10GE Uplink Ports Cisco IOS Release 12.2SRC introduces a new RSP720 with 10 Gigabit Ethernet (GE) uplink ports (RSP720-10GE). The Cisco 7600 RSP720-10GE consists of a full-size board and two integrated daughter cards: an MSFC4 and a PFC. The RSP720-10GE has an integrated switch fabric that interconnects all of the line cards in the router with point-to-point 20-Gbps full-duplex serial channels.
Chapter 2 Route Switch Processors and Supervisor Engines RSP720 with 10GE Uplink Ports – 10 gigabits per second (Gbps) on both 10GE ports – 1 Gbps on all three 1GE ports – 16 Gbps backplane forwarding When all five uplink ports are operational, the total bandwidth for uplink traffic is 20 Gbps (20 GE). • The RSP720-10GE provides flexible memory options like the RSP720. The RSP720-10GE ships with 2-GB memory on the route processor (RP) and 1-GB memory on the switch processor (SP).
Chapter 2 Route Switch Processors and Supervisor Engines RSP720 with 10GE Uplink Ports • High-availability features such as NonStop Forwarding with Stateful Switchover (NSF/SSO) and In-Service Software Upgrade (ISSU) are not supported. Only Route Processor Redundancy (RPR) mode is supported. • The uplinks on the standby RSP720-10GE are not active. This restriction exists because the uplink ports must perform lookups on the active RSP, which is not possible in RPR mode.
Chapter 2 Route Switch Processors and Supervisor Engines RSP720 with 10GE Uplink Ports • In 10GE only mode, eight queues are available for QoS. Use the mls qos supervisor 10g-only command to enable 10GE only mode.
Chapter 2 Route Switch Processors and Supervisor Engines Supervisor Engine 720 and Supervisor Engine 32 Supervisor Engine 720 and Supervisor Engine 32 The following figures (Figure 2-3, Figure 2-4, and Figure 2-5) show the front panel on the Supervisor Engine 720 (Sup720) and Supervisor Engine 32 (Sup32). The tables that follow describe the controls and LEDs on the RSP720, Sup720, and Sup32. For information on the Supervisor Engine 2 controls and LEDs, see the “Supervisor Engine 2” section on page 2-14.
Chapter 2 Route Switch Processors and Supervisor Engines Supervisor Engine 720 and Supervisor Engine 32 Table 2-2 RSP720, RSP720-10GE, Sup720, and Sup32 Front-Panel Controls Component Description Status LEDs Indicate the status of various functions on the module (see Table 2-3). Reset Button Restarts the router. Use a ballpoint pen tip or other small, pointed object to access the Reset button. Not all modules have a Reset button. CompactFlash Disk Slots One or two slots for flash memory cards.
Chapter 2 Route Switch Processors and Supervisor Engines Supervisor Engine 2 Table 2-3 RSP720, Sup720, and Sup32 LEDs (continued) LED Color Description ACTIVE Green The supervisor engine or RSP is operational and active. Orange The supervisor engine or RSP is powering up or is in standby mode. Green Sufficient power is available for all modules installed in the router. Orange The supervisor engine or RSP is powering up or has minor hardware problems. Red Major hardware problem.
Chapter 2 Route Switch Processors and Supervisor Engines Supervisor Engine 2 Table 2-4 Supervisor Engine 2 Front-Panel Controls Component Description Status LEDs Indicate the status of various functions on the module (see Table 2-5). Reset Button Restarts the router. Use a ballpoint pen tip or other small, pointed object to access the Reset button. Console Port Provides access to the router either locally (with a console terminal) or remotely (with a modem).
Chapter 2 Route Switch Processors and Supervisor Engines Supervisor Engine 2 Table 2-5 Supervisor Engine 2 LEDs (continued) LED 1 SYSTEM Color Description Green All chassis environmental monitors are reporting OK. Orange The power supply or power supply fan failed. Incompatible power supplies are installed. The redundant clock failed. One VTT2 module has failed or the VTT module temperature minor threshold has been exceeded.
CH A P T E R 3 Installing and Configuring Route Switch Processors and Supervisor Engines This chapter describes how to install and configure a route switch processor or supervisor engine. It also provides instructions for connecting to the console and uplink ports on the module.
Chapter 3 Installing and Configuring Route Switch Processors and Supervisor Engines Preparing for Installation or Removal Safety Precautions for Module Installation and Removal Be sure to observe the following warnings and safety precautions when you work on the router. Warning Hazardous voltage or energy is present on the backplane when the system is operating. Use caution when servicing.
Chapter 3 Installing and Configuring Route Switch Processors and Supervisor Engines Determining Module Location Caution • Avoid contact between the printed circuit boards and clothing. The wrist strap only protects components from ESD voltages on the body; ESD voltages on clothing can still cause damage. • Never attempt to remove the printed circuit board from the metal carrier. Periodically check the resistance value of the antistatic strap.
Chapter 3 Installing and Configuring Route Switch Processors and Supervisor Engines Installing a Supervisor Engine or Route Switch Processor Table 3-1 Supervisor Engine and Route Switch Processor Slot Assignments (continued) Module Supervisor Engine 32 Supervisor Engine 2 Slot Assignments • Slots 1 and 2 (4-slot chassis) • Slots 5 and 6 (6-slot and 9-slot chassis) • Slots 7 and 8 (13-slot chassis) • Not supported in the 3-slot chassis • Slots 1 and 2 (all chassis) • Not supported in the 4-
Chapter 3 Installing and Configuring Route Switch Processors and Supervisor Engines Installing a Supervisor Engine or Route Switch Processor R 4 T R PO Captive installation screws 45168 Ejector lever Step 4 TX X TIV E 3 T R PO C AR AL RIE AR R M R X TX AC R X R PO R T 2 C AR AL RIE AR R M R C AR AL RIE AR R M 1 T R PO TX X TIV AC TX AC TX X X R ES R K 4 LIN K 3 LIN 2 LIN K 1 LIN K C AR 4 2 AL RIE AR R M ET S U AT ST 4 PORT OC-12 POS MM TX X TIV X TX R AC
Chapter 3 Installing and Configuring Route Switch Processors and Supervisor Engines Installing a Supervisor Engine or Route Switch Processor Step 5 Carefully slide the module into the slot until the EMI gasket on the module makes contact with the module in the adjacent slot and both ejector levers have closed to approximately 45 degrees with respect to the module faceplate. (See Figure 3-3.
Chapter 3 Installing and Configuring Route Switch Processors and Supervisor Engines Removing a Supervisor Engine or Route Switch Processor Removing a Supervisor Engine or Route Switch Processor Before you remove a supervisor engine or route switch processor (RSP) from the router, you should first save the current configuration using the write {host file | network | terminal} command. This step saves time when bringing the module back online.
Chapter 3 Installing and Configuring Route Switch Processors and Supervisor Engines Hot Swapping (OIR) Modules Hot Swapping (OIR) Modules Cisco 7600 series routers provide a feature that allows you to remove and replace a redundant supervisor engine or route switch processor (and other redundant cards) without powering down the router. This feature, called hot swapping or online insertion and removal (OIR), allows you to remove and replace a redundant module without disrupting router operation.
Chapter 3 Installing and Configuring Route Switch Processors and Supervisor Engines Connecting to the Console Port Connecting to the Console Port The console port allows you to access the router either locally (with a console terminal) or remotely (with a modem). The console port is located on the front panel of the route switch processor or supervisor engine (see Figure 3-4). This section provides information about how to connect to the console port on a route switch processor or supervisor engine.
Chapter 3 Installing and Configuring Route Switch Processors and Supervisor Engines Connecting to the Uplink Ports Supervisor Engine 2 In addition to the above configuration requirements, note that with a Supervisor Engine 2 you can use two types of console cables to connect a terminal to the console port.
Chapter 3 Installing and Configuring Route Switch Processors and Supervisor Engines Connecting to the Uplink Ports Table 3-2 Route Switch Processor and Supervisor Engine Uplink Ports Module Uplink Ports Route Switch Processor 720 Two 10/100/1000 BASE-T Gigabit Ethernet uplink ports: RSP720-10GE • Port 1 requires that a 1-Gbps SFP module be installed. • Port 2 supports either a 1-Gbps SFP module or a 10/100/1000-Mbps RJ-45 connector.
Chapter 3 Installing and Configuring Route Switch Processors and Supervisor Engines Using Flash Memory Cards Note • If two RSPs or supervisor engines are installed, the uplink ports on the redundant (standby) module are active and can be used for normal traffic like any other ports in the chassis. • In Cisco IOS Release 12.2SRC, the uplink ports on a standby RSP720-10GE are not active and cannot be used for normal traffic.
Chapter 3 Installing and Configuring Route Switch Processors and Supervisor Engines Using Flash Memory Cards Table 3-3 lists the Cisco product numbers of memory cards supported on Cisco 7600 supervisor engines and route switch processors.
Chapter 3 Installing and Configuring Route Switch Processors and Supervisor Engines Power Management and Environmental Monitoring Removing a Flash Memory Card Caution Do not remove a flash memory card while its LED light is on or the file may become corrupted. To remove a flash memory card, follow these steps: Step 1 Make sure that the Disk LED is off (no operations are in progress). Step 2 Press the ejector button to disconnect the memory card from the connector at the back of the slot.
A P P E N D I X A Technical Specifications This appendix provides the technical specifications for the Cisco 7600 route switch processors and supervisor engines. Module Specifications Table A-1 lists the environmental and physical specifications for the Cisco 7600 route switch processors (RSPs) and supervisor engines.
Appendix A Technical Specifications Regulatory Standards Compliance Cisco 7600 Series Router Supervisor Engine and Route Switch Processor Guide A-2 OL-10100-04
A P P E N D I X B Cable and Connector Specifications This appendix lists the cable and connector specifications for the Cisco 7600 route switch processors (RSPs) and supervisor engines.
Appendix B Cable and Connector Specifications Uplink Port Transceiver Modules Uplink Port Transceiver Modules Transceiver modules that plug into the front panel of the supervisor engine or route switch processor provide the uplink ports for the router. Several types of transceiver modules are available: small form-factor pluggable (SFP) modules, X2 modules, XENPAK modules, and Gigabit Interface Converter (GBIC) modules. Table B-1 lists the orderable part numbers for supported transceiver modules.
Appendix B Cable and Connector Specifications Uplink Port Transceiver Modules Table B-1 Uplink Port Transceiver Modules (continued) Supervisor Engine or RSP Transceiver Module Part Numbers Supervisor Engine 32 10GE Uplink Ports (WS-SUP32-10GE-3B only): XENPAK-10GB-CX4 XENPAK-10GB-SR XENPAK-10GB-LX4 XENPAK-10GB-LR XENPAK-10GB-ER 1GE Uplink Ports (WS-SUP32-GE-3B): GLC-SX-MM GLC-LH-SM GLC-ZX-SM GLC-T Supervisor Engine 2 1000BASE-X GBIC modules, which are preinstalled 1GE Uplink Ports and Cabling Spe
Appendix B Cable and Connector Specifications Uplink Port Transceiver Modules Table B-2 1GE SFP Transceiver Modules (continued) Product ID Description SFP-GE-S 1000BASE-SX SFP transceiver module for MMF, 850-nm wavelength, extended operating temperature range and DOM support, LC connector SFP-GE-L 1000BASE-LX/LH SFP transceiver module for MMF and SMF, 1300-nm wavelength, extended operating temperature range and DOM support, LC connector SFP-GE-T 1000BASE-T SFP transceiver module for Category 5,
Appendix B Cable and Connector Specifications Uplink Port Transceiver Modules 10GE Uplink Ports and Cabling Specifications Table B-4 describes the X2 and XENPAK transceiver modules used for the 10GE uplink ports on the RSP720-10GE and WS-SUP32-10GE-3B. Table B-5 provides cabling specifications.
Appendix B Cable and Connector Specifications Console Port Cabling Specifications and Pinouts 2. Requires 5 dB 1550 nm fixed loss attenuator for < 20 km. Attenuator is available as a spare. The part number is WS-X6K-5DB-ATT=. 3. Links longer than 30 km are considered engineered links. GBIC Module Cabling Specifications Table B-6 provides cabling specifications for the 1000BASE-X interfaces on the Gigabit Interface Converter (GBIC) modules installed in the Supervisor Engine 2.
Appendix B Cable and Connector Specifications Console Port Cabling Specifications and Pinouts The accessories kit that is shipped with your router contains the necessary cable and adapters to connect a terminal or modem to the front-panel console port. Table B-7 EIA/TIA-232 Transmission Speed Versus Distance Rate (bps) Distance (feet) Distance (meters) 2400 200 60 4800 100 30 9600 50 15 19,200 25 7.6 38,400 12 3.7 56,000 8.6 2.
Appendix B Cable and Connector Specifications Console Port Cabling Specifications and Pinouts Figure B-1 Identifying a Rollover Cable Pin 1 and pin 8 should be the same color Pin 1 H3824 Pin 8 DB-9 Adapter (for Connecting to a PC) Use the RJ-45-to-RJ-45 rollover cable and RJ-45-to-DB-9 female DTE adapter (labeled “Terminal”) to connect the console port to a PC running terminal emulation software.
Appendix B Cable and Connector Specifications Console Port Cabling Specifications and Pinouts DB-25 Adapter (for Connecting to a Terminal) Use the RJ-45-to-RJ-45 rollover cable and RJ-45-to-DB-25 female DTE adapter (labeled “Terminal”) to connect the console port to a terminal. Table B-9 lists the pinouts for the asynchronous serial console port, the RJ-45-to-RJ-45 rollover cable, and the RJ-45-to-DB-25 female DTE adapter.
Appendix B Cable and Connector Specifications RJ-45 Connector Console Port Mode 2 Signaling and Pinouts (Sup2 Only) Table B-11 lists the pinouts for the Supervisor Engine 2 console port mode switch in mode 2 (switch in the out position). In this mode, you can connect a terminal to the supervisor engine using a Catalyst 5000 family Supervisor Engine III console cable and adapter (not provided). For instructions, see “Supervisor Engine 2” in the “Connecting a Terminal” section on page 3-9.
Appendix B Cable and Connector Specifications RJ-45 Connector RJ-45 Interface Cable Connector 48129 Figure B-2 Table B-12 10/100BASE-T Crossover Cable Pinout (MDI-X) Side 1 Pin (Signal) Side 2 Pin (Signal) 1 (RD+) 3 (TD+) 2 (RD–) 6 (TD–) 3 (TD+) 1 (RD+) 6 (TD–) 2 (RD–) 4 (Not used) 4 (Not used) 5 (Not used) 5 (Not used) 7 (Not used) 7 (Not used) 8 (Not used) 8 (Not used) Twisted-Pair Crossover 10/100BASE-T Cable Schematic Switch Switch 1 RD+ 1 RD+ 2 RD- 2 RD- 3 TD+ 3 TD+ 6 T
Appendix B Cable and Connector Specifications Fiber-Optic Connectors Table B-13 1000BASE-T Crossover Cable Pinout (MDI-X) Side 1 Pin (Signal) Side 2 Pin (Signal) 1 (TP0+) 3 (TP1+) 2 (TP0–) 6 (TP1–) 3 (TP1+) 1 (TP0+) 6 (TP1–) 2 (TP1–) 4 (TP2+) 7 (TP3+) 5 (TP2–) 8 (TP3–) 7 (TP3+) 4 (TP2+) 8 (TP3–) 5 (TP2–) Twisted-Pair Crossover 1000BASE-T Cable Schematic Switch Switch 1 TPO+ 1 TP0+ 2 TPO- 2 TP0- 3 TP1+ 3 TP1+ 6 TP1- 6 TP1- 4 TP2+ 4 TP2+ 5 TP2- 5 TP2- 7 TP3+ 7 TP3+ 8 TP3
Appendix B Cable and Connector Specifications Fiber-Optic Connectors SC Optical Connector H2214 Figure B-5 Always make sure that you insert the connector completely into the socket. This action is especially important when you are making a connection between a module and a long distance (1.24 miles [2 kilometers]) or a suspected highly attenuated network.
Appendix B Cable and Connector Specifications Fiber-Optic Connectors Make sure that you insert the connector completely into the socket. This action is especially important when you are making a connection between a module and a long distance (1.24 miles [2 kilometers]) or a suspected highly attenuated network. If the LINK LED on the supervisor engine or route switch processor does not light, try removing the network cable plug and reinserting it firmly into the module socket.
Appendix B Cable and Connector Specifications Fiber-Optic Connectors Cleaning the Fiber-Optic Connectors Fiber-optic connectors are used to connect two fibers together. When these connectors are used in a communications system, proper connection is critical. Fiber-optic connectors differ from electrical connectors or microwave connectors. In a fiber-optic system, light is transmitted through an extremely small fiber core. Because fiber cores are often 62.
Appendix B Cable and Connector Specifications LX/LH GBIC and MMF Cable Considerations LX/LH GBIC and MMF Cable Considerations The following sections describe the things you should consider if you are using a Supervisor Engine 2 with a long wavelength/long haul (LX/LH) GBIC with 62.5-micron diameter MMF cable. Patch Cord When using the long wavelength/long haul (LX/LH) GBIC with 62.5-micron diameter MMF on links that span more than 984 feet (300 meters), a mode-conditioning patch cord is required.
Appendix B Cable and Connector Specifications LX/LH GBIC and MMF Cable Considerations Patch Cord Installation Warning Invisible laser radiation may be emitted from disconnected fibers or connectors. Do not stare into beams or view directly with optical instruments. Statement 1051 Plug the end of the patch cord labeled “To Equipment” into the GBIC (see Figure B-9). Plug the end labeled “To Cable Plant” into the patch panel. The patch cord is 9.
Appendix B Cable and Connector Specifications LX/LH GBIC and MMF Cable Considerations Cisco 7600 Series Router Supervisor Engine and Route Switch Processor Guide B-18 OL-10100-04
I N D EX category 6 static electricity caution Symbols B-10 Cisco 7600 series router 3-13 features 1-3 overview 1-1 commands A copy running-config accessories kit, console port write 3-9, B-7 Sup Eng 720, Sup Eng 32 front-panel slot DB-9 B-9 B-8 modem installing 3-13 removing 3-14 modem 3-10 terminal to supervisor engine or RSP 1-6 physical interface to console port 1-5 cleaning fiber optic LC B RJ-45 3-6, 3-7 SC 1-4 B-15 B-14 MT-RJ bootflash 3-10 connectors 3-6, 3
Index D G DB-25 adapter GBICs, connecting to B-9 DB-9 adapter Gigabit Ethernet cables B-8 DISK LED, Sup Eng 720, Sup Eng 32 DRAM, default 3-10 B-4, B-5, B-6 2-14 1-4 H hot swapping E Cisco 7600 series router components EEPROM modules 1-4, 1-6 EIA/TIA-232 transmission speeds environmental monitoring excessive link spans 3-8 3-14 environmental specifications (table) ESD, preventing damage 3-8 supervisor engines and RSPs B-7 1-4 3-2 B-16 A-1 I installing flash memory cards module
Index LINK LED Sup Eng 2 2-16 Sup Eng 720, Sup Eng 32 link spans, excessive LX/LH GBIC 2-14 PCMCIA flash file system 1-4 PCMCIA LED, Sup Eng 2 2-16 PCMCIA slot, description 2-13, 3-12 physical interface addresses B-16 1-5 physical specifications (table) B-16 port addresses 1-5 port addresses (figure) M A-1 1-6 port mode switch, console port MAC address port numbers 1-5, 1-6 managing the router memory, default 3-2 PWR MGMT LED 1-4 modem, connecting to the supervisor engine or RS
Index front panel (figure) uplink ports front panel controls 2-7 LEDs (table) 3-11 Route Switch Processor 720 (RSP720-10GE) CompactFlash support RSP720-10GE 2-13 uplink ports 3-11 USB ports 3-12 2-13 Supervisor Engine 720 (Sup720) 2-8 RSP720-10GE, QoS CompactFlash support 2-11 S 2-12 front panel controls 2-13 slot numbers 3-11 SWITCH LOAD LED, Sup Eng 2 1-5 specifications, cabling Sup Eng 2 A-1 2-16 Sup Eng 720, Sup Eng 32 STATUS LED Sup Eng 2 2-16 SYSTEM LED B-1 specifica