
user manual


Table Of Contents
- User Guide for Internetwork Performance Monitor
- Contents
- Preface
- Overview of IPM
- Getting Started With IPM
- Using IPM to Measure Network Performance
- Measuring Network Performance for DHCP
- Measuring Network Performance for DLSw
- Measuring Network Performance for DNS
- Measuring Network Performance for HTTP
- Measuring Network Performance for FTP
- Measuring Network Performance for IP
- Measuring Network Performance for SNA
- Measuring Network Performance for TCP
- Measuring Network Performance for UDP
- Measuring Network Performance for Enhanced UDP
- Modifying IPM Components
- Working With Source Devices
- Working With Target Devices
- Working With Operations
- Working With Collectors
- Adding Components Using Seed Files
- Changing IP Addresses
- Setting the Baseline
- Setting IPM Database Preferences
- Setting SNMP Timeout and Retry Environment Variables
- Setting New IPM Server Process Timeout Values
- Setting the DISPLAY Variable in Solaris
- Backing Up or Restoring the IPM Database
- NVRAM Settings
- Managed Source Interface Settings
- Changing Administrative Password
- Changing IPM Database Password
- Working With Message Log Window
- Working With IPM From the CiscoWorks Homepage
- Accessing IPM Data From the CiscoWorks Homepage
- Viewing IPM Server Information
- Importing Devices From Device and Credential Repository
- Downloading the IPM Client
- Viewing Configuration Information
- Viewing Latency Data
- Viewing Jitter Data
- Viewing HTTP Data
- Accessing Software Updates and Additional Information
- IPM FAQs and Troubleshooting Tips
- IPM Command Reference
- SA Agent Feature Mapping
- Glossary
- Index
3-34
User Guide for Internetwork Performance Monitor
OL-11291-01
Chapter 3 Using IPM to Measure Network Performance
Measuring Network Performance for TCP
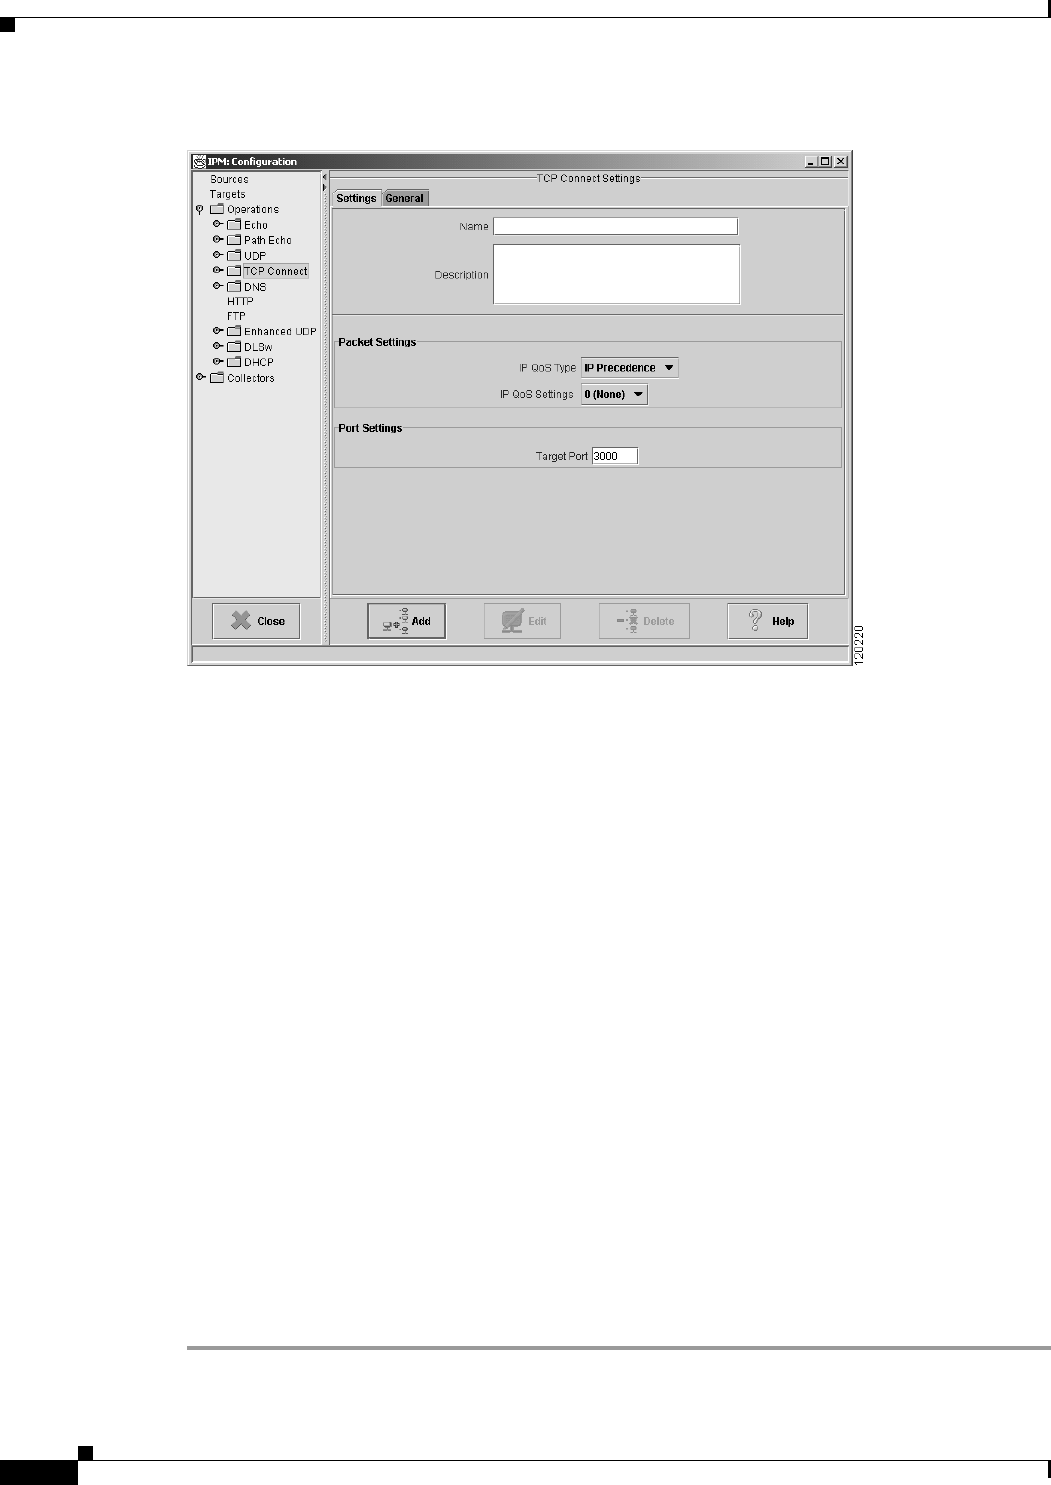
Figure 3-20 TCP Operation Configuration Window
Step 4 In the Name field, enter a descriptive name to assign to the operation. In the Description field, you can
enter a brief description of the operation, including its purpose.
Step 5 Select the IP QoS Type as IP Precedence or DCSP. The IP QoS Settings values change based on your IP
QoS Type selection.
• If you have selected IP QoS Type as IP Precedence, select the IP QoS Settings value from the
drop-down. The value you select sets the priority for the HTTP request packet. The default setting
is 0 (no priority). This option sets the ToS bits in the IP packet.
• If you have selected IP QoS Type as DSCP, select the desired IP QoS Settings value from the
drop-down. The value you select defines the packet priority and is based on the DSCP RFC
standards.
Step 6 In the Target Port field, enter the TCP port number for the target device to use when sending a response
to a connection request. Valid values are 1 to 65535. The default setting is 3000.
You can specify any port number, well known or otherwise, on any IP host, Cisco or non-Cisco, as long
as someone is listening on that port on the target.
• If this target uses the SA Agent, make sure you configured it as a Cisco SAA Responder target on
the Target Configuration window.
• If you mistakenly configured it as an IP target, and you specify a Target Port that is not well known
(that is if you specify a port number greater than 1024), IPM considers the target an IP device rather
than an SA Agent device. In such as case, IPM does not enable the SA Agent Control protocol. As
a result, the collector cannot connect to the target and no data is collected.
Step 7 Click Add.
IPM adds the newly defined operation to the IPM database.
Step 8 Click Close to close the Configuration window.