
user manual


8-34
Cisco Aironet 1200 Series Access Point Software Configuration Guide
OL-2159-05
Chapter 8 Security Setup
Setting Up Administrator Authorization
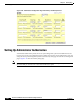
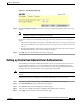
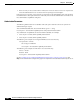
Figure 8-16 User Management Window
Step 4
Enter a username and password for the new user.
Step 5 Select the capabilities you want to assign to the new user. Capabilities include:
• Write—The user can change system settings. When you assign Write capability to a user, the user
also automatically receives Admin capability.
• SNMP—Designates the username as an SNMP community name. SNMP management stations can
use this SNMP community name to perform SNMP operations. The User Manager does not have to
be enabled for SNMP communities to operate correctly.
Note Selecting the SNMP check box does not grant SNMP write capability to the user; it only
designates the username as an SNMP community name. SNMP operations performed under
the username are restricted according to the username’s other assigned capabilities.
• Ident—The user can change the access point's identity settings (IP address and SSID). When you
assign Ident capability to a user, the user also automatically receives Write and Admin capabilities.
• Firmware—The user can update the access point's firmware. When you assign Firmware capability
to a user, the user also automatically receives Write and Admin capabilities.
• Admin—The user can view most system screens. To allow the user to view all system screens and
make changes to the system, select Write capability.
Step 6 Click Apply. The User Management window disappears, and the new user appears in the user list on the
User Information page.
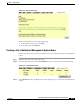
Step 7 Click the browser’s Back button to return to the Security Setup page. On the Security Setup page, click
User Manager. The User Manager Setup page appears. Figure 8-17 shows the User Manager Setup
page.