
user manual


8-39
User Guide for Cisco Digital Media Manager 5.4.x
OL-15762-05
Chapter 8 Authentication and Federated Identity
Procedures
Step 10
Prepare your
Shibboleth config
for use by
Cisco DMS.
a.
Open /opt/shibboleth-idp/metadata/opt/shibboleth-idp/metadata/Idp-metadata.xml
for editing.
b.
Delete lines 9 through 11.
<Extensions>
<shibmd:Scope regexp="false"><EXAMPLE>.<COM></shibmd:Scope>
</Extensions>
c.
Delete lines 67 through 69.
<Extensions>
<shibmd:Scope regexp="false"><EXAMPLE>.<COM></shibmd:Scope>
</Extensions>
d.
Find this string:
</IDPSSODescriptor>
e.
Enter this new binding immediately before </IDPSSODescriptor>.
<SingleSignOnService Binding="urn:oasis:names:tc:SAML:2.0:bindings:SOAP"
Location="https://<YOUR_SHIBBOLETH_SERVER_FQDN>:8443/idp/profile/SAML2/SOAP/ECP
" />
f.
Append :8443 to the end of every FQDN in this file.
g.
Save your edited copy of this file to your local system.
Be sure to use your Shibboleth hostname in the local filename. For example, you might name
this local copy idp-shibboleth.xml.
Step 11
Cause
Cisco DMS to
trust Shibboleth.
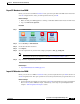
See the “Import IdP Metadata into DMM” topic.
Step 12
Deploy
Shibboleth.
cp /opt/shibboleth-idp/war/idp.war /usr/local/tomcat/webapps/
Step 13
Test your work.
a.
Restart Tomcat.
b.
Check for the “OK” message at http://<hostname>:8080/idp/profile/Status.
Step 14
Stop. You have completed this procedure.