
user manual


Table Of Contents
- Cisco Aironet 1300 Series Wireless Outdoor Access Point/Bridge Hardware Installation Guide
- Contents
- Preface
- Overview
- Installation Overview
- Mounting Overview
- Troubleshooting Autonomous Access Points and Bridges
- Checking the LEDs on an Autonomous Access Point/Bridge
- Power Injector
- Checking Power
- Checking Basic Configuration Settings
- Antenna Alignment
- Running the Carrier Busy Test
- Running the Ping or Link Test
- Resetting the Autonomous Access Point/Bridge to the Default Configuration
- Reloading the Access Point/Bridge Image
- Obtaining the Autonomous Access Point/Bridge Image File
- Connecting to the Console Serial Port
- Obtaining the TFTP Server Software
- Troubleshooting Lightweight Access Points
- Translated Safety Warnings
- Declarations of Conformity and Regulatory Information
- Manufacturers Federal Communication Commission Declaration of Conformity Statement
- VCCI Statement for Japan
- Industry Canada
- European Community, Switzerland, Norway, Iceland, and Liechtenstein
- Declaration of Conformity for RF Exposure
- Guidelines for Operating Cisco Aironet Access Points and Bridges in Japan
- Administrative Rules for Cisco Aironet Access Points and Bridges in Taiwan
- Operation of Cisco Aironet Access Points in Brazil
- Declaration of Conformity Statements
- Access Point Specifications
- Channels and Maximum Power Levels
- Console Serial Cable Pinouts
- Priming Lightweight Access Points Prior to Deployment
- Configuring DHCP Option 43 for Lightweight Access Points
- Load-Dump Protection for Transportation Vehicles
- Glossary
- Index
4-4
Cisco Aironet 1300 Series Wireless Outdoor Access Point/Bridge Hardware Installation Guide
OL-5048-06
Chapter 4 Troubleshooting Autonomous Access Points and Bridges
Checking the LEDs on an Autonomous Access Point/Bridge
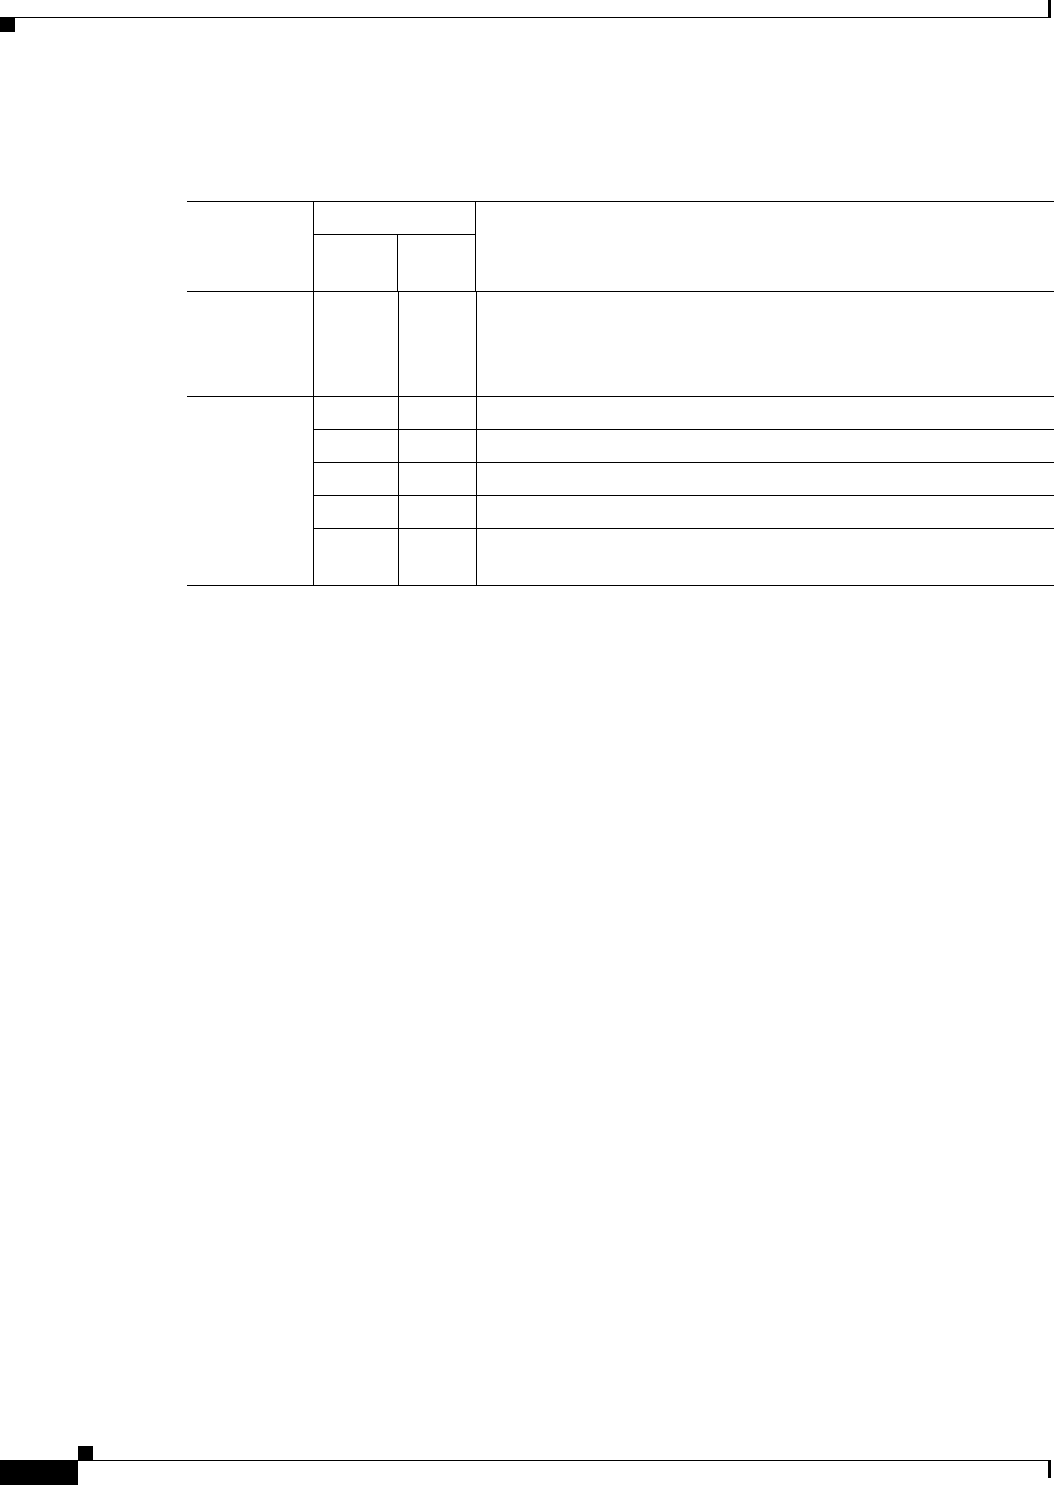
The LED blinking error codes are described in Table 4-2.
Table 4-2 LED Blinking Error Codes on an Autonomous Access Point/Bridge
LED
Blinking Codes
Description
First
Digit
Second
Digit
Ethernet 2 1 Ethernet cable problem—verify that the cable is properly connected
and not defective. This error might also indicate a problem with the
Ethernet link. If the cable is connected properly and not defective,
contact technical support for assistance.
Radio 1 2 Radio not detected—contact technical support for assistance.
1 3 Radio not ready—contact technical support for assistance.
1 4 Radio did not start—contact technical support for assistance.
1 5 Radio failure—contact technical support for assistance.
1 6 Radio did not flash its firmware—contact technical support for
assistance.