
User Manual


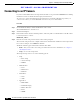
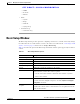
Table Of Contents
- Contents
- Preface
- Introduction
- Basic Set Up
- Viewing Live Video
- Advanced Viewing Set Up
- Managing an IP Camera through the Web
- Connecting to an IP Camera
- Basic Setup Window
- Advanced Setup Window
- IP Filter Window
- Users Window
- Maintenance Window
- Firmware Window
- Video Window
- Audio Window
- Mail Window
- Motion Detection Window
- Event Window
- SNMP Window
- DDNS Window
- I/O Ports Window
- RS-485 Window
- System Window
- Image Window
- Network Window
- Syslog & Log Window
- View Video Log Window
- Troubleshooting
- Streaming Video/Audio Solution
- Index

EFT DRAFT—CISCO CONFIDENTIAL
4-3
Cisco Video Surveillance System IP Camera User Guide
OL-14220-01
Chapter 4 Advanced Viewing Set Up
Making Video Available from the Internet
This feature is normally called port forwarding or virtual servers. The port forwarding/virtual server
entry tells the router or gateway that incoming TCP connections on port 1024 should be passed to the IP
camera. If necessary, refer to the user manual for your router gateway for further details.
Note The Port for the Port Forwarding / Virtual Server entry is the Secondary Port number that is specified on
the Network screen of the IP camera.
IP Camera Setup
The IP camera configuration does not need to be changed unless:
• You wish to change the port number from the default value (1024).
• You wish to use the DDNS (Dynamic DNS) feature of the IP camera.
HTTP Port Configuration
Normally, HTTP (web) connections use port 80. Because the IP camera uses HTTP, but port 80 is likely
to be used by a web server, you can use a different port for the IP camera. This port is called the
alternative port.
The default alternative port is 1024. If you prefer to use a different port number, you can specify the port
number on the IP camera Advanced Setup window. (For detailed information about the Advanced Setup
window, see the “Advanced Setup Window” section on page 5-6.)
Note users need to know this port number to connect and view live video, so you must inform users of the
correct port number.
DDNS (Dynamic DNS)
Many internet connections use a dynamic IP address, where the IP address is allocated whenever the
Internet connection is established. In this situation, other Internet users do not know the IP address so
they cannot establish a connection.
DDNS is designed to solve this problem by allowing users to connect to your LAN using a domain name
instead of an IP address.
To use DDNS, follow these steps:
Procedure
Step 1 Register for the DDNS service with a supported DDNS service provider.
You can then apply for, and be allocated, a Domain Name.
Step 2 Enter and save the correct DDNS settings on the IP camera DDNS window.
After you configure these settings, operation is automatic:
• The IP camera automatically contacts the DDNS server whenever it detects that the IP address has
changed and inform the DDNS server of the new IP address.