
User Manual

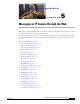
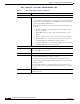
Table Of Contents
- Contents
- Preface
- Introduction
- Basic Set Up
- Viewing Live Video
- Advanced Viewing Set Up
- Managing an IP Camera through the Web
- Connecting to an IP Camera
- Basic Setup Window
- Advanced Setup Window
- IP Filter Window
- Users Window
- Maintenance Window
- Firmware Window
- Video Window
- Audio Window
- Mail Window
- Motion Detection Window
- Event Window
- SNMP Window
- DDNS Window
- I/O Ports Window
- RS-485 Window
- System Window
- Image Window
- Network Window
- Syslog & Log Window
- View Video Log Window
- Troubleshooting
- Streaming Video/Audio Solution
- Index

CHAPTER
EFT DRAFT—CISCO CONFIDENTIAL
4-1
Cisco Video Surveillance System IP Camera User Guide
OL-14220-01
4
Advanced Viewing Set Up
This Chapter provides information about the optional settings and features for viewing video via the IP
camera. This information is intended for the camera Administrator.
This chapter includes these topics:
• Adjusting the Video Image, page 4-1
• Making Video Available from the Internet, page 4-2
• Viewing Live Video via the Internet, page 4-4
• Motion Detection Alerts, page 4-4
Adjusting the Video Image
If necessary, the IP camera administrator can adjust the video image. To do so, follow these steps:
Procedure
Step 1 Connect to the web-based interface of the IP camera.
For instructions, see Chapter 5, “Managing an IP Camera through the Web.”
Step 2 Choose Video.
The Video screen appears.
Step 3 Configure the options that are described in Table 4-1 as needed, and then save your changes.
Table 4-1 Video Screen Options
Option Description
MPEG-4 Settings
Resolution Select the desired video resolution format. The default resolution is 720 x
480.
Video Quality Control
• Constant Bit Rate—Select the desired bit rate. The default value is 1.2
Mbps.
• Fixed Quality—Select the desired option. The default fixed quality is
Normal.