
User Manual
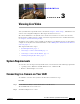
Table Of Contents
- Contents
- Preface
- Introduction
- Basic Set Up
- Viewing Live Video
- Advanced Viewing Set Up
- Managing an IP Camera through the Web
- Connecting to an IP Camera
- Basic Setup Window
- Advanced Setup Window
- IP Filter Window
- Users Window
- Maintenance Window
- Firmware Window
- Video Window
- Audio Window
- Mail Window
- Motion Detection Window
- Event Window
- SNMP Window
- DDNS Window
- I/O Ports Window
- RS-485 Window
- System Window
- Image Window
- Network Window
- Syslog & Log Window
- View Video Log Window
- Troubleshooting
- Streaming Video/Audio Solution
- Index

EFT DRAFT—CISCO CONFIDENTIAL
2-2
Cisco Video Surveillance System IP Camera User Guide
OL-14220-01
Chapter 2 Basic Set Up
Performing the Initial Set Up of the IP Camera
Step 2 Connect the LAN Cable
Connect the IP camera to a 10/100BaseT hub or switch using a standard LAN cable.
Note This step disables the wireless interface on the camera because only one interface can be active.
The LAN cable should be connected or disconnected only when the camera is powered off.
Attaching or detaching the LAN cable while the camera is powered on does not switch the
interface between wired and wireless.
Step 3 Power on the camera.
Connect the a 12Vpower adapter to the IP camera and power up.
Step 4 Check the LEDs:
• The Ready LED turns on briefly then starts blinking. It blinks during start up, which takes 15 to 20
seconds. After startup completes, the Ready LED should remain on.
• The Network LED should be on.
For more information about the LEDs on the camera, see the“Physical Details” section on page 1-3.
Performing the Initial Set Up of the IP Camera
You perform the initial set up of the IP camera using the supplied Windows-based setup wizard. This
program can locate the IP camera even if its IP address is invalid for your network. You can then
configure the IP camera with appropriate TCP/IP settings for your LAN.
Subsequent administration can be performed through your web browser, as explained in Chapter 5,
“Managing an IP Camera through the Web.”
To perform the initial set up of the IP camera, follow these steps:
Procedure
Step 1 Put the supplied CD-ROM into the disk drive.
If the setup program does not start automatically, navigate to the root folder on the disk and click
wvc2300.exe.
Step 2 In the Welcome window, click Click Here to Start.
Step 3 In the License Agreement window, read the license agreement and click Next if you agree with the terms
and want to continue with the installation.
If you do not agree with the terms, click Cancel to stop the installation.
Step 4 Follow the instructions in the Connection 1 window to connect a network cable to your network router
or switch and click Next.
Step 5 Follow the instructions in the Connection 2 window to connect the other end of the network cable to the
Ethernet port on the camera and click Next.
Step 6 Follow the instructions in the Connection3 window to connect the included power adapter to the power
port on the camera and plug the other end of the cable into an electrical outlet, then click Next.