
CompactFlash Adapter Installation Guide
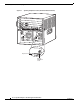
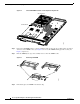
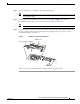
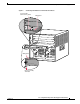
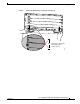
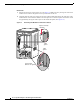
Table Of Contents
- Cisco CompactFlash Adapter for Bootflash Upgrade Installation Note
- Contents
- Safety Overview
- Installing the SP Bootflash Memory Upgrade Kit
- Removing and Installing the CompactFlash in the CompactFlash Adapter
- Attaching Your ESD Grounding Strap
- Module Handling Guidelines
- Safety Warning Translations
- Obtaining Documentation
- Documentation Feedback
- Cisco Product Security Overview
- Product Alerts and Field Notices
- Obtaining Technical Assistance
- Obtaining Additional Publications and Information

16
Cisco CompactFlash Adapter for Bootflash Upgrade Installation Note
78-17277-04
Installing the SP Bootflash Memory Upgrade Kit
Reinstalling the Supervisor Engine 720
Caution During this procedure, wear grounding wrist straps and handle modules by the carrier edges only to
avoid ESD damage to the card.
To reinstall the Supervisor Engine 720 in the chassis, follow these steps:
Step 1 Attach an ESD grounding strap to your wrist and to ground. (If you are unsure about the correct way to
attach an ESD grounding strap, see the “Attaching Your ESD Grounding Strap” section on page 24 for
instructions.)
Step 2 Verify that the captive installation screws are tightened on all modules installed in the chassis. This
action assures that the EMI gaskets on all modules are fully compressed in order to maximize the
opening space for the removed module.
Note If the captive installation screws are loose, the EMI gaskets on the installed modules will push
adjacent modules toward the open slot, reducing the opening size and making it difficult to
install the removed module.
Step 3 Fully open both ejector levers on the supervisor engine that is being installed. (See Figure 7.)