Catalyst 4900 Series Switch Installation Guide August 2008 Americas Headquarters Cisco Systems, Inc. 170 West Tasman Drive San Jose, CA 95134-1706 USA http://www.cisco.
THE SPECIFICATIONS AND INFORMATION REGARDING THE PRODUCTS IN THIS MANUAL ARE SUBJECT TO CHANGE WITHOUT NOTICE. ALL STATEMENTS, INFORMATION, AND RECOMMENDATIONS IN THIS MANUAL ARE BELIEVED TO BE ACCURATE BUT ARE PRESENTED WITHOUT WARRANTY OF ANY KIND, EXPRESS OR IMPLIED. USERS MUST TAKE FULL RESPONSIBILITY FOR THEIR APPLICATION OF ANY PRODUCTS.
CCDE, CCENT, Cisco Eos, Cisco Lumin, Cisco Nexus, Cisco StadiumVision, Cisco TelePresence, the Cisco logo, DCE, and Welcome to the Human Network are trademarks; Changing the Way We Work, Live, Play, and Learn and Cisco Store are service marks; and Access Registrar, Aironet, AsyncOS, Bringing the Meeting To You, Catalyst, CCDA, CCDP, CCIE, CCIP, CCNA, CCNP, CCSP, CCVP, Cisco, the Cisco Certified Internetwork Expert logo, Cisco IOS, Cisco Press, Cisco Systems, Cisco Systems Capital, the Cisco Systems logo, Ci
C O N T E N T S Preface ix Audience ix Organization ix Related Documentation x Command Syntax Conventions xi Statement 1071—Warning Definition xii Obtaining Documentation and Submitting a Service Request xxi CHAPTER 1 Product Overview 1-1 Catalyst 4900 Series Switch Applications 1-2 Catalyst 4948 Switch Software Features 1-3 Catalyst 4948-10GE and Catalyst 4928-10GE Switch Software Features 1-4 Hardware System Features 1-6 Switch Components 1-7 Traffic Ports on the Catalyst 4948 1-7 Traffic Ports on the
EMI Recommendations 2-4 Power Requirements and Heat Dissipation 2-4 Grounding Requirements 2-6 Safety Overview 2-7 Ensuring Safety 2-7 Working Safely with Electricity 2-8 Preventing Electrostatic Discharge Damage 2-9 Site Planning Checklist 2-9 CHAPTER Installing the Switch 3-1 3 Verifying the Contents 3-1 Rack-Mounting the Switch 3-2 Rack-Mounting Guidelines 3-3 Lifting the Chassis Safely 3-5 Required Installation Tools 3-5 Rack-Mounting the Switch 3-6 Connecting AC Power to the Switch 3-9 Connecting D
Management Port A-2 Catalyst 4900 Series Switch Specifications A-3 APPENDIX B Initial Configuration for the Switch B-1 Connecting to the Switch B-2 Starting the Terminal-Emulation Software B-3 Connecting to a Power Source B-3 Entering the Initial Configuration Information B-4 IP Settings B-4 Performing the Initial Configuration B-5 APPENDIX C Compliance Information and Translated Safety Warnings C-1 Translated Safety Warnings C-2 Statement 1003—DC Power Disconnection C-2 Statement 1004—Installation In
Statement 191—VCCI Class A Warning for Japan C-50 Statement 256—Class A Warning for Hungary C-51 Statement 294—Class A Warning for Korea C-51 Statement 257—Class A Notice for Taiwan and Other Traditional Chinese Markets C-52 Statement 371—Power Cable and AC Adapter C-52 INDEX Catalyst 4900 Series Switch Installation Guide viii 78-18039-02
Preface This preface describes the audience, organization, and conventions of the Catalyst 4900 Series Switch Installation Guide and provides information on how to obtain related documentation. Audience Only trained and qualified service personnel (as defined in IEC60950-1 and AZ/NZS 60950-1) should install, replace, or service the equipment.
Preface Chapter Title Description Chapter 5 Troubleshooting the Installation Provides troubleshooting guidelines for the initial hardware installation and suggests steps to help isolate and resolve problems. Appendix A Specifications Lists the switch system specifications. Appendix B Initial Configuration Details initial setup of a system that will allow further for the Switch configuration via Telnet.
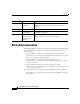
Preface Command Syntax Conventions This sectionTable 1 describes the syntax used with the commands in this document. Table 1 Command Syntax Guide Convention Description boldface Commands and keywords. italic Command input that is supplied by you. [ Keywords or arguments that appear within square brackets are optional. ] {x|x|x} A choice of keywords (represented by x) appears in braces separated by vertical bars. You must select one. ^ or Ctrl Represent the key labeled Control.
Preface Timesaver Warning Means the described action saves time. You can save time by performing the action described in the paragraph. Means reader be warned. In this situation, you might perform an action that could result in bodily injury. Statement 1071—Warning Definition Warning IMPORTANT SAFETY INSTRUCTIONS This warning symbol means danger. You are in a situation that could cause bodily injury.
Preface Varoitus TÄRKEITÄ TURVALLISUUSOHJEITA Tämä varoitusmerkki merkitsee vaaraa. Tilanne voi aiheuttaa ruumiillisia vammoja. Ennen kuin käsittelet laitteistoa, huomioi sähköpiirien käsittelemiseen liittyvät riskit ja tutustu onnettomuuksien yleisiin ehkäisytapoihin. Turvallisuusvaroitusten käännökset löytyvät laitteen mukana toimitettujen käännettyjen turvallisuusvaroitusten joukosta varoitusten lopussa näkyvien lausuntonumeroiden avulla.
Preface Avvertenza IMPORTANTI ISTRUZIONI SULLA SICUREZZA Questo simbolo di avvertenza indica un pericolo. La situazione potrebbe causare infortuni alle persone. Prima di intervenire su qualsiasi apparecchiatura, occorre essere al corrente dei pericoli relativi ai circuiti elettrici e conoscere le procedure standard per la prevenzione di incidenti. Utilizzare il numero di istruzione presente alla fine di ciascuna avvertenza per individuare le traduzioni delle avvertenze riportate in questo documento.
Preface ¡Advertencia! INSTRUCCIONES IMPORTANTES DE SEGURIDAD Este símbolo de aviso indica peligro. Existe riesgo para su integridad física. Antes de manipular cualquier equipo, considere los riesgos de la corriente eléctrica y familiarícese con los procedimientos estándar de prevención de accidentes. Al final de cada advertencia encontrará el número que le ayudará a encontrar el texto traducido en el apartado de traducciones que acompaña a este dispositivo.
Preface Aviso INSTRUÇÕES IMPORTANTES DE SEGURANÇA Este símbolo de aviso significa perigo. Você se encontra em uma situação em que há risco de lesões corporais. Antes de trabalhar com qualquer equipamento, esteja ciente dos riscos que envolvem os circuitos elétricos e familiarize-se com as práticas padrão de prevenção de acidentes. Use o número da declaração fornecido ao final de cada aviso para localizar sua tradução nos avisos de segurança traduzidos que acompanham o dispositivo.
Preface Catalyst 4900 Series Switch Installation Guide 78-18039-02 xvii
Preface Catalyst 4900 Series Switch Installation Guide xviii 78-18039-02
Preface Catalyst 4900 Series Switch Installation Guide 78-18039-02 xix
Preface Catalyst 4900 Series Switch Installation Guide xx 78-18039-02
Preface Obtaining Documentation and Submitting a Service Request For information on obtaining documentation, submitting a service request, and gathering additional information, see the monthly What’s New in Cisco Product Documentation, which also lists all new and revised Cisco technical documentation, at: http://www.cisco.com/en/US/docs/general/whatsnew/whatsnew.
Preface Catalyst 4900 Series Switch Installation Guide xxii 78-18039-02
CH A P T E R 1 Product Overview This chapter describes the Catalyst 4900 series switches, as well as system features and components.
Chapter 1 Product Overview Catalyst 4900 Series Switch Applications Catalyst 4900 Series Switch Applications The Catalyst 4900 series switches (see Figure 1-1, Figure 1-2, and Figure 1-3) are designed for high-performance, high-density edge switching applications. They are fixed configuration switching solutions delivering 10/100/1000 connectivity on all ports, supporting hot swappable, redundant power supplies in a compact one rack-unit size for applications where space is limited.
Chapter 1 Product Overview Catalyst 4948 Switch Software Features Catalyst 4928-10GE Switch 271710 Figure 1-3 Catalyst ME 4924 10GE PS1 PS2 FAN STATUS 1 8 9 16 17 CON 24 MGMT 25 26 ENABLED 27 28 29 ENABLED 30 The Catalyst 4928-10GE switch has a 48-Gbps, nonblocking, full-duplex switching fabric, providing 102 million packets-per-second of switching capacity for high-speed applications. The Catalyst 4928-10GE chassis has 28 1000BASEX SFP ports, and two X2 10-Gigabit Ethernet uplink ports.
Chapter 1 Product Overview Catalyst 4948-10GE and Catalyst 4928-10GE Switch Software Features • Catalyst 4500 series management software features include the following: – Command-line interface (CLI) and Simple Network Management Protocol (SNMP) interfaces consistent with the Catalyst 4500 series switches – Compatible development of new features with the Catalyst 4500 series switches – Support for out-of-band management over serial lines through a terminal attached to the console interface – Support
Chapter 1 Product Overview Catalyst 4948-10GE and Catalyst 4928-10GE Switch Software Features – Q-in-Q for EFM – Cisco Inter Switch Link (ISL) tagging on all ports • 16,000 multicast forwarding entries and 16,000 unicast forwarding entries • 1022 ingress policers and 1022 egress policers • 32,000 ingress Security ACEs and 32,000 egress Security ACEs • Support for port aggregation using Port Aggregation Protocol (PAgP) for Gigabit EtherChannel • Catalyst 4500 series management software features in
Chapter 1 Product Overview Hardware System Features Hardware System Features The Catalyst 4900 series switches are high-performance dedicated Ethernet switches that fully integrate into the Catalyst family of switches using Catalyst 4500 series system software. The following is an overview of the Catalyst 4900 series hardware features: • (Catalyst 4948 and 4948-10GE) 48 10BASE-T/100BASE-TX/1000BASE-T Ethernet ports using RJ-45 interfaces. The following standards are supported: – IEEE 802.
Chapter 1 Product Overview Switch Components Switch Components This section describes the hardware components. Traffic Ports on the Catalyst 4948 There are 48 10/100/1000BASE-T Ethernet ports using RJ-45 interfaces and four 1000BASE-X Ethernet ports using SFP interfaces. These SFP ports share MAC addresses with the last four 10/100/1000BASE-T ports.
Chapter 1 Product Overview Switch Components Figure 1-4 (Catalyst 4948) Management Port LEDs Detailed View Cata lyst CON 4948 45 4 6 MGT port LED Figure 1-5 113140 MGT 47 4 8 (Catalyst 4948-10GE) Management Port LEDs Detailed View Catalyst WS-C4948 10GE X2-1 X2-2 CON 130084 MGT MGT port LED Figure 1-6 (Catalyst 4928-10GE) Management Port Detailed View E 271711 Catalyst ME 4924 10G CON MGMT 25 26 ENABLED 27 28 29 ENABLED 30 Management Port LED Catalyst 4900 Series Switch I
Chapter 1 Product Overview Switch Components Front Panel LEDs The LEDs on the front panel of the switch (see Figure 1-4 and Figure 1-7) provide status information as follows: Figure 1-7 Detailed View of the STATUS LEDs Power supply 1 LED Power supply 2 LED Fan LED PS1 PS2 FAN 113141 STATUS 1 Port LEDs STATUS LED • STATUS LED indicates the operating state of the switch. • PS1 LED indicates the internal power supply status. • PS2 LED indicates the internal power supply status.
Chapter 1 Product Overview Switch Components Table 1-1 describes LED functions.
Chapter 1 Product Overview Switch Components Table 1-1 LED Functions (continued) LED Color or State Description FAN Off No power to the switch or fans (the tray may not be plugged in especially if one or more of the power supplies status LED is green) Fan tray operational Fault detected Green Red PS1 and PS2 Off Green Red No power to the PS Operational1 Fault detected or the on/off switch is set to off while the power supply is plugged in 1.
Chapter 1 Product Overview Switch Components Figure 1-8 Airflow (Catalyst 4948-10GE shown) PS1 Catalyst WS-C4948 10GE PS2 FAN 130085 X2-1 STATUS X2-2 1 16 17 32 33 CON MGT 48 There are four fans in the fan tray. If an individual fan fails, the other fans continue to run. Sensors monitor the internal air temperatures. The number of fans in operation and their speed varies according to the internal temperature for the quietest operation possible.
Chapter 1 Product Overview Switch Components Figure 1-9 On/Off Switch Locations 113143 On/Off Switch The switch will start with only one power supply plugged in, but redundant failover and load sharing will not be available in this configuration. We recommend that you always connect both power supplies to separate AC or DC circuits for optimal power reliability.
Chapter 1 Product Overview Switch Components Power Management for the Switch You can choose AC or DC power supplies for your switch. The Catalyst 4900 series switches support the following power supplies: • 300 W AC • 300 W DC A redundant power supply can be identified and diagnosed by a running system regardless of its input status. AC and DC supplies are interchangeable. Power Management Modes Catalyst 4900 series switches support the redundant power management mode.
CH A P T E R 2 Site Planning This chapter describes how to prepare your site for installation of the switch and contains these sections: • Site Environmental Requirements, page 2-1 • Site Power Requirements, page 2-2 • Grounding Requirements, page 2-6 • Safety Overview, page 2-7 • Site Planning Checklist, page 2-9 For detailed information about cabling requirements, see Chapter 4, “Transceiver Modules.
Chapter 2 Site Planning Site Power Requirements The switch operates as a standalone system mounted in a rack in a secure wiring closet. It requires a dry, clean, well-ventilated, and air-conditioned environment. To ensure normal operation, maintain ambient airflow. If the airflow is blocked or restricted, or if the intake air is too warm, an overtemperature condition can occur. The switch environmental monitor can then shut down the system to protect the system components.
Chapter 2 Site Planning Site Power Requirements • EMI Recommendations, page 2-4 • Power Requirements and Heat Dissipation, page 2-4 Pre-installation Requirements Follow these requirements when preparing your site for the switch installation: • Connect each switch to separate wiring on a dedicated circuit; provide each switch with its own branch circuit connection with sufficient overcurrent protection and direct grounding to the branch circuit.
Chapter 2 Site Planning Site Power Requirements EMI Recommendations Follow these guidelines when setting up the site wiring. When planning the location of the new system, consider electromagnetic interface (EMI), the distance limitations for signaling, and connector compatibility. When wires are run for any significant distance in an electromagnetic field, radio frequency interference (RFI) can occur between the field and the signals on the wires.
Chapter 2 Site Planning Site Power Requirements You will also need to provide power to the switch with the appropriate AC power cord for your location. Table 2-1 lists the power cords that are used with the AC power supply. Table 2-1 AC-Input Power Cord Options Locale Part Number Length Plug Type 120352 Appliance Coupler 300 W AC Power Supply 8.2 ft (2.5 m) 125 VAC, 15 A NEMA 5-15P CAB 13.2 ft (4.0 m) 250 VAC, 16 A NEMA 6-20 non-locking CAB 13.6 ft (4.
Chapter 2 Site Planning Grounding Requirements Table 2-1 AC-Input Power Cord Options (continued) Locale Part Number Length Italy CAB-C2316-C15-IT= (was CAB-7ACI=) 8.2 ft (2.5 m) 250 VAC, 16 A 1/3/16 CEI 23-16 United Kingdom CAB-BS1363-C15-UK= (was CAB-7ACU=) 8.2 ft (2.5 m) 250 VAC, 13 A BS 89/13 BS 1363/A Argentina CAB-IR2073-C15-AR= (was CAB-7KACR=) 8.2 ft (2.5 m) 250 VAC, 10 A IRAM 2073 South Africa, India CAB-BS546-C15-SA= (was CAB-7KACSA=) 8.2 ft (2.
Chapter 2 Site Planning Safety Overview Figure 2-1 Grounding Pad Locations (Catalyst 4849-10GE shown) Grounding pads PS1 Catalyst WS-C4948 10GE PS2 FAN X2-2 1 16 17 32 CON 33 MGT 48 130180 X2-1 STATUS Safety Overview This section provides safety information that you should read and understand to ensure a safe switch installation. Ensuring Safety Follow these guidelines to ensure your safety and protect the equipment.
Chapter 2 Site Planning Safety Overview Warning Note This equipment must be grounded. Never defeat the ground conductor or operate the equipment in the absence of a suitably installed ground conductor. Contact the appropriate electrical inspection authority or an electrician if you are uncertain that suitable grounding is available. Statement 1024 To completely de-energize the system, unplug the power cord. • Always use caution when lifting heavy equipment.
Chapter 2 Site Planning Site Planning Checklist • Do not work alone when potentially hazardous conditions exist. • Never assume that power has been disconnected from a circuit; always check. • Do not perform any action that creates a potential hazard to people or makes the equipment unsafe. • Examine your work area carefully for possible hazards such as moist floors, ungrounded power extension cables, and missing safety grounds.
Chapter 2 Site Planning Site Planning Checklist Table 2-2 Site Planning Checklist Task No.
CH A P T E R 3 Installing the Switch This chapter describes how to install the Catalyst 4900 series switch. For first-time installations, perform the procedures in the following sections in the order listed.
Chapter 3 Installing the Switch Rack-Mounting the Switch To verify the contents of the shipping container follow these steps: Step 1 Step 2 Compare the contents of the accessories kit to the packing slip.
Chapter 3 Installing the Switch Rack-Mounting the Switch Warning To prevent bodily injury when mounting or servicing this unit in a rack, you must take special precautions to ensure that the system remains stable. The following guidelines are provided to ensure your safety: • This unit should be mounted at the bottom of the rack if it is the only unit in the rack.
Chapter 3 Installing the Switch Rack-Mounting the Switch – Install the stabilizers before mounting or servicing the switch in the rack (if the rack is provided with stabilizing devices). • The equipment rack is properly ventilated. – Install the chassis in an enclosed rack only if it has adequate ventilation or an exhaust fan; use an open rack whenever possible. – Ensure that the ambient temperature of the rack environment does not exceed a maximum temperature of 104° F (40° C).
Chapter 3 Installing the Switch Rack-Mounting the Switch Lifting the Chassis Safely The chassis is not intended to be moved frequently. Before you install the switch, ensure that your site is properly prepared so that you can avoid moving the chassis later to accommodate power sources and network connections. Whenever you lift a chassis or any heavy object, follow these guidelines: • Ensure that your footing is solid, and balance the weight of the chassis between your feet.
Chapter 3 Installing the Switch Rack-Mounting the Switch • Your own ESD grounding strap or the disposable ESD strap included with the system The following tools and equipment are required to install the chassis in a rack: • Rack-mount kit • Tape measure and level Rack-Mounting the Switch Note The illustrations shown are of a Catalyst 4948-10GE switch. The process for the Catalyst 4948 and Catalyst 4928-10GE is identical. Follow these steps to install the switch in a rack.
Chapter 3 Installing the Switch Rack-Mounting the Switch Table 3-1 Quantity Part Description 4 12-24 x 3/4-inch Phillips binder-head screws 4 10-32 x 3/4-inch Phillips binder-head screws Note Step 2 Rack-Mount Kit Checklist Received Figure 3-2 illustrates how to attach the front of the switch to the rack. You can also attach the rear of the switch to the rack, depending on the configuration of your rack. Note that the L brackets connect the chassis to the rack.
Chapter 3 Installing the Switch Rack-Mounting the Switch – If the chassis front panel is in the front of the rack, insert the rear of the chassis between the mounting posts. – If the rear of the chassis is in the front of the rack, insert the front of the chassis between the mounting posts. b. Align the mounting holes in the L bracket with the mounting holes in the equipment rack. c.
Chapter 3 Installing the Switch Connecting AC Power to the Switch Figure 3-4 Installing the Cable Guide PS1 Catalyst WS-C4948 10GE PS2 FAN X2-1 STATUS X2-2 1 16 17 32 33 CON MGT 130089 48 Step 5 Do not connect the power cord at this time. Proceed to the “Connecting AC Power to the Switch” section on page 3-9.
Chapter 3 Installing the Switch Connecting AC Power to the Switch Figure 3-5 AC Power Supply On/off switch AC power plug Status LEDs 120696 Handle Step 3 Connect the other end of the power cords to an AC-power input source. If both power supplies will be used, make sure they are on different circuits. Step 4 Turn the power switches to the ON position.
Chapter 3 Installing the Switch Connecting DC Power to the Switch From the system console, enter the show power command to display the power supply and system status. For more information on this command, see the command reference publication for your software release. If the LEDs or show power command indicate a power or other system problem, see Chapter 5, “Troubleshooting the Installation,” for troubleshooting information.
Chapter 3 Installing the Switch Connecting DC Power to the Switch Step 1 Prior to connecting the power supply to a power source, ensure that all of the site power and grounding requirements described in Chapter 2, “Site Planning,” have been met and the chassis is properly grounded as described in the “Grounding Requirements” section on page 2-6. Step 2 Remove the safety cover from the power terminal. Step 3 Connect the power supply ground terminal to earth ground.
Chapter 3 Installing the Switch Connecting DC Power to the Switch Step 5 Replace the safety cover over the power terminals. Step 6 Connect the other end of the power cables to an DC-power input source. If both power supplies will be used, make sure they are on different circuits. Step 7 Turn on the power from the power source. The DC supply does not have an on/off switch.
Chapter 3 Installing the Switch Connecting DC Power to the Switch Catalyst 4900 Series Switch Installation Guide 3-14 78-18039-02
CH A P T E R 4 Transceiver Modules This chapter tells you where to find instructions for installing SFP modules and X2 modules, which are laser optical transceivers used for Ethernet connections. Where needed, notes applying specifically to these switches are provided. SFP Modules To install SFP Modules, refer to the Cisco Small Form-Factor Pluggable Modules Installation Note at the following location: http://www.cisco.com/en/US/products/hw/modules/ps5455/prod_installation_gu ide09186a00803aa0da.
Chapter 4 Transceiver Modules X2 Modules Note You must insert the SFP with the latching mechanism reversed on SFP port 46 and port 48. Figure 4-1 Connecting LC Connectors to the SFP Module (Catalyst 4948) CON AUX 45 46 47 48 113146 Catalyst 4948 X2 Modules You must connect the cables and install the X2 modules as shown in Figure 4-2 and Figure 4-3. More general installation information is in the 10-Gigabit Ethernet X2 Transceiver Installation Note at the following location: http://www.cisco.
Chapter 4 Transceiver Modules X2 Modules Figure 4-2 Connecting SC Connectors to the X2 Module Catalyst WS-C4948 10GE X2-1 X2-2 MGT 130088 CON If a module designed for operation on an SMF cable is directly coupled to an MMF cable, an effect known as Differential Mode Delay (DMD) might occur. See the Catalyst 4500 Series Module Installation Guide for more information.
Chapter 4 Transceiver Modules X2 Modules Figure 4-3 Installing the 10-Gigabit Ethernet X2 Module Ca ta lys tW SC4 94 81 0G E CO X1 N MG LIN K T X2 Ca ta lys tW SC4 94 81 0G E CO X1 N T X2 130091 MG Caution If you attempt to insert the bottom X2 module with the cooling fins pointing up, you will probably permanently damage the connector. For either the top or bottom connector, forcing a module could potentially damage both the module and the switch.
Chapter 4 Transceiver Modules Cleaning the Fiber-Optic Connectors Tip For complete information on inspecting and cleaning fiber-optic connections, refer to the white-paper document at this URL: http://www.cisco.com/en/US/tech/tk482/tk876/technologies_white_paper09186a 0080254eba.shtml Module Maintenance Guidelines To properly maintain modules, follow these guidelines: Warning • To prevent ESD damage, follow normal handling procedures.
Chapter 4 Transceiver Modules Cleaning the Fiber-Optic Connectors Connector loss, or insertion loss, is a critical performance characteristic of a fiber-optic connector. Return loss is also an important factor. Return loss specifies the amount of reflected light; the lower the reflection, the better the connection. The best physical contact connectors have return losses greater than –40 dB, although –20 to –30 dB is more common.
Chapter 4 Transceiver Modules Cleaning the Fiber-Optic Connectors Step 3 Use a magnifying glass or inspection microscope to inspect the ferrule at an angle. Do not look directly into the aperture. Repeat the process if any contamination is detected. Additional Guidelines The connectors used inside the system have been cleaned by the manufacturer and connected to the adapters in the proper manner.
Chapter 4 Transceiver Modules Cleaning the Fiber-Optic Connectors Catalyst 4900 Series Switch Installation Guide 4-8 78-18039-02
CH A P T E R 5 Troubleshooting the Installation This chapter describes how to troubleshoot the switch hardware installation and contains these sections: • Getting Started, page 5-2 • Problem Solving to the System Component Level, page 5-2 • Identifying Startup Problems, page 5-3 • Troubleshooting the Power Supply, page 5-5 • Contacting Customer Service, page 5-6 If your system has problems starting up, use the information in this chapter to help isolate the cause.
Chapter 5 Troubleshooting the Installation Getting Started Getting Started When the initial system boot is complete, verify the following: • Power supplies are supplying power to the system. • The system fan assembly is operating. • System software boots successfully. If all of these conditions are met and the hardware installation is complete, refer to the Software Configuration Guide and the Command Reference publications to troubleshoot the software.
Chapter 5 Troubleshooting the Installation Identifying Startup Problems Identifying Startup Problems When you connect the power cords to the switch, follow these steps: Step 1 Flip the power switches to the on position (AC powered systems only). Step 2 Verify that power is available to the power supplied from the site AC or DC source. Flip breakers and fuses if necessary. Step 3 Listen for the system fan assembly.
Chapter 5 Troubleshooting the Installation Identifying Startup Problems Table 5-1 Power Supply LED Meanings LED and Color Meaning INPUT OK (AC) This LED should turn green immediately when power is applied to the supply and the power switch is set to ON. Green AC input voltage is greater than 82 +/-3V. Red In a dual power supply configuration (alternate unit powered) the AC input is less than 73 +/-3V, or the power supply is turned off.
Chapter 5 Troubleshooting the Installation Troubleshooting the Power Supply • The port LEDs (1-48) are green when the module is operational (online). If no signal is detected, the LINK LED is off. The port LED remains yellow if the port is disabled. The port LED flashes yellow if the port tested faulty at startup. Step 3 If a STATUS LED is red, contact a customer service representative for instructions.
Chapter 5 Troubleshooting the Installation Contacting Customer Service Contacting Customer Service If you are unable to solve a startup problem after using the troubleshooting suggestions in this chapter, contact a customer service representative for assistance and further instructions.
APPENDIX A Specifications This appendix provides cable and technical specifications for the Catalyst 4900 series switches. Console Port The console port is an RJ-45 receptacle. The Request to Send (RTS) signal tracks the state of the Clear to Send (CTS) input. Table A-1 lists the console port pinouts.
Appendix A Specifications Management Port Management Port The 10/100BASE-T (Catalyst 4948) or 10/100/1000BASE-T (Catalyst 4948-10GE) management port use an RJ-45 receptacle with a Link Status LED. Table A-2 lists the 10/100BASE-T port pinouts.
Appendix A Specifications Catalyst 4900 Series Switch Specifications Catalyst 4900 Series Switch Specifications Table A-4 shows Catalyst 4900 series switch specifications.
Appendix A Specifications Catalyst 4900 Series Switch Specifications Table A-4 Catalyst 4900 Series Switch Specifications (continued) Item Specification Power supply output 300 W AC-input 4 A maximum @ 100 VAC 2 A maximum @ 240 VAC AC frequency 50 to 60 Hz Output current 25 A max Peak current 4 A max @ 100 VAC 2 A max @ 240 VAC Inrush value 20 A for one cycle of AC Output voltage 12 V Input KVA rating 0.375 KVA DC Power Minimum input –40.
APPENDIX B Initial Configuration for the Switch This chapter provides a quick step-by-step initial setup procedure for a switch. These steps describe how to do a simple installation: 1. Connecting to the Switch, page B-2 2. Starting the Terminal-Emulation Software, page B-3 3. Connecting to a Power Source, page B-3 4.
Appendix B Initial Configuration for the Switch Connecting to the Switch Connecting to the Switch You must use the console port to perform the initial configuration. To connect the switch console port to a PC, use the supplied RJ-45-to-DB-9 adapter cable. Follow these steps to connect the PC or terminal to the switch: Step 1 Using the supplied RJ-45-to-DB-9 adapter cable, insert the RJ-45 connector into the console port that is located on the front of the switch, as shown in Figure B-1.
Appendix B Initial Configuration for the Switch Starting the Terminal-Emulation Software Starting the Terminal-Emulation Software Before you power on the switch, start the terminal-emulation session so that you can see the output display from the power-on self-test (POST). The terminal-emulation software—frequently a PC application such as Hyperterminal or ProcommPlus—makes communication between the switch and your PC or terminal possible.
Appendix B Initial Configuration for the Switch Entering the Initial Configuration Information POST lasts approximately 1 minute. After POST is complete, the system and status LEDs remain green (see the “Front Panel LEDs” section on page 1-9 for more information). If the switch fails POST, the system LED turns amber. Note POST failures are usually fatal. Call Cisco Systems if your switch does not pass POST.
Appendix B Initial Configuration for the Switch Entering the Initial Configuration Information Performing the Initial Configuration Follow these steps to complete the initial configuration for the switch: Step 1 At the terminal prompt, enter the enable command to enter privileged exec mode: Switch> enable Password: password Switch# Step 2 Set the system time using the clock set command in privileged EXEC mode.
Appendix B Initial Configuration for the Switch Entering the Initial Configuration Information The password can be from 1 to 25 alphanumeric characters, can start with a number, is case sensitive, allows spaces, but ignores leading spaces. The secret password is encrypted and the enable password is in plain text. Switch1 (config)# enable secret SecretPassword Step 9 Configure an enable password, and press Return.
Appendix B Initial Configuration for the Switch Entering the Initial Configuration Information Interface Protocol Vlan1 up FastEthernet1 up IP-Address OK? Method Status 172.16.1.2 YES manual up unassigned YES unset up !--- Output suppressed.
Appendix B Initial Configuration for the Switch Entering the Initial Configuration Information Catalyst 4900 Series Switch Installation Guide B-8 78-18039-02
APPENDIX C Compliance Information and Translated Safety Warnings Note Warning Only trained and qualified service personnel (as defined in IEC 60950-1 and AS/NZS 60950) should install, replace, or service the equipment. Install the system in accordance with the U.S. National Electric Code if you are in the United States. IMPORTANT SAFETY INSTRUCTIONS This warning symbol means danger. You are in a situation that could cause bodily injury.
Appendix C Compliance Information and Translated Safety Warnings Translated Safety Warnings • California Perchlorate Contamination Prevention Act (Title 22, California Code of Regulations, Chapter 33), page C-46 • EMC Class A Notices and Warnings, page C-46 Translated Safety Warnings This section repeats in multiple languages the warnings in this guide. Statement 1003—DC Power Disconnection Warning Before performing any of the following procedures, ensure that power is removed from the DC circuit.
Appendix C Compliance Information and Translated Safety Warnings Translated Safety Warnings ¡Advertencia! Varning! Aviso Advarsel Antes de proceder con los siguientes pasos, comprobar que la alimentación del circuito de corriente continua (CC) esté cortada (OFF). Innan du utför någon av följande procedurer måste du kontrollera att strömförsörjningen till likströmskretsen är bruten. Antes de executar qualquer um dos procedimentos a seguir, verifique se a energia foi removida do circuito DC.
Appendix C Compliance Information and Translated Safety Warnings Translated Safety Warnings Statement 1004—Installation Instructions Warning Read the installation instructions before connecting the system to the power source. Statement 1004 Waarschuwing Raadpleeg de installatie-instructies voordat u het systeem op de voedingsbron aansluit. Varoitus Lue asennusohjeet ennen järjestelmän yhdistämistä virtalähteeseen.
Appendix C Compliance Information and Translated Safety Warnings Translated Safety Warnings Catalyst 4900 Series Switch Installation Guide 78-18039-02 C-5
Appendix C Compliance Information and Translated Safety Warnings Translated Safety Warnings Statement 1006—Chassis Warning for Rack-Mounting and Servicing Warning Waarschuwing Varoitus To prevent bodily injury when mounting or servicing this unit in a rack, you must take special precautions to ensure that the system remains stable. The following guidelines are provided to ensure your safety: • This unit should be mounted at the bottom of the rack if it is the only unit in the rack.
Appendix C Compliance Information and Translated Safety Warnings Translated Safety Warnings Attention Warnung Avvertenza Pour éviter toute blessure corporelle pendant les opérations de montage ou de réparation de cette unité en casier, il convient de prendre des précautions spéciales afin de maintenir la stabilité du système. Les directives ci-dessous sont destinées à assurer la protection du personnelþ: • Si cette unité constitue la seule unité montée en casier, elle doit être placée dans le bas.
Appendix C Compliance Information and Translated Safety Warnings Translated Safety Warnings Advarsel Aviso ¡Advertencia! Unngå fysiske skader under montering eller reparasjonsarbeid på denne enheten når den befinner seg i et kabinett. Vær nøye med at systemet er stabilt. Følgende retningslinjer er gitt for å verne om sikkerheten: • Denne enheten bør monteres nederst i kabinettet hvis dette er den eneste enheten i kabinettet.
Appendix C Compliance Information and Translated Safety Warnings Translated Safety Warnings Varning! Aviso Advarsel För att undvika kroppsskada när du installerar eller utför underhållsarbete på denna enhet på en ställning måste du vidta särskilda försiktighetsåtgärder för att försäkra dig om att systemet står stadigt. Följande riktlinjer ges för att trygga din säkerhet: • Om denna enhet är den enda enheten på ställningen skall den installeras längst ned på ställningen.
Appendix C Compliance Information and Translated Safety Warnings Translated Safety Warnings • • • • • • Catalyst 4900 Series Switch Installation Guide C-10 78-18039-02
Appendix C Compliance Information and Translated Safety Warnings Translated Safety Warnings • • • CCVP, the Cisco logo, and the Cisco Square Bridge logo are trademarks of Cisco Systems, Inc.; Changing the Way We Work, Live, Play, and Learn is a service mark of Cisco Systems, Inc.
Appendix C Compliance Information and Translated Safety Warnings Translated Safety Warnings Catalyst 4900 Series Switch Installation Guide C-12 78-18039-02
Appendix C Compliance Information and Translated Safety Warnings Translated Safety Warnings Catalyst 4900 Series Switch Installation Guide 78-18039-02 C-13
Appendix C Compliance Information and Translated Safety Warnings Translated Safety Warnings Statement 1008—Class 1 Laser Product Warning Waarschuwing Class 1 laser product. Statement 1008 Klasse-1 laser produkt.
Appendix C Compliance Information and Translated Safety Warnings Translated Safety Warnings Varoitus Luokan 1 lasertuote. Attention Produit laser de classe 1. Warnung Laserprodukt der Klasse 1. Avvertenza Prodotto laser di Classe 1. Advarsel Laserprodukt av klasse 1. Aviso Produto laser de classe 1. ¡Advertencia! Varning! Aviso Advarsel Producto láser Clase I. Laserprodukt av klass 1. Produto a laser de classe 1. Klasse 1 laserprodukt.
Appendix C Compliance Information and Translated Safety Warnings Translated Safety Warnings Statement 1011—Staring into Laser Beam Warning Waarschuwing Varoitus Do not stare into the beam or view it directly with optical instruments. Statement 1011 Niet in de straal staren of hem rechtstreeks bekijken met optische instrumenten. Älä katso säteeseen äläkä tarkastele sitä suoraan optisen laitteen avulla.
Appendix C Compliance Information and Translated Safety Warnings Translated Safety Warnings Avvertenza Advarsel Aviso ¡Advertencia! Varning! Non fissare il raggio con gli occhi né usare strumenti ottici per osservarlo direttamente. Stirr eller se ikke direkte pŒ strŒlen med optiske instrumenter. Não olhe fixamente para o raio, nem olhe para ele directamente com instrumentos ópticos. No mirar fijamente el haz ni observarlo directamente con instrumentos ópticos.
Appendix C Compliance Information and Translated Safety Warnings Translated Safety Warnings Statement 1017—Restricted Area Warning Waarschuwing Varoitus This unit is intended for installation in restricted access areas. A restricted access area can be accessed only through the use of a special tool, lock and key, or other means of security. Statement 1017 Deze eenheid is bestemd voor installatie in plaatsen met beperkte toegang.
Appendix C Compliance Information and Translated Safety Warnings Translated Safety Warnings ¡Advertencia! Esta unidad ha sido diseñada para instalación en áreas de acceso restringido. Sólo puede obtenerse acceso a una de estas áreas mediante la utilización de una herramienta especial, cerradura con llave u otro medio de seguridad. Varning! Denna enhet är avsedd för installation i områden med begränsat tillträde.
Appendix C Compliance Information and Translated Safety Warnings Translated Safety Warnings Catalyst 4900 Series Switch Installation Guide C-20 78-18039-02
Appendix C Compliance Information and Translated Safety Warnings Translated Safety Warnings Statement 1019—Main Disconnecting Device Warning The plug-socket combination must be accessible at all times, because it serves as the main disconnecting device. Statement 1019 Waarschuwing De combinatie van de stekker en het elektrisch contactpunt moet te allen tijde toegankelijk zijn omdat deze het hoofdmechanisme vormt voor verbreking van de aansluiting.
Appendix C Compliance Information and Translated Safety Warnings Translated Safety Warnings Advarsel Aviso ¡Advertencia! Varning! Kombinasjonen støpsel/uttak må alltid være tilgjengelig ettersom den fungerer som hovedfrakoplingsenhet. A combinação ficha-tomada deverá ser sempre acessível, porque funciona como interruptor principal. El conjunto de clavija y toma ha de encontrarse siempre accesible ya que hace las veces de dispositivo de desconexión principal.
Appendix C Compliance Information and Translated Safety Warnings Translated Safety Warnings Statement 1024—Ground Conductor Warning This equipment must be grounded. Never defeat the ground conductor or operate the equipment in the absence of a suitably installed ground conductor. Contact the appropriate electrical inspection authority or an electrician if you are uncertain that suitable grounding is available. Statement 1024 Waarschuwing Deze apparatuur dient geaard te zijn.
Appendix C Compliance Information and Translated Safety Warnings Translated Safety Warnings Advarsel Aviso Dette utstyret må jordes. Omgå aldri jordingslederen og bruk aldri utstyret uten riktig montert jordingsleder. Ta kontakt med fagfolk innen elektrisk inspeksjon eller med en elektriker hvis du er usikker på om det finnes velegnet jordning. Este equipamento deve ser aterrado. Nunca anule o fio terra nem opere o equipamento sem um aterramento adequadamente instalado.
Appendix C Compliance Information and Translated Safety Warnings Translated Safety Warnings Statement 1030—Equipment Installation Warning Only trained and qualified personnel should be allowed to install, replace, or service this equipment. Statement 1030 Waarschuwing Deze apparatuur mag alleen worden geïnstalleerd, vervangen of hersteld door bevoegd geschoold personeel. Varoitus Tämän laitteen saa asentaa, vaihtaa tai huoltaa ainoastaan koulutettu ja laitteen tunteva henkilökunta.
Appendix C Compliance Information and Translated Safety Warnings Translated Safety Warnings Aviso ¡Advertencia! Varning! Aviso Advarsel Apenas pessoal treinado e qualificado deve ser autorizado a instalar, substituir ou fazer a revisão deste equipamento. Solamente el personal calificado debe instalar, reemplazar o utilizar este equipo. Endast utbildad och kvalificerad personal bör få tillåtelse att installera, byta ut eller reparera denna utrustning.
Appendix C Compliance Information and Translated Safety Warnings Translated Safety Warnings Statement 1040—Product Disposal Warning Waarschuwing Varoitus Ultimate disposal of this product should be handled according to all national laws and regulations. Statement 1040 Het uiteindelijke wegruimen van dit product dient te geschieden in overeenstemming met alle nationale wetten en reglementen. Tämä tuote on hävitettävä kansallisten lakien ja määräysten mukaisesti.
Appendix C Compliance Information and Translated Safety Warnings Translated Safety Warnings Attention La mise au rebut ou le recyclage de ce produit sont généralement soumis à des lois et/ou directives de respect de l'environnement. Renseignez-vous auprès de l'organisme compétent. Warnung Die Entsorgung dieses Produkts sollte gemäß allen Bestimmungen und Gesetzen des Landes erfolgen. Avvertenza Lo smaltimento di questo prodotto deve essere eseguito secondo le leggi e regolazioni locali.
Appendix C Compliance Information and Translated Safety Warnings Translated Safety Warnings Catalyst 4900 Series Switch Installation Guide 78-18039-02 C-29
Appendix C Compliance Information and Translated Safety Warnings Translated Safety Warnings Statement 1045—Short-circuit Protection Warning This product requires short-circuit (overcurrent) protection, to be provided as part of the building installation. Install only in accordance with national and local wiring regulations. Statement 1045 Waarschuwing Voor dit product moet kortsluitbeveiliging (overstroombeveiliging) deel uitmaken van de installatie in het gebouw.
Appendix C Compliance Information and Translated Safety Warnings Translated Safety Warnings Advertencia Este producto necesita estar conectado a la protección frente a cortacircuitos (sobretensiones) que exista en el edificio. Instálelo únicamente en conformidad con las regulaciones sobre cableado, tanto locales como nacionales, a las que se tenga que atener. Varning! Denna produkt kräver att kortslutningsskydd (överström) tillhandahålles som en del av byggnadsinstallationen.
Appendix C Compliance Information and Translated Safety Warnings Translated Safety Warnings Catalyst 4900 Series Switch Installation Guide C-32 78-18039-02
Appendix C Compliance Information and Translated Safety Warnings Translated Safety Warnings Statement 1051—Laser Radiation Warning Invisible laser radiation may be emitted from disconnected fibers or connectors. Do not stare into beams or view directly with optical instruments. Statement 1051 Waarschuwing Losgekoppelde of losgeraakte glasvezels of aansluitingen kunnen onzichtbare laserstraling produceren.
Appendix C Compliance Information and Translated Safety Warnings Translated Safety Warnings Avvertenza Advarsel Aviso ¡Advertencia! Varning! Aviso Advarsel Le fibre ottiche ed i relativi connettori possono emettere radiazioni laser. I fasci di luce non devono mai essere osservati direttamente o attraverso strumenti ottici. Det kan forekomme usynlig laserstråling fra fiber eller kontakter som er frakoblet. Stirr ikke direkte inn i strålene eller se på dem direkte gjennom et optisk instrument.
Appendix C Compliance Information and Translated Safety Warnings Translated Safety Warnings Catalyst 4900 Series Switch Installation Guide 78-18039-02 C-35
Appendix C Compliance Information and Translated Safety Warnings Translated Safety Warnings Statement 1074—Comply with Local and National Electrical Codes Warning Waarschuwing Installation of the equipment must comply with local and national electrical codes. Statement 1074 Bij installatie van de apparatuur moet worden voldaan aan de lokale en nationale elektriciteitsvoorschriften. Varoitus Laitteisto tulee asentaa paikallisten ja kansallisten sähkömääräysten mukaisesti.
Appendix C Compliance Information and Translated Safety Warnings Translated Safety Warnings Aviso ¡Advertencia! Varning! A instalação do equipamento tem de estar em conformidade com os códigos eléctricos locais e nacionais. La instalación del equipo debe cumplir con las normativas de electricidad locales y nacionales. Installation av utrustningen måste ske i enlighet med gällande elinstallationsföreskrifter.
Appendix C Compliance Information and Translated Safety Warnings Translated Safety Warnings Varoitus Tasavirtaliittimissä saattaa olla huomattava jännite tai teho. Sulje suojus aina, kun liittimet eivät ole käytössä. Suojuksen ollessa suljettuna varmista, että kohde on suojattu eristämättömiltä johtimilta. Attention Le voltage ou l'énergie électrique des terminaux à courant continu peuvent être dangereux. Veillez à toujours replacer le couvercle lors les terminaux ne sont pas en service.
Appendix C Compliance Information and Translated Safety Warnings Regulatory Standards Compliance Regulatory Standards Compliance This section includes all regulatory, safety, EMC (Class A or Class B), telecomm, and NEBS standards. The Catalyst 4948, Catalyst 4948-10GE, and Catalyst 4928-10GE switches are in compliance with national and international standards as described in Table C-1.
Appendix C Compliance Information and Translated Safety Warnings Regulatory Standards Compliance Table C-1 Class A Regulatory Standards Compliance (continued) Specification Standard EN 60950-1 IEC 60950-1 AS/NZS 60950-1 EMC FCC Part 15 (CFR 47) Class A ICES-003 Class A EN50082-1 CISPR22 Class A AS/NZS CISPR22 Class A VCCI Class A EN55022 Class A EN55024 EN61000-3-2 EN6100-3-3 EN61000-6-1 EN300 386 KN22 Class A KN immunity series CISPR24 Table C-2 Industry EMC, Safety, and Environmental Standards
Appendix C Compliance Information and Translated Safety Warnings Regulatory Standards Compliance Table C-2 Industry EMC, Safety, and Environmental Standards (continued) Specification Standard Qwest NEBS Compliance TCG Checklist ATT NEBS requirements ATT TP76200 level 3 and TCG Checklist ETSI ETS 300 019-2-1, Class 1.1 Storage ETS 300 019-2-2, Class 2.1 and 2.2 Transportation ETS 300 019-2-3, Class 3.
Appendix C Compliance Information and Translated Safety Warnings European Directives Table C-3 GR-1089 Installation and Caution Instructions (continued) An electrical conducting path shall exist between the product chassis and the metal surface of the enclosure or rack in which it is mounted or to a grounding conductor. Electrical continuity shall be provided by using thread-forming type mounting screws that remove any paint or nonconductive coatings and establish a metal-to-metal contact.
Appendix C Compliance Information and Translated Safety Warnings European Directives Deutsch [German]: Dieses Gerät entspricht den grundlegenden Anforderungen und den weiteren entsprechenden Vorgaben der Richtlinie 1999/5/EU. Eesti [Estonian]: See seade vastab direktiivi 1999/5/EÜ olulistele nõuetele ja teistele asjakohastele sätetele. Español [Spanish]: Este equipo cumple con los requisitos esenciales asi como con otras disposiciones de la Directiva 1999/5/CE.
Appendix C Compliance Information and Translated Safety Warnings European Directives Polski [Polish]: Português [Portuguese]: Este equipamento está em conformidade com os requisitos essenciais e outras provisões relevantes da Directiva 1999/5/EC. [Romanian]: Acest echipament este in conformitate cu cerintele esentiale si cu alte prevederi relevante ale Directivei 1999/5/EC. Slovensko [Slovenian]: Ta naprava je skladna z bistvenimi zahtevami in ostalimi relevantnimi pogoji Direktive 1999/5/EC.
Appendix C Compliance Information and Translated Safety Warnings European Directives English: Dansk: This equipment is in compliance with the essential requirements and other provisions of Directives 73/23/EEC and 89/336/EEC as amended by Directive 93/68/EEC. Dette udstyr er i overensstemmelse med de ufravigelige hensyn og andre bestemmelser i direktiv 73/23/EEC og 89/336/EEC som ændred i direktiv 93/68/EEC.
Appendix C Compliance Information and Translated Safety Warnings EMC Class A Notices and Warnings Catalyst 4948 and Catalyst 4948-10GE switches Suomalainen: Svenska: Tämä laite on direktiivien 73/23/ETY ja 89/336/ETY (kuten muutettu direktiivissä 93/68/ETY) keskeisten vaatimusten ja määräysten mukainen. Denna utrustning uppfyller de väsentliga kraven och andra villkor i direktiven 73/23/EEC och 89/336/EEC enligt ändringarna i direktiv 93/68/EEC.
Appendix C Compliance Information and Translated Safety Warnings EMC Class A Notices and Warnings This equipment has been tested and found to comply with the limits for a Class A digital device, pursuant to Part 15 of the FCC Rules. These limits are designed to provide reasonable protection against harmful interference when the equipment is operated in a commercial environment.
Appendix C Compliance Information and Translated Safety Warnings EMC Class A Notices and Warnings Warnung Dies ist ein Produkt der Klasse A. Bei der Verwendung dieses Produkts im Haus- oder Wohnungsbereich kann es zu Funkstörungen kommen. In diesem Fall muss der Benutzer u. U. angemessene Maßnahmen ergreifen. Avvertenza Prodotto di classe A. È possibile che il prodotto generi interferenze radio in un ambienti chiusi.
Appendix C Compliance Information and Translated Safety Warnings EMC Class A Notices and Warnings Catalyst 4900 Series Switch Installation Guide 78-18039-02 C-49
Appendix C Compliance Information and Translated Safety Warnings EMC Class A Notices and Warnings Statement 191—VCCI Class A Warning for Japan Warning This is a Class A product based on the standard of the Voluntary Control Council for Interference by Information Technology Equipment (VCCI). If this equipment is used in a domestic environment, radio disturbance may arise. When such trouble occurs, the user may be required to take corrective actions.
Appendix C Compliance Information and Translated Safety Warnings EMC Class A Notices and Warnings Statement 256—Class A Warning for Hungary Warning This equipment is a class A product and should be used and installed properly according to the Hungarian EMC Class A requirements (MSZEN55022). Class A equipment is designed for typical commercial establishments for which special conditions of installation and protection distance are used.
Appendix C Compliance Information and Translated Safety Warnings EMC Class A Notices and Warnings Statement 257—Class A Notice for Taiwan and Other Traditional Chinese Markets Warning This is a Class A Information Product, when used in residential environment, it may cause radio frequency interference, under such circumstances, the user may be requested to take appropriate countermeasures.
I N D EX Numerics C 1000 W power supplies cable guide 3-8 power cords (table) 2-5 chassis dimensions A-3 weight A-3 A checklist, site planning 2-9 accessory kit contents 3-2 cleaning guidelines 4-7 AC-input power cords console port 1-7 product numbers (table) 2-5 connecting to B-2 airflow location 1-7 site environment 2-2 within the chassis 1-11 pinouts A-1 customer service 5-6 alternative wiring 4-1 D B dimensions, chassis A-3 blank faceplate 1-13 brackets documentation audience i-ix
Index starting the terminal-emulation software B-3 E electrostatic discharge (ESD) 2-9 installing the switch EMI recommendations 2-4 guidelines 3-2 environmental requirements 2-1 lifting 3-5 procedure 3-6 safety overview 2-7 F tools required 3-5 troubleshooting 5-1 fan tray cooling 1-11 failure 1-12 L status LED 1-11 fiber-optic connectors 4-7 label, chassis serial number 5-6 LEDs locations 1-9 G meanings 1-10 POST results B-4 grounding requirement, DC systems 2-6 power supply 5-3 H M hard
Index port status LED 1-10 S POST LEDs B-4 safety ensuring safety 2-7 power connecting 3-9, 3-11 overview 2-7 DC grounding requirements 2-6 translated safety warnings C-2 determining power requirements and heat dissipation 2-4 screws 3-6 EMI recommendations 2-4 site planning serial number, chassis 5-6 general requirements 2-3 checklist 2-9 management 1-14 DC grounding requirement 2-6 specifications A-3 EMI recommendations 2-4 troubleshooting 5-2 environmental requirements 2-1 warnings
Index traffic ports 1-7 troubleshooting contacting customer service 5-6 initial boot 5-2 methodology 5-2 power supply 5-4, 5-5 startup 5-3 typographical conventions i-xi W warnings translated safety C-2 weight chassis A-3 Catalyst 4900 Series Switch Installation Guide IN-4 78-18039-02