
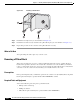
Bridge/Router Installation Guide


4-20
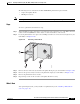
Cisco CRS-1 Carrier Routing System 4-Slot Line Card Chassis Installation Guide
OL-10971-07
Chapter 4 Installing and Removing SFCs, RPs, MSCs, PLIMs, and Associated Components
How to Install or Remove a Switch Fabric Card
Steps
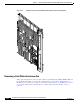
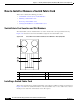
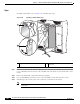
To install a switch fabric card, see Figure 4-13 and follow these steps:
Figure 4-13 Installing a Switch Fabric Card
Step 1 Go to the rear of the chassis. Attach the ESD-preventive wrist strap to your wrist and connect its leash
to one of the ESD connection sockets on the rear (SFC) side of the chassis or a bare metal surface on the
chassis.
Step 2 Remove the switch fabric card from its antistatic packaging.
Step 3 Use a medium Phillips screwdriver to remove the switch fabric card from its protective carrier.
Step 4 Visually inspect the connector pins on the card before you insert it into the chassis.
Note Do not attempt to install a card with bent pins, because this may damage the chassis midplane
connectors.
1 Captive screw 2 Ejector lever and its direction of installation
or removal
S
T
A
T
U
S
S
T
A
T
U
S
S
T
A
T
U
S
158462
S
T
A
T
U
S
1
2