Cisco ASR 903 Router Hardware Installation Guide June 2013 Cisco Systems, Inc. www.cisco.com Cisco has more than 200 offices worldwide. Addresses, phone numbers, and fax numbers are listed on the Cisco website at www.cisco.com/go/offices.
THE SPECIFICATIONS AND INFORMATION REGARDING THE PRODUCTS IN THIS MANUAL ARE SUBJECT TO CHANGE WITHOUT NOTICE. ALL STATEMENTS, INFORMATION, AND RECOMMENDATIONS IN THIS MANUAL ARE BELIEVED TO BE ACCURATE BUT ARE PRESENTED WITHOUT WARRANTY OF ANY KIND, EXPRESS OR IMPLIED. USERS MUST TAKE FULL RESPONSIBILITY FOR THEIR APPLICATION OF ANY PRODUCTS.
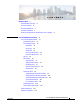
CONTENTS About this Book ix Document Revision History Document Audience ix ix Document Organization x Document Conventions x Obtaining Documentation and Submitting a Service Request CHAPTER 1 Cisco ASR 903 Router Overview xi 1-1 Cisco ASR 903 Router Features 1-1 System Specifications 1-2 Power Supply Features 1-3 Redundancy 1-4 Dying Gasp 1-4 Status LEDs 1-4 DC Power Specifications 1-4 AC Power Specifications 1-5 Fan Tray 1-5 RSP Modules 1-6 Supported RSPs 1-7 Supported RSP Features 1-7 RSP R
Contents CHAPTER 2 Preparing for Installation 2-1 Safety Guidelines 2-1 Standard Warning Statements 2-2 Safety Guidelines for Personal Safety and Equipment Protection Safety Precautions for Module Installation and Removal 2-3 Safety with Electricity 2-4 Power Supply Considerations 2-8 Preventing ESD Damage 2-8 Site Planning 2-9 General Precautions 2-9 Site Planning Checklist 2-9 Site Selection Guidelines 2-10 Environmental Requirements 2-10 Physical Characteristics 2-10 Air Flow Guidelines 2-11 Air Flo
Contents Installing the Chassis Ground Connection Installing the Fan Tray 3-8 Removing and Replacing the Fan Tray 3-5 3-8 RSP Installation 3-10 Installing an RSP Module 3-11 Removing an RSP Module 3-12 Hot-Swapping an RSP Module 3-13 Interface Module Installation 3-14 Installing an Interface Module 3-14 Removing an Interface Module 3-15 Hot-Swapping an Interface Module 3-15 Installing the Power Supply 3-17 Preventing Power Loss 3-17 Power Connection Guidelines 3-18 Guidelines for DC-Powered Systems 3-18
Contents Connecting Cables to a GPS Interface 3-38 Connecting Ethernet Cables 3-39 Connecting Cables to SFP Modules 3-40 Connecting T1/E1 cables 3-40 Installing the Cable Connector 3-40 RJ45 Cable Pinouts 3-41 Connecting Cables to the Patch Panel 3-41 Recommended Patch Panel 3-42 Connecting the Fan Tray Alarm Port 3-42 Connector and Cable Specifications 3-43 CHAPTER 4 Cisco ASR 903 Router Initial Configuration 4-1 Checking Conditions Prior to System Startup 4-1 Powering Up the Cisco ASR 903 Router 4
Contents OC-3 Interface Module LEDs 5-9 T1/E1 Interface Module LEDs 5-9 Power Supply LEDs 5-10 Fan Tray LEDs 5-10 Alarm Conditions 5-11 CHAPTER A Site Log A-1 INDEX Cisco ASR 903 Router Hardware Installation Guide OL-25178-04 vii
Contents Cisco ASR 903 Router Hardware Installation Guide viii OL-25178-04
About this Book The preface describes the revision history, audience, organization, and conventions of Cisco ASR 903 Router Hardware Installation Guide. It also lists sources for obtaining additional information and technical assistance from Cisco Systems.
Chapter Document Organization This guide includes the following chapters and appendix: Title Description Chapter 1, “Cisco ASR 903 Router Overview” This chapter provides an overview of the Cisco ASR 903 Router. Chapter 2, “Preparing for Installation” This chapter provides site preparation guidelines for installing the Cisco ASR 903 Router. Chapter 3, “Installing the Cisco ASR This chapter describes the Cisco ASR 903 Router 903 Router” and how to install it.
Chapter Tip Caution Timesaver Warning Means the following information will help you solve a problem. Means reader be careful. In this situation, you might perform an action that could result in equipment damage or loss of data. Means the described action saves time. You can save time by performing the action described in the paragraph. Means reader be warned. In this situation, you might perform an action that could result in bodily injury.
Chapter Cisco ASR 903 Router Hardware Installation Guide -xii OL-25178-04
CH A P T E R 1 Cisco ASR 903 Router Overview The Cisco ASR 903 Router is a fully-featured aggregation platform designed for the cost-effective delivery of converged mobile and business services. With shallow depth, low power consumption, and an extended temperature range, this compact 3-rack-unit (RU) router provides high service scale, full redundancy, and flexible hardware configuration.
Chapter 1 Cisco ASR 903 Router Overview Cisco ASR 903 Router Features • Side-to-side forced air cooling • Temperature range of -40 to 149 degrees F (-40 to 65 degrees C) with DC power supply • Temperature range of -32 to 104 degrees F (0 to 40 degrees C) with AC power supply Figure 1-1 illustrates the Cisco ASR 903 Router chassis design.
Chapter 1 Cisco ASR 903 Router Overview Cisco ASR 903 Router Features Table 1-1 Cisco ASR 903 Router System Specifications Operating Temperature The Cisco ASR 903 Router supports the following temperature ranges with the DC power supply: • -60–4000 meters: -40 to 104 degrees F (-40 to + 40 degrees C) • -60–1800 meters: -40 to 149 degrees F (-40 to + 65 degrees C) The Cisco ASR 903 Router supports the following temperature ranges with the AC power supply: • -60—4000 meters:32 to 104 degrees F (0 to
Chapter 1 Cisco ASR 903 Router Overview Cisco ASR 903 Router Features • AC Power Specifications, page 1-5 Redundancy The Cisco ASR 903 Router chassis includes a slot for an optional redundant power supply. The redundant power supply option provides a second, identical power supply to ensure that power to the chassis continues uninterrupted if one power supply fails or input power on one line fails. The Cisco ASR 903 Router supports current sharing between the power supplies.
Chapter 1 Cisco ASR 903 Router Overview Cisco ASR 903 Router Features Table 1-2 DC Power Supply Specifications Part number A900-PWR550-D Input power specification +24/-48 VDC Input voltage -48/-60 VDC Minimum output voltage -36/18 VDC Maximum output voltage -72/36 VDC Wire gauge for DC input power connections 12 AWG minimum for -48/-60 VDC. 8 AWG minimum for 24 VDC. Connector accepts 8 AWG maximum.
Chapter 1 Cisco ASR 903 Router Overview Cisco ASR 903 Router Features Figure 1-2 shows the fan tray. Figure 1-2 Cisco ASR 903 Router Fan Tray FAN TEMP CRIT MAJ MIN 281933 ALARM For more information about air flow guidelines, see Air Flow Guidelines, page 2-11. For instructions on how to install the fan tray, see Installing the Fan Tray, page 3-8. For a summary of the LEDs on the fan tray, see “LED Summary” section on page 5-7.
Chapter 1 Cisco ASR 903 Router Overview Cisco ASR 903 Router Features • Traffic management, including buffering, queuing, and scheduling, Ethernet MAC functions • Network clocking functions including phase and time-of-day for BITS, 1 PPS, 10 MHz, and 1588 PTP clock references.
Chapter 1 Cisco ASR 903 Router Overview Cisco ASR 903 Router Features Network Timing Interfaces The RSP supports the following network timing interfaces: • BITS input/output port—RJ48 jack • 1 PPS input and output—Mini coax connectors • 2.048 or 10 MHz input and output—Mini coax connectors • Time of Day (ToD) or 1 PPS input or output port—Shielded RJ45 jack Network timing interfaces support redundancy in a redundant RSP configuration.
Chapter 1 Cisco ASR 903 Router Overview Cisco ASR 903 Router Features Interface Modules In addition to the ports provided on an RSP, the Cisco ASR 903 Router supports the following interface modules: Note • Gigabit Ethernet SFP Interface Module, page 1-9 • Gigabit Ethernet RJ45 Interface Module, page 1-10 • 10 Gigabit Ethernet XFP Interface Module, page 1-11 • T1/E1 Interface Module, page 1-13 • OC-3 Interface Module, page 1-14 For information about supported interface modules, see the Release
Chapter 1 Cisco ASR 903 Router Overview Cisco ASR 903 Router Features • GLC-FE-100LX • GLC-FE-100LX-RGD • GLC-FE-100ZX • GLC-LH-SMD • GLC-LH-SM-RGD • GLC-SX-MMD • GLC-SX-MM-RGD • GLC-TE • GLC-ZX-SMD • GLC-ZX-SM-RGD • SFP-GE-L • SFP-GE-S • SFP-GE-T • SFP-GE-Z For more information about installing a SFP Gigabit Ethernet module, see the “Interface Module Installation” section on page 3-14.
Chapter 1 Cisco ASR 903 Router Overview Cisco ASR 903 Router Features 10 Gigabit Ethernet XFP Interface Module The 10 Gigabit Ethernet XFP interface module provides a single port supporting a 10 Gigabit Ethernet XFP module. Figure 1-6 shows the interface module. 1 x 10 GE Gigabit Ethernet XFP Interface Module 282437 Figure 1-6 Note 10 Gigabit Ethernet interface modules are not supported in slots 4 and 5.
Chapter 1 Cisco ASR 903 Router Overview Cisco ASR 903 Router Features • DWDM-XFP-46.92 • DWDM-XFP-47.72 • DWDM-XFP-48.51 • DWDM-XFP-50.12 • DWDM-XFP-50.92 • DWDM-XFP-51.72v • DWDM-XFP-52.52 • DWDM-XFP-54.13 • DWDM-XFP-54.94 • DWDM-XFP-55.75 • DWDM-XFP-56.55 • DWDM-XFP-58.17 • DWDM-XFP-58.98 • DWDM-XFP-59.79 • DWDM-XFP-60.61 • DWDM-XFP-1560.
Chapter 1 Cisco ASR 903 Router Overview Cisco ASR 903 Router Features T1/E1 Interface Module The T1/E1 interface module provides connectivity for up to 16 T1/E1 ports through a 100-pin Amplimite connector. The T1/E1 interface module requires the use of a patch panel to provide RJ48 (T1) or BNC (E1) connectors. Figure 1-7 shows the interface module.
Chapter 1 Cisco ASR 903 Router Overview Cisco ASR 903 Router Features OC-3 Interface Module The OC-3 interface module can operate as up to four STM-1 interfaces. Note The optical interface module is designed for OC-3 and OC-12 traffic, but OC-12 functionality is not currently supported. Figure 1-8 shows the interface module.
Chapter 1 Cisco ASR 903 Router Overview Interface Numbering Temperature Sensor The Cisco ASR 903 Router has a temperature sensor to detect overtemperature conditions inside the chassis. The overtemperature detection trips at 75 degrees C +/- 5% with the ambient (inlet) trip point at 67 degrees C. This condition is reported to the processor as an interrupt, and the software takes action to generate the appropriate alarms.
Chapter 1 Cisco ASR 903 Router Overview Regulatory Compliance Figure 1-10 shows interface numbering in a Cisco ASR 903 Router.
CH A P T E R 2 Preparing for Installation The following sections describe how to prepare for the installation of the Cisco ASR 903 Router at your site: • Safety Guidelines, page 2-1 • Site Planning, page 2-9 • Receiving the Cisco ASR 903 Router, page 2-19 Safety Guidelines Before you begin the installation of the Cisco ASR 903 Router, review the safety guidelines in this chapter to avoid injuring yourself or damaging the equipment.
Chapter 2 Preparing for Installation Safety Guidelines Standard Warning Statements To see translations of the warnings that appear in this publication, refer to the Regulatory Compliance and Safety Information document that accompanied this device. Warning To prevent bodily injury when mounting or servicing this unit in a rack, you must take special precautions to ensure that the system remains stable.
Chapter 2 Preparing for Installation Safety Guidelines Safety Guidelines for Personal Safety and Equipment Protection The following guidelines help ensure your safety and protect the equipment. This list does not include all the potentially hazardous situations. Therefore, you should be on alert. • Before moving the system, always disconnect all the power cords and interface cables. • Never assume that power is disconnected from a circuit; always check.
Chapter 2 Preparing for Installation Safety Guidelines Warning Invisible laser radiation may be emitted from disconnected fibers or connectors. Do not stare into beams or view directly with optical instruments. Statement 1051 Safety with Electricity Warning Before working on a chassis or working near power supplies, unplug the power cord on AC units; disconnect the power at the circuit breaker on DC units.
Chapter 2 Preparing for Installation Safety Guidelines Warning When you connect or disconnect the power and relay connector with power applied, an electrical arc can occur. This could cause an explosion in hazardous area installations. Be sure that power is removed from the switch and alarm circuit. Be sure that power cannot be accidentally turned on or verify that the area is nonhazardous before proceeding.
Chapter 2 Preparing for Installation Safety Guidelines Warning Do not use this product near water; for example, near a bath tub, wash bowl, kitchen sink or laundry tub, in a wet basement, or near a swimming pool. Statement 1035 Warning Never install telephone jacks in wet locations unless the jack is specifically designed for wet locations. Statement 1036 Warning Before opening the unit, disconnect the telephone-network cables to avoid contact with telephone-network voltages.
Chapter 2 Preparing for Installation Safety Guidelines Warning Hazardous voltage or energy may be present on DC power terminals. Always replace cover when terminals are not in service. Be sure uninsulated conductors are not accessible when cover is in place. Statement 1075 When working on equipment powered by electricity, follow these guidelines: • Locate the room’s emergency power-off switch. If an electrical accident occurs, you will be able to quickly turn off the power.
Chapter 2 Preparing for Installation Safety Guidelines Power Supply Considerations Check the power at your site to ensure that you are receiving clean power (free of spikes and noise). Install a power conditioner if necessary. Warning This equipment is designed for connection to TN and IT power systems. Statement 16 Preventing ESD Damage Warning This equipment needs to be grounded. Use a green and yellow 6 AWG ground wire to connect the host to earth ground during normal use.
Chapter 2 Preparing for Installation Site Planning Site Planning The following sections describe how to plan for the installation of the Cisco ASR 903 Router: • General Precautions, page 2-9 • Site Planning Checklist, page 2-9 • Site Selection Guidelines, page 2-10 • Air Flow Guidelines, page 2-11 • Floor Loading Considerations, page 2-12 • Site Power Guidelines, page 2-12 • Site Cabling Guidelines, page 2-13 • Rack-Mounting Guidelines, page 2-15 • Installation Checklist, page 2-18 • Cr
Chapter 2 Preparing for Installation Site Planning • Consideration has been given to the console port wiring and limitations of the cabling involved, according to TIA/EIA-232F. • The Cisco ASR 903 Router Ethernet cabling distances are within limitations. • The equipment rack in which you plan to install the Cisco ASR 903 Router complies with requirements. • In selecting the location of the rack, careful consideration has been given to safety, ease of maintenance, and proper airflow.
Chapter 2 Preparing for Installation Site Planning Air Flow Guidelines Cool air is circulated through the Cisco ASR 903 Router by a fan tray located along the right side of the router. Air flow is side-to-side, right to left, as shown in “Cisco ASR 903 Router Chassis Air Flow”.
Chapter 2 Preparing for Installation Site Planning Air Flow Guidelines for Enclosed Rack Installation To install a Cisco ASR 903 Router in a 4-post enclosed cabinet, the front and rear doors of the cabinet must be removed or be perforated with a minimum of 65% open area (70% for ETSI 800mm racks). If you are mounting the chassis in a 4-post enclosed cabinet, ensure that you have a minimum of 6 inches (15.24 cm) of clearance on each side of the chassis.
Chapter 2 Preparing for Installation Site Planning The maximum power draw of the Cisco ASR 903 Router chassis and its configurable hardware components are listed in the following table. The maximum power draw values are not affected by whether the router chassis contains 1 or 2 power supplies AC or DC.
Chapter 2 Preparing for Installation Site Planning The extent of your network and the distances between the network interface connections depend in part on the following factors: • Signal type • Signal speed • Transmission medium The distance and rate limits referenced in the following sections are the IEEE-recommended maximum speeds and distances for signaling purposes. Use this information as a guideline in planning your network connections prior to installing the Cisco ASR 903 Router.
Chapter 2 Preparing for Installation Site Planning If you use twisted-pair cable in your plant wiring with a good distribution of grounding conductors, the plant wiring is unlikely to emit radio interference. If you exceed the recommended distances, use a high-quality twisted-pair cable with one ground conductor for each data signal.
Chapter 2 Preparing for Installation Site Planning The distance between the center lines of the mounting holes on the two mounting posts must be 18.31 inches ± 0.06 inch (46.50 cm ± 0.15 cm). The rack-mounting hardware included with the chassis is suitable for most 19-inch equipment racks. Consider installing the Cisco ASR 903 Router in a rack with the following features: Note • Network Equipment Building System (NEBS) compliant, 19-inch (48.3 cm) wide rack.
Chapter 2 Preparing for Installation Site Planning • Use the show environment all command regularly to check the internal system status. The environmental monitor continually checks the interior chassis environment; it provides warnings about high temperature and creates reports on other potentially dangerous occurrences. If warning messages are displayed, take immediate action to identify the cause, and correct the problem.
Chapter 2 Preparing for Installation Site Planning Installation Checklist To assist you with your installation and to provide a record of what was done by whom and when, photocopy the Cisco ASR 903 Router Installation Checklist shown in Table 2-1. Use this to record the completion and verification of each procedure. After the checklist is completed, place it in your Site Log along with the other records pertaining to your new Cisco router.
Chapter 2 Preparing for Installation Receiving the Cisco ASR 903 Router Creating a Site Log The Site Log provides a record of all the actions related to installing and maintaining the router. Keep it in an accessible place near the chassis so that anyone who performs tasks has access to it. Create the Site Log prior to the installation. (See Appendix A, “Site Log” for more information on the Site Log as well as a sample Site Log that can be used to make copies.
Chapter 2 Preparing for Installation Receiving the Cisco ASR 903 Router Chassis-Lifting Guidelines The chassis is not intended to be moved frequently. Before you install the system, ensure that your site is properly prepared so that you can avoid having to move the chassis later to accommodate power sources and network connections. Two or more people are required to lift the chassis.
Chapter 2 Preparing for Installation Receiving the Cisco ASR 903 Router Note Warning For more information on cable specifications, see Chapter 5, “Troubleshooting.
Chapter 2 Preparing for Installation Receiving the Cisco ASR 903 Router Table 2-2 Cisco ASR 903 Router Shipping Container Contents (continued) Component Description Accessories kit Chassis rack-mount brackets (19-inch EIA) Three sets of screws: • Front and rear rack-mount bracket screws (2 sets) • Cable-management bracket screws Six cable-management brackets (one per bracket) One earth lug with two 10-32 screws.
CH A P T E R 3 Installing the Cisco ASR 903 Router This chapter describes how to install the Cisco ASR 903 Router and includes the following sections: • Prerequisites, page 3-1 • Installing the Router in a Rack, page 3-1 • Installing the Chassis Ground Connection, page 3-5 • Installing the Fan Tray, page 3-8 • RSP Installation, page 3-10 • Interface Module Installation, page 3-14 • Installing the Power Supply, page 3-17 • Connecting the Cisco ASR 903 Router to the Network, page 3-27 Prereq
Chapter 3 Installing the Cisco ASR 903 Router Installing the Router in a Rack Installing the Chassis Brackets The chassis is shipped with mounting brackets that can be installed on the front or rear of the chassis. To install the brackets on the front of the chassis, perform these steps: Step 1 Remove the rack-mount brackets from the accessory kit and position them beside the router chassis. Figure 3-1 shows how to attach the brackets on the Cisco ASR 903 Router for a 19-inch EIA rack.
Chapter 3 Installing the Cisco ASR 903 Router Installing the Router in a Rack Installing the Router Chassis in the Rack To install the router chassis in the equipment rack, perform these steps: Step 1 Step 2 • If the front of the chassis (front panel) is at the front of the rack, insert the rear of the chassis between the mounting posts. • If the rear of the chassis is at the front of the rack, insert the front of the chassis between the mounting posts.
Chapter 3 Installing the Cisco ASR 903 Router Installing the Router in a Rack Installing the Chassis in a 300 mm ETSI Cabinet 209246 Figure 3-5 Step 3 Install the 8 or 12 (4 or 6 per side) 12-24 x 3/4-inch or 10-32 x 3/4-inch screws through the holes in the bracket and into the threaded holes in the equipment rack posts. Step 4 Use a tape measure and level to verify that the chassis is installed straight and level.
Chapter 3 Installing the Cisco ASR 903 Router Installing the Chassis Ground Connection Installing the Chassis Ground Connection Before you connect the power or turn on the power to the Cisco ASR 903 Router, you must provide an adequate chassis ground (earth) connection to your router. This section describes how to ground the Cisco ASR 903 Router chassis. The router provides two locations for attaching a 2-hole grounding lug according to the rack-mounting brackets you use to install the router.
Chapter 3 Installing the Cisco ASR 903 Router Installing the Chassis Ground Connection To ensure that the chassis ground connection that you provide is adequate, you need the following parts and tools: • Ratcheting torque screwdriver with Phillips head that exerts up to 15 in.-lb (1.
Chapter 3 Installing the Cisco ASR 903 Router Installing the Chassis Ground Connection Step 3 Using a crimping tool (as specified by the ground lug manufacturer), crimp the ground lug to the ground wire as shown in Figure 3-10. Crimping a Ground Lug onto the Ground Wire 60529 Figure 3-10 Step 4 Use a Phillips head screwdriver to attach the 2-hole ground lug and wire assembly to the router with the 2 pan-head Phillips head screws.
Chapter 3 Installing the Cisco ASR 903 Router Installing the Fan Tray Installing the Fan Tray The fan tray is a modular unit that provides cooling to the Cisco ASR 903 Router. Follow these steps to install the fan tray in the chassis: Step 1 Orient the fan tray so that the captive screws are on the left side of the fan tray’s front panel. Figure 3-11 shows how to orient the fan tray.
Chapter 3 Installing the Cisco ASR 903 Router Installing the Fan Tray Caution The router can stay active for up to five minutes if the temperature is below the ambient limit. However, in the event of an overtemperature alarm, the router can shut down in less than five minutes. In the event of a critical temperature alarm, the router shuts down immediately.
Chapter 3 Installing the Cisco ASR 903 Router RSP Installation Step 3 Pull the fan tray backward toward you no more than 1 inch to disengage it from the power receptacle on the midplane, as shown in Figure 3-13. Figure 3-13 Fan Tray Removal FAN TEMP SYNC CRIT MAJ MIN ACT PWR TOD BITS MGMT ENET STAT 24V—60V 28A 209394 ALARM When removing the fan tray, keep your hands and fingers away from the spinning fan blades. Let the fan blades completely stop before you remove the fan tray.
Chapter 3 Installing the Cisco ASR 903 Router RSP Installation Installing an RSP Module To install an RSP module in the router chassis, perform the following steps: Step 1 Choose a slot for the module. Make sure that there is enough clearance to accommodate any equipment that will be connected to the ports on the module. If a blank module filler plate is installed in the slot in which you plan to install the module, remove the plate by removing its 2 Phillips pan-head screws.
Chapter 3 Installing the Cisco ASR 903 Router RSP Installation Step 7 Verify that the captive installation screws are tightened on all of the modules installed in the chassis. This step ensures that the EMI gaskets on all the modules are fully compressed in order to maximize the opening space for the new or replacement module.
Chapter 3 Installing the Cisco ASR 903 Router RSP Installation Step 5 Grasp the front edge of the module and slide the module straight out of the slot. If the chassis has horizontal slots, place your hand under the module to support its weight as you slide it out from the slot. Do not touch the module circuitry. Caution To prevent ESD damage, handle modules by the carrier edges only. Step 6 Place the module on an antistatic mat or antistatic foam, or immediately reinstall the module in another slot.
Chapter 3 Installing the Cisco ASR 903 Router Interface Module Installation • When inserting multiple IMs into the chassis, wait until each IM reaches an OK state before inserting the next IM.
Chapter 3 Installing the Cisco ASR 903 Router Interface Module Installation Caution Do not use interface module and power supply ejector handles to lift the chassis; using the handles to lift the chassis can deform or damage the handles. Removing an Interface Module Step 1 To remove an interface module, disconnect all the cables from each interface module. Step 2 Loosen the locking thumbscrews on both sides of the interface module.
Chapter 3 Installing the Cisco ASR 903 Router Interface Module Installation Caution To avoid erroneous failure messages, note the current configuration of all interfaces before you remove or replace an interface module, and allow at least 2 minutes for the system to reinitialize after a module has been removed or replaced. This time is recommended in order to allow for synchronization between components within the interface module and for synchronization with the standby RSP.
Chapter 3 Installing the Cisco ASR 903 Router Installing the Power Supply Installing the Power Supply The Cisco ASR 903 Router router provides the choice of two different power supplies: • DC power—19.2VDC to -72VDC The DC power supply uses 3 position terminal block-style connector with positive latching/securing and labeled connections for +24/48V, GRD, -24/48V. The terminal block connector is of suitable size to carry the appropriate AWG wire size to handle the input current of the power supply.
Chapter 3 Installing the Cisco ASR 903 Router Installing the Power Supply Use the information in the “DC Power Specifications” section on page 1-4 to estimate the power requirements and heat dissipation of a Cisco ASR 903 Router based on a given configuration of the router. Determining power requirements is useful for planning the power distribution system needed to support the router.
Chapter 3 Installing the Cisco ASR 903 Router Installing the Power Supply Installing the DC Power Supply The following sections describe how to install a DC power supply in the Cisco ASR 903 Router: • Installing the DC Power Supply Module, page 3-19 • Installing the Terminal Block, page 3-20 • Activating the DC Power Supply, page 3-23 Note This equipment is suitable for installation in Network Telecommunications Facilities and locations where the NEC applies.
Chapter 3 Installing the Cisco ASR 903 Router Installing the Power Supply Figure 3-16 GE-0 GE-1 Installing the DC Power Supply GE-2 GE-3 GE-4 GE-5 GE-6 GE-7 FAN TEMP PWR STAT CRIT MAJ MIN GE-0 GE-1 GE-2 GE-3 GE-4 GE-5 GE-6 GE-7 GE-0 GE-1 GE-2 GE-3 GE-4 GE-5 GE-6 GE-7 PWR STAT PWR RUDY RSP STAT SYNC ACT PWR CONSOLE MEM 1PPS IN 1PPS OUT 1OMHZ IN STAT L 0 S L 1 S L 2 S L 3 S L 4 S L 5 S L 6 S L 7 S L 0 S L 1 S L 2 S L 3 S L 4 S L
Chapter 3 Installing the Cisco ASR 903 Router Installing the Power Supply Figure 3-17 DC Power Supply with Lead Wires 1 2 207765 3 Step 4 1 Ground lead wire 3 2 Negative (–) lead wire — — Positive (+) lead wire Insert the exposed wire of one of the three DC-input power source wires into the terminal block plug. Make sure that you cannot see any wire lead. Only wire with insulation should extend from the terminal block. Caution Do not overtorque the plug captive screws of the terminal block.
Chapter 3 Installing the Cisco ASR 903 Router Installing the Power Supply Step 5 Use a ratcheting torque screwdriver to torque the terminal block plug captive screw (above the installed wire lead) from 4.425 in.-lb (.5 N-m) to 5.310 in-lb (.6 N-m) as shown in Figure 3-18. Figure 3-18 Torquing the DC Power Supply Terminal Block Plug Screws 207764 1 1 Step 6 Torque is from 4.425 in.-lb (.5 N-m) to 5.310 in-lb (.6 N-m).
Chapter 3 Installing the Cisco ASR 903 Router Installing the Power Supply Caution Secure the wires coming in from the terminal block plug so that they cannot be disturbed by casual contact. Step 7 Ensure that the terminal block plug is fully seated in the terminal block header on the DC power supply panel. The plug has a locking feature. You should hear a snap or click when it is installed properly.
Chapter 3 Installing the Cisco ASR 903 Router Installing the Power Supply • INPUT OK LED is green • OUTPUT FAIL LED is green If the LEDs indicate a power problem, see Chapter 5, “Troubleshooting.” If you are installing a redundant DC power supply, ensure that each power supply is connected to a separate power source in order to prevent power loss in the event of a power failure. If you are installing a redundant DC power supply, repeat these steps for the second power source.
Chapter 3 Installing the Cisco ASR 903 Router Installing the Power Supply Step 7 Replace the DC power supply within 5 minutes. If the power supply bay is to remain empty, install a blank filler plate (Cisco part number A900-PWR-BLANK) over the opening, and secure it with the captive installation screws.
Chapter 3 Installing the Cisco ASR 903 Router Installing the Power Supply Activating the AC Power Supply Follow these steps to activate the AC power supply: Step 1 Plug the power cord into the power supply. Step 2 Connect the other end of the power cord to an AC-input power source.
Chapter 3 Installing the Cisco ASR 903 Router Connecting the Cisco ASR 903 Router to the Network Step 1 Disconnect the power cord from the power source. Do not touch the metal prongs on the power cord when it is still connected to the power supply. Step 2 Remove the power cord from the power connection on the power supply. Do not touch the metal prongs embedded in the power supply. Step 3 Loosen the captive installation screws.
Chapter 3 Installing the Cisco ASR 903 Router Connecting the Cisco ASR 903 Router to the Network Connecting to the Serial Port using Microsoft Windows This procedure shows how to connect to the serial port using Microsoft Windows. Note Install the USB device driver before establishing a physical connection between the router and the PC, by using the USB Console cable plugged into the USB serial port. Otherwise, the connection will fail.
Chapter 3 Installing the Cisco ASR 903 Router Connecting the Cisco ASR 903 Router to the Network Figure 3-22 Connecting the USB Console Cable to the Cisco ASR 903 Router MEM GE-0 GE-1 GE-2 GE-3 GE-4 GE-5 GE-6 GE-7 GE-0 GE-1 GE-2 GE-3 GE-4 GE-5 GE-6 GE-7 PWR 1PPS IN CONSOLE RUDY RSP FAN TEMP SYNC STAT ACT PWR PWR MEM CONSOLE 1PPS IN 1PPS OUT 1OMHZ IN 1OMHZ OUT TOD BITS MGMT ENET MEM CONSOLE 1PPS IN 1PPS OUT 1OMHZ IN 1OMHZ OUT TOD BITS MGMT ENET STAT 24V—60V 2
Chapter 3 Installing the Cisco ASR 903 Router Connecting the Cisco ASR 903 Router to the Network Connecting to the Console Port using Mac OS X This procedure describes how to connect a Mac OS X system USB port to the console using the built in OS X Terminal utility. Step 1 Use the Finder to go to Applications > Utilities > Terminal. Step 2 Connect the OS X USB port to the router.
Chapter 3 Installing the Cisco ASR 903 Router Connecting the Cisco ASR 903 Router to the Network Installing the Cisco Microsoft Windows USB Device Driver A USB device driver must be installed the first time a Microsoft Windows-based PC is connected to the USB serial port on the router.
Chapter 3 Installing the Cisco ASR 903 Router Connecting the Cisco ASR 903 Router to the Network Installing the Cisco Microsoft Windows Vista USB Driver This procedure shows how to install the Microsoft Windows Vista USB driver. Step 1 Obtain the file Cisco_usbconsole_driver.zip from the Cisco.com web site and unzip it. Step 2 If using 32-bit Windows Vista double-click the file setup.exe from the Windows_32 folder, or if using 64-bit Windows Vista double-click the file setup(x64).
Chapter 3 Installing the Cisco ASR 903 Router Connecting the Cisco ASR 903 Router to the Network Step 1 Run the setup.exe for Windows 32-bit or setup(x64).exe for Windows-64bit. Click Next. Step 2 The InstallShield Wizard for Cisco Virtual Com appears. Click Next. Step 3 When the Program Maintenance window appears, select the Remove radio button. Click Next. Step 4 When the Remove the Program window appears, click Remove. Step 5 When the InstallShield Wizard Completed window appears click Finish.
Chapter 3 Installing the Cisco ASR 903 Router Connecting the Cisco ASR 903 Router to the Network To connect a modem to the router, follow these steps: Step 1 Connect the RJ45 end of the adapter cable to the black AUX port on the router, as shown in Figure 3-23.
Chapter 3 Installing the Cisco ASR 903 Router Connecting the Cisco ASR 903 Router to the Network Connecting a Management Ethernet Cable When using the Ethernet Management port in the default mode (speed-auto and duplex-auto) the port operates in auto-MDI/MDI-X mode. The port automatically provides the correct signal connectivity through the Auto-MDI/MDI-X feature. The port automatically senses a crossover or straight-through cable and adapts to it.
Chapter 3 Installing the Cisco ASR 903 Router Connecting the Cisco ASR 903 Router to the Network Figure 3-24 Cisco ASR 903 Router Flash Token Memory Stick CONSOL E 209390 MEM Removing a USB Flash Device To remove and then replace a USB flash token memory stick from a Cisco ASR 903 Router, follow these steps: Step 1 Pull the memory stick from the USB port. Step 2 To replace a Cisco USB Flash memory stick, simply insert the module into the USB port labeled MEM as shown in Figure 3-24 .
Chapter 3 Installing the Cisco ASR 903 Router Connecting the Cisco ASR 903 Router to the Network Step 3 Connect the other end to the BTS patch or demarcation panel at your site. Step 4 Turn on power to the router. For information about the BITS port pinouts, see Chapter 5, “Troubleshooting.” Note Warning Use of two BITS sources or a Y-cable is optional. Each BITS input port is routed to both RSPs, so that SETS device on each RSP has visibility to both BITS inputs.
Chapter 3 Installing the Cisco ASR 903 Router Connecting the Cisco ASR 903 Router to the Network Connecting Cables to a GPS Interface The following sections describe how to connect cables from the Cisco ASR 903 Router to a GPS unit for input or output timing of frequency: • Connecting Cables to the Input 10Mhz or 1PPS Interface, page 3-38 • Connecting Cables to the Output 10Mhz or 1PPS Interface, page 3-38 • Connecting Cables to the ToD Interface, page 3-38 Note A Y-cable is required to connect to
Chapter 3 Installing the Cisco ASR 903 Router Connecting the Cisco ASR 903 Router to the Network Warning Note To comply with the Telcordia GR-1089 NEBS standard for electromagnetic compatibility and safety, connect the ToD ports only to intra-building or unexposed wiring or cable. The intrabuilding cable must be shielded and the shield must be grounded at both ends.
Chapter 3 Installing the Cisco ASR 903 Router Connecting the Cisco ASR 903 Router to the Network Connecting Cables to SFP Modules For information on connecting cables to Cisco optical and Ethernet SFP interfaces, see http://www.cisco.com/en/US/partner/products/hw/modules/ps5455/prod_installation_guides_list.html. Connecting T1/E1 cables The physical layer interface for the Cisco ASR 903 Router T1/E1 port is a customer-installed high-density connector.
Chapter 3 Installing the Cisco ASR 903 Router Connecting the Cisco ASR 903 Router to the Network Figure 3-26 shows how the cable is connected between the T1/E1 interface module and the patch panel. Figure 3-26 Cable Installation between T1/E1 Interface and Patch Panel 1 PORTS 1-16 TRANS MIT RECEIV 255735 E 1 Patch panel interfaces For information about the pinout of the cable connecting the T1/E1 interface to the rear of the patch panel, see the “T1/E1 Port Pinout” section on page 5-4.
Chapter 3 Installing the Cisco ASR 903 Router Connecting the Cisco ASR 903 Router to the Network ports as described in GR-1089-CORE) and require isolation from the exposed OSP cabling. The addition of Primary Protectors is not sufficient protection in order to connect these interfaces metallically to OSP wiring.
Chapter 3 Installing the Cisco ASR 903 Router Connecting the Cisco ASR 903 Router to the Network Connector and Cable Specifications For more information on cable specifications and pinouts, see Chapter 5, “Troubleshooting”.
Chapter 3 Installing the Cisco ASR 903 Router Connecting the Cisco ASR 903 Router to the Network Cisco ASR 903 Router Hardware Installation Guide 3-44 OL-25178-04
CH A P T E R 4 Cisco ASR 903 Router Initial Configuration This chapter guides you through a basic router configuration, which is sufficient for you to access your network. Complex configuration procedures are beyond the scope of this publication and can be found in the modular configuration and modular command reference publications in the Cisco IOS software configuration documentation set that corresponds to the software release installed on your Cisco hardware.
Chapter 4 Cisco ASR 903 Router Initial Configuration Powering Up the Cisco ASR 903 Router Powering Up the Cisco ASR 903 Router Make certain that all card slots and compartments are closed off. Install blank faceplates on any empty slots. Always have power supply slots filled. If you leave a power supply slot uncovered, then you risk exposure to hazardous voltages on the power pins on the midplane.
Chapter 4 Cisco ASR 903 Router Initial Configuration Powering Up the Cisco ASR 903 Router initrd at: isord at: avail ram: 009B9000 01006219 01007000 0D1DF800 00400000 00800000 Kernel load: Uncompressing image... dst: 00000000 lim: 00400000 start: 00807673 size: 001B15F6...done.
Chapter 4 Cisco ASR 903 Router Initial Configuration Powering Up the Cisco ASR 903 Router *Feb 19 17:34:29.720: %PARSER-4-BADCFG: Unexpected end of configuration file. *Feb 19 17:34:29.809: %NETCLK-5-NETCLK_MODE_CHANGE: Network clock source not available. The network clock has changed to freerun *Feb 19 17:34:10.138: %CPPHA-7-SYSREADY: F0: cpp_ha: CPP client process FMAN-FP (5 of 5) ready. *Feb 19 17:34:29.824: %LINK-3-UPDOWN: Interface GigabitEthernet0, changed state to up *Feb 19 17:34:10.
Chapter 4 Cisco ASR 903 Router Initial Configuration Configuring the Cisco ASR 903 Router at Startup During the boot process, observe the system LEDs. The LEDs on the shared port adapter go on and off in an irregular sequence. Once the router has booted, the green STATUS LED comes on and stays on. Verifying the Front Panel LEDs The front-panel indicator LEDs provide power, activity, and status information useful during bootup. For more detailed information about the LEDs, see Chapter 5, “Troubleshooting.
Chapter 4 Cisco ASR 903 Router Initial Configuration Configuring the Cisco ASR 903 Router at Startup For information on modifying the configuration after you create it, see the Cisco IOS configuration and command reference guides. To configure a Cisco ASR 903 Router from the console, you must connect a terminal or terminal server to the console port on the Cisco ASR 903 Router RSP. To configure the Cisco ASR 903 Router using the management Ethernet port, you must have the router’s IP address available.
Chapter 4 Cisco ASR 903 Router Initial Configuration Configuring the Cisco ASR 903 Router at Startup Rights clause at FAR sec. 52.227-19 and subparagraph (c) (1) (ii) of the Rights in Technical Data and Computer Software clause at DFARS sec. 252.227-7013. cisco Systems, Inc. 170 West Tasman Drive San Jose, California 95134-1706 . . .
Chapter 4 Cisco ASR 903 Router Initial Configuration Safely Powering Off the Cisco ASR 903 Router Safely Powering Off the Cisco ASR 903 Router This section explains how to shut down the Cisco ASR 903 Router. It is recommended that before turning off all power to the chassis, you issue the reload command. This insures that the operating system cleans up all the file systems. Once the reload operation is complete, then the Cisco ASR 903 Router can be powered off safely.
CH A P T E R 5 Troubleshooting The following sections provide information for troubleshooting problems on the Cisco ASR 903 Router.
Chapter 5 Troubleshooting Pinouts Table 5-1 Pin BITS Port Pinout (continued) Signal Name Direction Description 6 Not used 7 Not used 8 Not used GPS Port Pinout Table 5-2 summarizes the GPS port pinouts. Table 5-2 GPS Port Pinout 10 Mhz (input and output) 1PPS (input and output) Input—Sine wave Input—Pulse shape Output—Square wave Output—Pulse shape Input— > 1.7 volt p-p (+8 to +10 dBm) Input— > 2.4 volts TTL compatible Output— > 2.4 volts TTL compatible Output— > 2.
Chapter 5 Troubleshooting Pinouts Table 5-3 RJ45 1PPS/ToD Port Pinout (continued) Pin Signal Name Direction Description 7 TOD_P Output or Input Time of Day character 8 TOD_N Output or Input Time of Day character Alarm Port Pinout Table 5-4 summarizes the external alarm input pinout.
Chapter 5 Troubleshooting Pinouts T1/E1 Port Pinout Table 5-6 summarizes the pinouts of the cable (Tyco part number 2163442-1, Cisco part number 72-5184-01) used to connect the T1/E1 interface module to the rear of the patch panel.
Chapter 5 Troubleshooting Pinouts Table 5-6 Line 15 T1/E1 Interface Pinouts (continued) 100 TX_RING_P5 41 1 94 RX_RING_P5 41 4 50 TX_TIP_P5 16 2 44 RX_TIP_P5 16 5 Figure 5-1 shows the wiring schematic of the cable used to connect the T1/E1 interface module to the rear of the patch panel. Wiring Schematic of Cable between T1/E1 Interface and Patch Panel 343344 Figure 5-1 Management Ethernet Port Pinout Table 5-7 summarizes the Management Ethernet port pinout.
Chapter 5 Troubleshooting Pinouts USB Console Port Pinout Table 5-8 summarizes the USB console port pinout. Table 5-8 Single USB Console Port Pin Signal Name A1 Vcc +5VDC (500mA) A2 D- Data - A3 D+ Data + A4 Gnd Ground Note Direction Description The USB Console port +5VDC is input and operates as an USB peripheral device. USB Flash/MEM Port Pinout Table 5-9 summarizes the USB flash/MEM port pinout.
Chapter 5 Troubleshooting LED Summary LED Summary The following sections describe the meanings of the LEDs on the Cisco ASR 903 Router. • RSP LEDs, page 5-7 • Interface Module LEDs, page 5-8 • Power Supply LEDs, page 5-10 • Fan Tray LEDs, page 5-10 • Alarm Conditions, page 5-11 RSP LEDs Table 5-10 summarizes the RSP LEDs. Note A major alarm condition indicates the failure of a single fan in the fan tray; a critical alarm indicates the failure of multiple fans.
Chapter 5 Troubleshooting LED Summary Table 5-10 LED RSP LEDs (continued) Color/State Description (two LEDs for eachT1/E1 port) Flashing yellow Holdover Green Locked to source USB flash (MEM) Flashing green USB activity BITS Off Out of service/not configured Amber Fault or loop condition Green In frame/working properly Interface Module LEDs Table 5-11 summarizes the interface module LEDs.
Chapter 5 Troubleshooting LED Summary OC-3 Interface Module LEDs Table 5-13 summarizes the LEDs for the OC-3 interface module.
Chapter 5 Troubleshooting LED Summary Power Supply LEDs Table 5-15 summarizes the power supply LEDs for both the AC and DC power supplies.
Chapter 5 Troubleshooting LED Summary Table 5-16 Fan Tray LEDs LED Color/State Description Critical (CRIT) Off No critical alarm Red Critical alarm (defaults to ON upon RSP reset) Alarm Conditions Table 5-17 summarizes the meaning of alarm conditions on the Cisco ASR 903 Router.
Chapter 5 Troubleshooting LED Summary Cisco ASR 903 Router Hardware Installation Guide 5-12 OL-25178-04
A P P E N D I X A Site Log Use the Site Log to provide a record of actions related to installing and maintaining the router. Keep it in an accessible place near the chassis so that those who performs tasks have access to it. Use the Installation Checklist (see the “Site Planning” section on page 2-9) to verify the steps in the installation and maintenance of your router.
Appendix A Table A-1 Date Site Log Site Log Description of Action Performed or Symptom Observed Initials Cisco ASR 903 Router Hardware Installation Guide A-2 OL-25178-04
INDEX electromagnetic pulse A See EMP airflow EMP, avoiding chassis clearance altitude 2-14 2-16 2-10 G auxiliary port connecting to a modem 3-34 to ?? B global parameters, configuring 4-6 H back panel 3-6, 3-7 humidity C 2-10 I cable length, factors determining 2-14 installation chassis starting the router ground connection description preventing overheating coaxial cable 2-12 installing 2-16 2-13 4-2 lifting chassis 2-20 interface commands numbering show environment
Index startup system N numbering interface 4-2 T 1-15 temperature sensor 1-15 terminal server connections P 4-6 PC connecting to router ?? to 3-28 power surge suppression power lines (warning) 2-14 2-4 power supplies (warning) 2-4 procedures starting the router 4-2 R regulatory compliance 1-16 restricted access (warning) 2-4 reviewing changes to configuration RJ-45 connectors 4-7 2-14 router connecting to a PC ?? to 3-28 RS-232 asynchronous data 2-14 S safety information 1-16